- Step 1Make a rough pass: To start, stay focused on the problem you want to solve. For example, "I want to track orders of my products from customers." Put another way, ask yourself, "What are the connections (or relations) among those items?" In this case, customers place orders for products and, so, orders contain specific products for specific customers. Now, let's grab a penciland eraserto generate some lists based on that statement.
Those three broad categories serve as starting points for creating three relatedbut separatedatabases. The specific bits of information you might track, such as addresses, the status of orders, and product descriptions, naturally become the individual fields you'll list within the appropriate database. As your rough list of fields and possible databases grows, draw some boxes and arrows to sketch out how you might organize the data (Figure 8.1).
Figure 8.1. Use a rough sketch to brainstorm how you might organize your data. 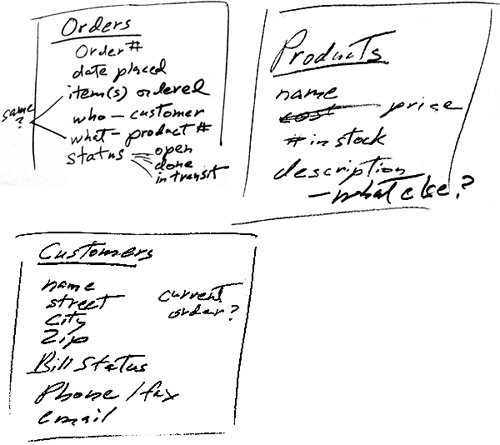
- Step 2Get comments, refine formal list: Clean up your rough sketch and use the result to start gathering comments and reactions from possible users (Figure 8.2). The goal here is to see if you've overlooked any necessary fields or databases, and showing your own list will help others focus on what's missing. Maybe someone wants a picture for each product. In our example, someone suggested using separate fields for billing and shipping addresses. What else is missing?
Figure 8.2. Create a cleaned-up list of possible fields and databases, then gather comments from users. 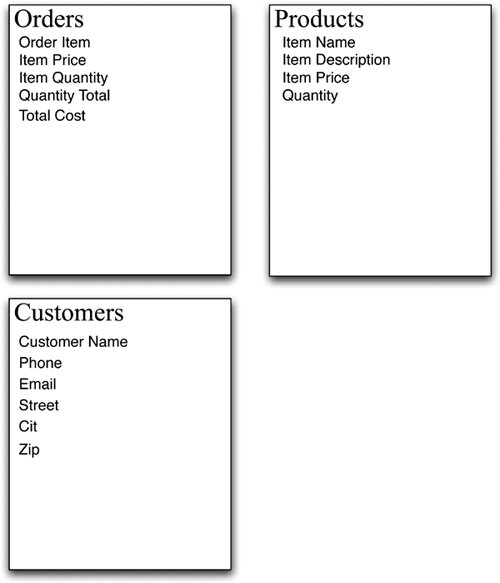
Based on everyone's comments, as you refine the list, you'll find that most fields naturally fall into one of the possible databases. If you find people asking that the same field appear in several databases, that's usually a sign that you need to link the databases using what FileMaker calls a match field. For example, customer names naturally go in the Customers database but you also might want each record in the Orders database to show who placed the order. Match fields let you create a relation between the databases so that you can display customer names within the Orders database without duplicating data already in the Customers database. These relational databases keep everything speedy without bulking up any single database with extraneous data. So, in our example list of needed fields, we've added a Customer ID# match field to link the Customers database and the Orders database (Figure 8.3). Similarly, we've added an Item ID# match field to link the Orders database and the Products database.
Figure 8.3. Refine your list of fields based on user comments and add match fields to link the related databases. 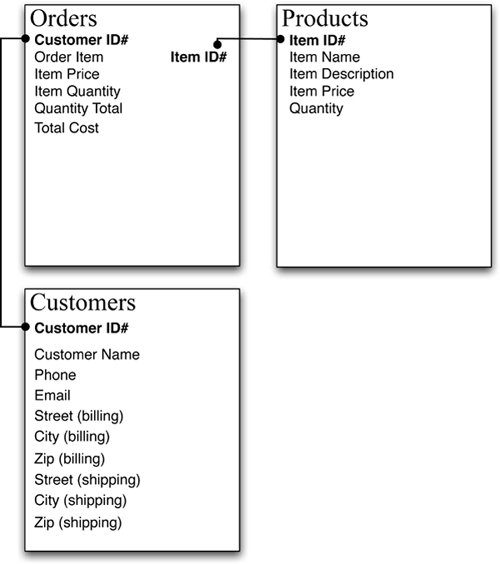
- Step 3Define fields and relationships: Once you've settled on a list of necessary fields and databases, you'll use FileMaker to define the fields, including those match fields (Figure 8.4). Hold off touching your computer just yet. The details of defining fields are explained in Defining Fields on page 93.
Figure 8.4. Once you have a list of necessary fields and databases, you create them using the Define Database dialog box. 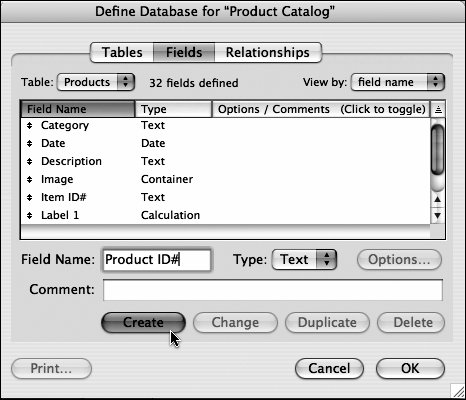
The Define Database dialog box, the same one you'll use to define your fields, includes a tab for defining your other databases. That makes it easy to switch among the databases as you continue defining fields (Figure 8.5). To link the related databases, you then switch to the Define Database dialog box's Relationships tab. Using its click-and-drag tools, you draw lines between your match fields and, presto, you create a set of relational databases (Figures 8.68.7). The details are explained in Creating Relational Databases on page 125.
Figure 8.5. The Define Database dialog box lets you easily switch between defining fields and defining databases. 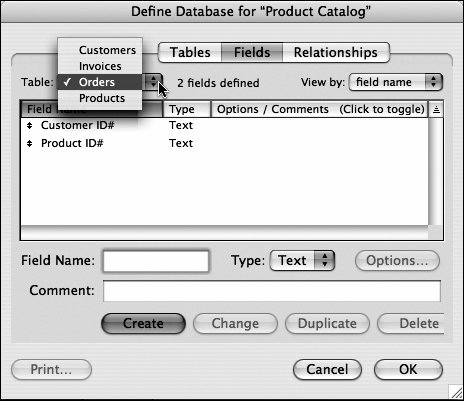
Figure 8.6. The Relationships tab lets you use click-and-drag tools to draw connections between your match fields. 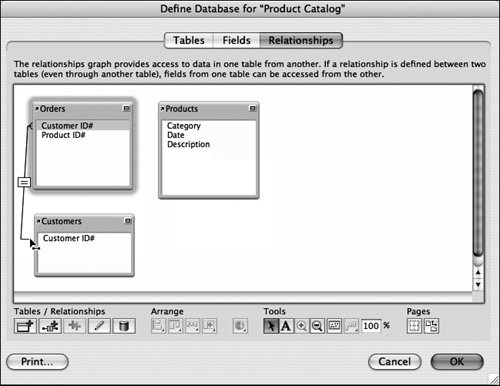
Figure 8.7. FileMaker makes it easy to create and understand the relational links among your databases. 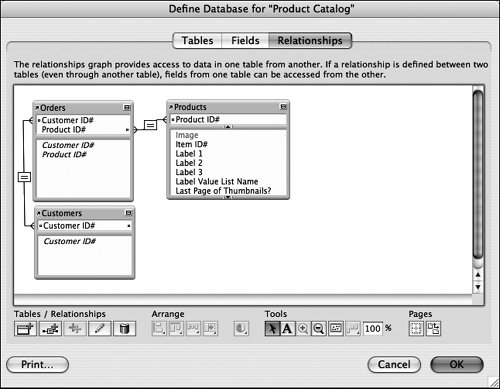
The best part of the process is that FileMaker doesn't lock you into figuring it all out upfront. At any time, you can go back and add more fields, databases, and links. Don't bog down trying to think of everything right now. Instead, consider the layouts you'll need to clearly organize all that data.
- Step 4Create layouts: In general, you'll want to create a separate layout for each major task: entering customer data, printing mail labels, generating order invoices, etc. Also consider creating different layouts for each type of user. Sales folks, for example, probably need to see different data than accountants.
A good place to start is FileMaker's Standard form layout, which lends itself to capturing most of the basic information you'll need for each particular database, such as customer data (Figure 8.8).
Figure 8.8. Use the New Layout/Report dialog box to choose among basic layout forms. 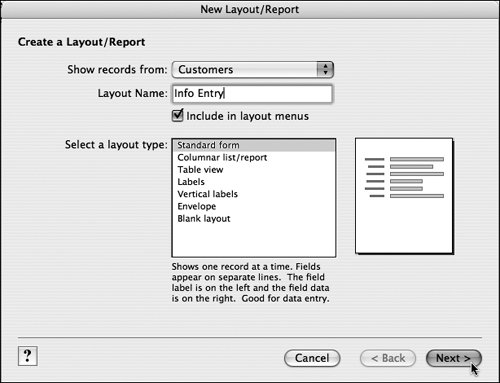
FileMaker's new tabbed layouts make it easy to tuck database clutter out of sight so that users can focus on the information they need (Figures 8.98.10). See Creating Layouts on page 143. To make layouts easy on the eyes and easy to understand, see Layout Formatting and Graphics on page 197. For more information on using lookups and portals to link related databases, see Creating Relational Databases on page 125.
Figure 8.9. Use the Tab Control Setup dialog box to quickly generate a list of layout tabs. 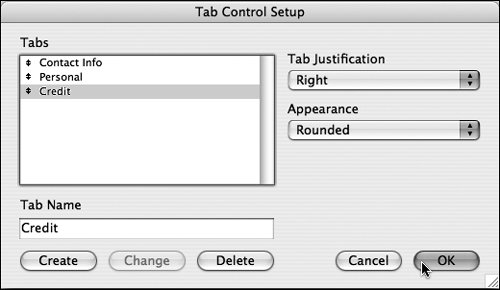
Figure 8.10. Tabbed layouts make it easy to store lots of information in an at-a-glance design. 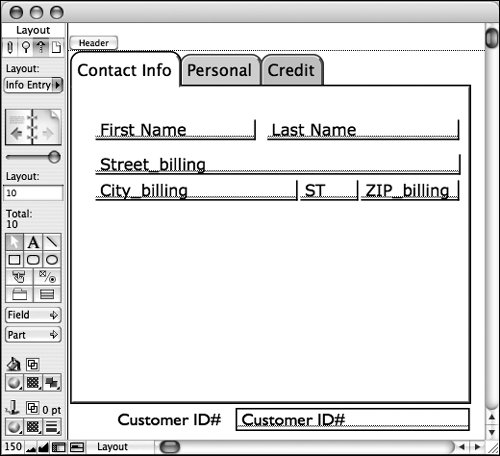
- Step 5Review once more, then populate: Before you begin adding information to the still-empty database (called populating it), run your design by key users for one last look. After making any adjustments, your new relational database is ready to start accepting information record by record or by importing existing data. See Changing Formats on page 225.
Remember: Like a Web site, a database is never really finished. Inevitably, you and its users will find ways to improve it and expand its usefulness. For now, at least, step back and give everyone time to settle into using your new database. |