FileMaker Pro 8 for Windows and Macintosh(c) Visual Quickstart Guide
Authors: Hester N.
Published year: 2006
Pages: 39-45/184
Buy this book on amazon.com >>


To turn on/off toolbars

1.

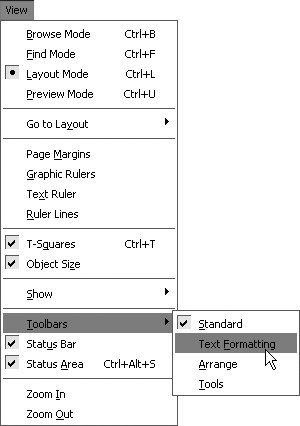
Choose View > Toolbars and select a toolbar from the submenu to turn it on or off ( Figure 3.26 ). Checked toolbars are already on; unchecked ones are off.

Figure 3.26. To turn toolbars on or off, choose View > Toolbars and make a selection from the submenu.


2.

Release your cursor on the selected toolbar and by default, it will appear in the area below FileMaker's menu bar.

Tip

  • The mode you're working in dictates which toolbars will be available: the Arrange and Tools toolbars cannot be turned on unless you're in Layout mode.


Rearranging the toolbars

FileMaker makes it easy to rearrange the toolbars to suit your work setup. Sometimes it's easiest to have your activated toolbars " docked ," that is, running horizontally across the top of FileMaker's main window. For some tasks , however, you may prefer to have a toolbar sitting out on the desktop itself. You also can resize toolbars when they're on your desktop.


To move toolbars to the desktop

1.

To move a docked toolbar (those running across FileMaker's main window), click your cursor on the vertical bar marking the toolbar's left-hand edge (top, Figure 3.27 ).

Figure 3.27. To move toolbars to your desktop, click on any toolbar's left edge (top), drag to the desktop (middle), and release your cursor (bottom).


2.

Continue pressing the cursor and drag the toolbar to a new spot on the desktop (middle, Figure 3.27 ).

3.

Release the cursor and the toolbar will appear with its own title (bottom, Figure 3.27 ).


To dock toolbars in the main window

1.

To move a freestanding toolbar into a docked position below FileMaker's menu bar, click on the toolbar's title (top, Figure 3.28 ).

Figure 3.28. To dock a toolbar below FileMaker's menu bar, click the toolbar's title (top), drag it toward the menu bar (middle), and release the cursor (bottom).


2.

Continue pressing the cursor and drag the toolbar to the area just below the menu bar (middle, Figure 3.28 ).

3.

Release the cursor and the toolbar will snap into place (bottom, Figure 3.28 ).


To resize freestanding toolbars

  • To resize a freestanding toolbar, click an outer edge (Windows) or its lower-right corner (Mac) and drag the cursor to shrink or enlarge the toolbar ( Figure 3.29 ).

    Figure 3.29. To resize a freestanding toolbar, click its outer edge (Windows) or lower-right corner (Mac) and drag the cursor to shrink or enlarge the toolbar.


Opening, Closing, and Saving Files

Opening and closing files in FileMaker works like most programs. Unlike many programs, however, FileMaker automatically saves data as you enter it. If by habit, you type or , the Sort dialog box will appear. Just click Done and you'll be back to where you were with no harm done.


To open a file

1.

If you haven't started the FileMaker program, do so now by either choosing All Programs > FileMaker Pro from the Start menu ( Figure 3.30 ) or double-clicking the FileMaker Pro icon in the FileMaker Pro 8 folder (Mac).

Figure 3.30. To launch FileMaker, navigate to the icon from the Start menu (Windows) or double-click its icon (Mac).


2.

A dialog box will appear asking whether you want to create a new file using a template, create a new empty file, or open an existing file ( Figure 3.31 ). Make your choice and click OK .

Figure 3.31. When FileMaker's opening dialog box appears, you may open a new template-based file, a new empty file, or an existing file.


3.

Depending on your choice in step 2, a dialog box will appear asking you to create and name a copy of the selected template ( Figure 3.32 ), open an existing file, or create and name a new file.

Figure 3.32. If you use one of FileMaker's templates, a dialog box will ask you to create and name a copy of the selected template.


Tips

  • If you'd rather not see the dialog box that asks whether you want to open a template, a new file, or an existing file every time you launch FileMaker, check the No longer show this dialog box ( Figure 3.33 ). In the future, when FileMaker starts up, you can then go directly to the File menu.

    Figure 3.33. To skip FileMaker's opening dialog box, check the No longer show this dialog box.

  • If you've turned off the opening dialog box (see the previous Tip), you still can open an existing file by choosing File > Open ( Figure 3.34 ). Or use your keyboard: (Windows) or (Mac).

    Figure 3.34. You also can open an existing file using the File menu.


FileMaker Pro 8 for Windows and Macintosh(c) Visual Quickstart Guide
Authors: Hester N.
Published year: 2006
Pages: 39-45/184
Buy this book on amazon.com >>

Similar books on Amazon