| Sometimes you or co-workers need to see FileMaker data in spreadsheet form or want to sift through some Microsoft Excel numbers using FileMaker. Moving in either direction's no problem: FileMaker 8 can quickly generate Excel-compatible files or read data created by Excel. Similarly, you can move Adobe PDF (Portable Document Format) files in and out of FileMaker with ease. Additionally, it's just as easy to email the Excel or PDF file to others. This section focuses on saving (exporting) FileMaker data in the Excel and PDF formats. For more on importing those formats into FileMaker see To import data for a new FileMaker database on page 235. To save or email records for Excel 1. | Before you export the FileMaker database, use FileMaker's Find and Omit commands to expand or narrow the Found Set to just the records you'll want. Use FileMaker's Sort command to then put the records in the order you want them to appear initially in Excel (Figure 14.1).
Figure 14.1. Before exporting a FileMaker database, use the Find, Omit, and Sort commands to order the records as you want them to appear in Excel. 
| 2. | In Browse, Layout, or Preview mode, choose File > Save/Send Records As > Excel.
| 3. | When the Save Records As Excel dialog box appears, use the Save As text window to clearly name the file (leave the .xls suffix as is) and use the Where drop-down menu to navigate to the folder in which you'll save the file (Figure 14.2). Use the Save drop-down menu to choose whether to save the Records being browsed or (less often) only the Current Record.
Figure 14.2. Use the Save As text window to name the file and the Where drop-down menu to navigate to the folder in which you'll save the file. 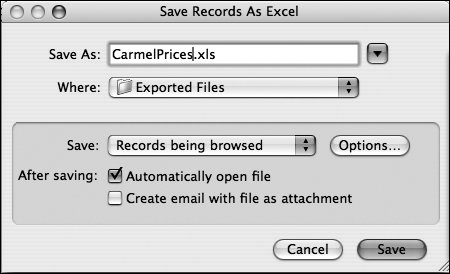
| | | 4. | To set how the records appear within Excel, click Options to open the Excel Options dialog box (Figure 14.3). By default, Use field name as column names in first row is selected. Deselect the box if you want no column names to appear. Name the Worksheet using the first text box; use the other three based on your needs. Click OK to return to the Save Records As dialog box.
Figure 14.3. By default, Use field name as column names in first row is selected in the Excel Options dialog box. Adding a Worksheet name helps you identify the data once it's opened in Excel. 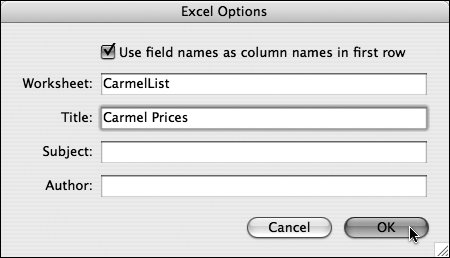
| 5. | Back in the Save Records As dialog box, you can select the first checkbox to Automatically open file in Excel once it's saved.
or
Select the second checkbox to Create email with [an Excel] file as attachment (Figure 14.2).
or
Select both boxes to open the file in Excel and create a new email with an Excel attachment.
| 6. | Once you make your choices, click Save to close the dialog box. If you selected Automatically open file in step 5, the new file opens in Excel (Figure 14.4). If you selected Create email..., your default email program generates a new blank message with the Excel file attached (Figure 14.5).
Figure 14.4. If you selected Automatically open file in step 5, the new file opens in Excel. 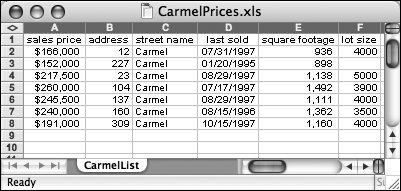
Figure 14.5. If you selected Create email in step 5, your default email program generates a new blank message with the Excel file attached. 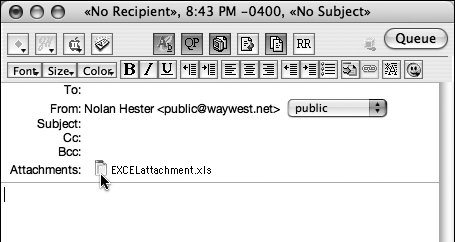
|
To save records as PDF 1. | Before you export the FileMaker database, use FileMaker's Find and Omit commands to expand or narrow the Found Set to just the records you'll want. Use FileMaker's Sort command to then put the records in the order you want them to appear in the PDF.
| 2. | In Browse, Layout, or Preview mode, choose File > Save/Send Records As > PDF.
| 3. | When the Save Records As PDF dialog box appears, use the Save As text window to clearly name the file (leave the .pdf suffix as is) and use the Where drop-down menu to navigate to the folder in which you'll save the file (Figure 14.6). Use the Save drop-down menu to choose whether to save the Records being browsed or (less often) only the Current Record.
Figure 14.6. Use the Save As text window to name the file and the Where drop-down menu to navigate to the folder in which you'll save the file. To set how the records appears in a PDF, click Options. 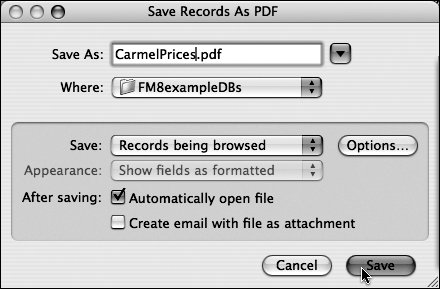
| 4. | To set how the records appear in a PDF, click Options to open the PDF Options dialog box where the Document tab is selected by default (Figure 14.7). Fill in the text windows as needed; note that the bottom area lets you set which pages print and how they are numbered. If you want more control over the PDF's appearance, see Tips on the next page. Click OK to return to the Save Records As dialog box.
Figure 14.7. In the PDF Options dialog box, the Document tab is selected by default. Use the top half to add identifying details; the bottom half to control which pages print. 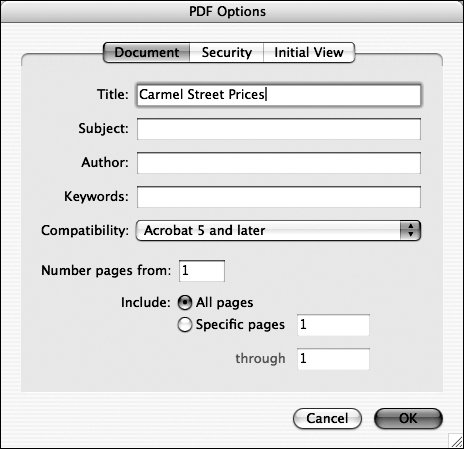
| 5. | Back in the Save Records As dialog box, you can select the first checkbox to Automatically open file in your default PDF viewer once it's saved.
or
Select the second checkbox to Create email with [a PDF] file as attachment.
or
Select both boxes to open the file as a PDF and create a new email with a PDF attachment.
| | | 6. | Once you make your choices, click Save to close the dialog box. If you selected Automatically open file in step 5, the new file opens in your default PDF viewer (Figure 14.8). If you selected Create email..., your default email program generates a new blank message with the PDF file attached.
Figure 14.8. The PDF version preserves the layout and data of the original FileMaker document. 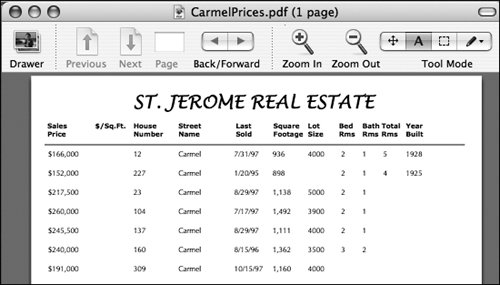
|
 Tips Tips
In step 3, you can save just the FileMaker layout without data by setting the Save drop-down menu to Blank Record and then choosing one of three options in the Appearance drop-down menu (Figure 14.9). This is handy if, for example, you want to get someone's reaction to a layout and its fieldswithout needing to include the data. Figure 14.9. Save just the layout without data, by setting the Save drop-down menu to Blank Record and choosing an option in the Appearance drop-down menu. 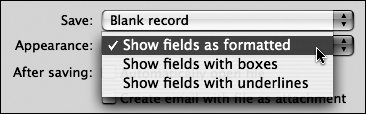 In step 4, you can use the Security tab to require a password from anyone opening the PDF document (Figure 14.10). You also can control whether the document can be printed or changed. Figure 14.10. Use the Security tab to control who can open, edit, and print the PDF document. 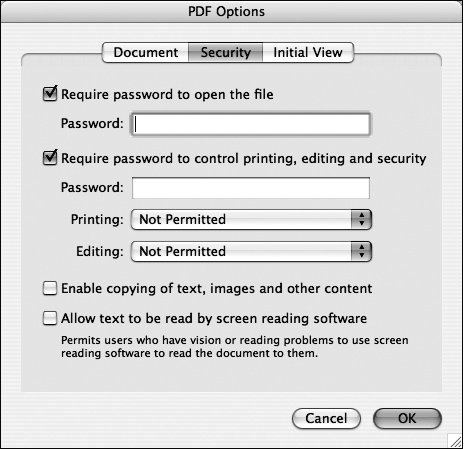 Also in step 4, you can use the Initial View tab to control the PDF document's appearance when it first opens (Figure 14.11). There may be times when you want to exert this level of control. But take a minute to consider whether you really need to override the PDF viewer settings of the recipient. Figure 14.11. The Initial View tab gives you precise control over how the PDF document appears when first opened. 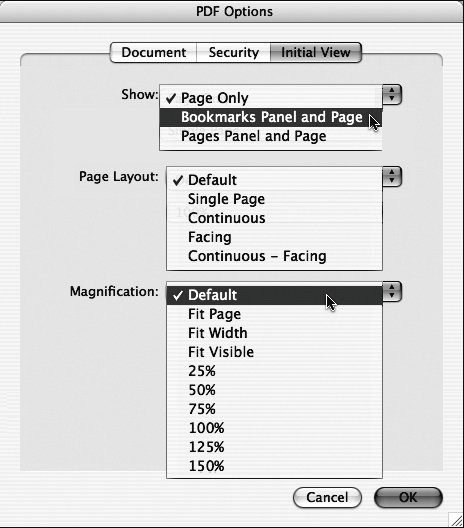
|