| When you define relationships, you do so by using lookups or portals. Lookup fields copy data from a source database into a destination database, where it remains unchanged unless you update it manually. Portals do not copy data, but simply display it in the destination file by, in effect, using a window back to the source file (hence the name, portal). For that reason, portals require less storage space since the data is stored in only one file. The portal is also "live" so that any change in the linked data is automatically reflected. Sometimes, you don't want a live connection. Take, for example, an order where you want to preserve an item's cost at the time of the sale. A portal showing an item's cost would display an ever-changing price, which could change even after the order was filled. In that case, a lookup would be better. But, when you want to have the most up-to-date data displayed, such as a customer's contact information, use a portal. To define a lookup 1. | Open the database you want to use as the destination file (ordersEG in our example). In either Browse or Layout mode, choose File > Define > Database ( in Windows, in Windows,  on the Mac). on the Mac).
| 2. | When the Define Database dialog box appears, click the Tables tab, and select the same file (Figure 10.15).
Figure 10.15. When the Define Database dialog box appears, click the Tables tab, and select the destination file. 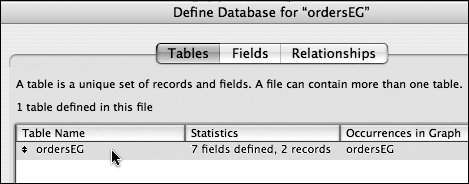
| 3. | Now click the dialog box's Fields tab (Figure 10.16). In the Field Name text window, type in a new field with exactly the same name as the field you want to look up in the source file (in our example, Item Price from the productsEG file). Select Number from the Type drop-down menu and click Create.
Figure 10.16. In the Field Name text window, type in a new field with exactly the same name as the field you want to look up in the source file. 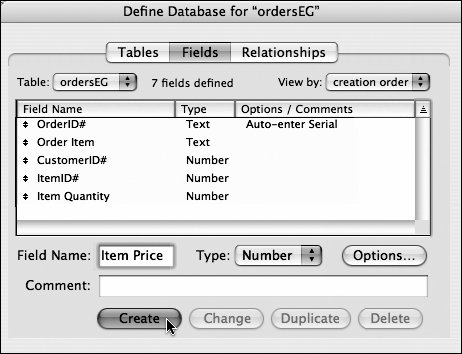
| | | 4. | Click the Options button and when the Options dialog box appears, select Looked-up value and click the Specify button (Figures 10.17).
Figure 10.17. When the Options dialog box appears, select Looked-up value and click the Specify button. 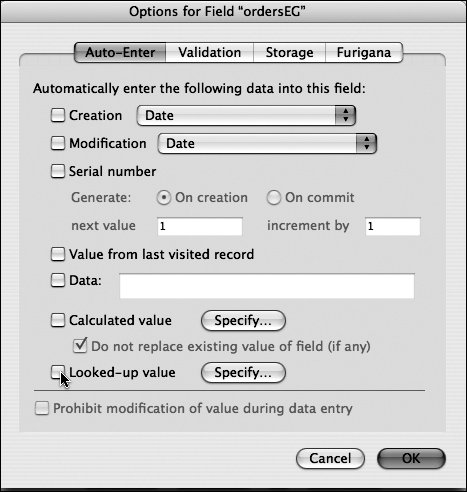
| 5. | When the Lookup for Field dialog box appears, use the Lookup from related table drop-down menu to select the source file (productsEG in our example) (Figure 10.18).
Figure 10.18. Use the Lookup from related table dropdown menu to select the source file, then select your source fields in the left-hand list. 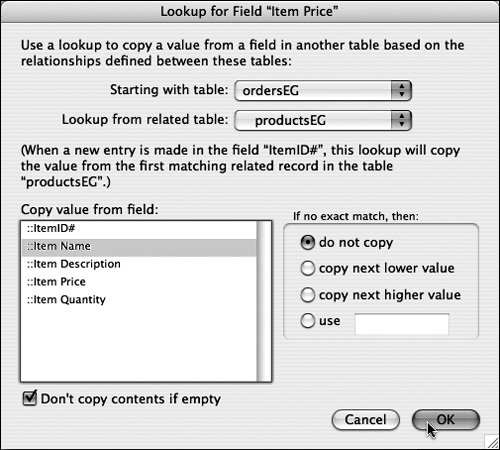
| 6. | In the left-hand Copy value from field, select the source field you want to use (Item Name in our example). Leave the default selections Don't copy contents if empty and If no exact match then: do not copy as they are. Click OK to close the dialog box.
| 7. | When the Options dialog box reappears, click OK again. Finally, when the Define Database dialog box for your destination file reappears, the field within the destination field (Item Price) will have a Lookup to the source file (Figure 10.19).
Figure 10.19. The field within the destination field (Item Price) will have a Lookup to the source file. 
| | | 8. | Repeat to add as many lookup fields as you need. Click OK to close the dialog box.
| | | 9. | Since you already linked the two files using a match field, once you also add the lookup fields to a layout in the destination file, you can switch to Browse mode, enter a CustomerID#, press  , and FileMaker automatically looks up the other fields and copies them from the source file (Figure 10.20). , and FileMaker automatically looks up the other fields and copies them from the source file (Figure 10.20).
Figure 10.20. In Browse mode, enter a CustomerID#, press  , and the other fields are copied from the source file. , and the other fields are copied from the source file. 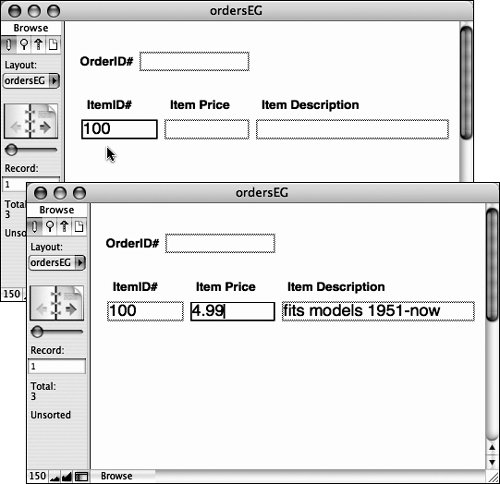
|
 Tips Tips
In step 3, it helps to have the source file open and visible on your screen to ensure that you enter the exact name of the source field in the destination file's Define Database dialog box. In step 5, the source file appears in the drop-down menu because you've already defined its relationship to your destination file. If your lookup requires another file that you haven't yet linked to the destination file, select Define Relationships from the drop-down menu. Once you've defined a relationship, you can create lookups from the destination file to any number of source files. Simply repeat the above steps except that in step 3, you create a new field named after another source file and field.
To define a portal 1. | Open the database you want to use as the destination file and switch to Layout mode ( in Windows, in Windows,  on the Mac). on the Mac).
| 2. | Assuming you're still working with the default layout (otherwise, select your intended layout in the pop-up menu), click the Portal Tool (a, Figure 10.21). Click in the layout and drag the pointer until the portal reaches the general shape and size you want (b, Figure 10.21). Release the cursor.
Figure 10.21. Click the Portal Tool (a) and drag the pointer (b) to shape the portal to the size needed. 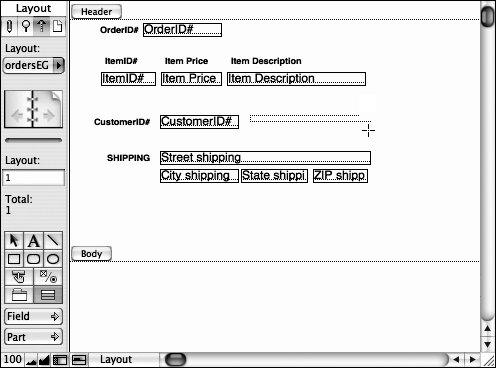
| 3. | When the Portal Setup dialog box appears, use the pop-up menu to choose the source file that contained your match field (Figure 10.22). (In our example, we use customersEG.) Click OK to close the dialog box. (If you have not linked the files previously, choose File > Define > Database and see To create a relationship on page 132.)
Figure 10.22. When the Portal Setup dialog box appears, use the pop-up menu to choose the source file that contained your match field. 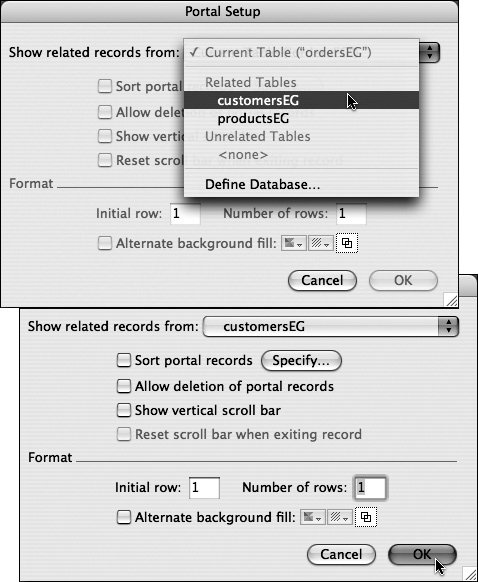
| | | 4. | When the Add Fields to Portal dialog box appears, click items in the Available fields list ( -click to select multiple items), then click Move (top, Figure 10.23). Once you're satisfied with your new list of Included fields, click OK to close the dialog box (bottom, Figure 10.23). -click to select multiple items), then click Move (top, Figure 10.23). Once you're satisfied with your new list of Included fields, click OK to close the dialog box (bottom, Figure 10.23).
Figure 10.23. In the Add Fields to Portal dialog box, select items in the Available fields list and move them into your new list of Included fields. 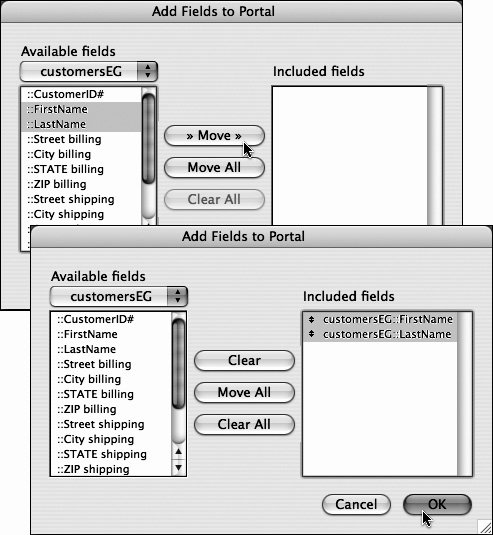
| 5. | The labels of the fields being used appear in the layout's portal (Figure 10.24). You can style and format this field as you would any other. (See Formatting and Graphics in Layouts on page 197.)
Figure 10.24. The labels of the fields being used appear in the layout's portal. 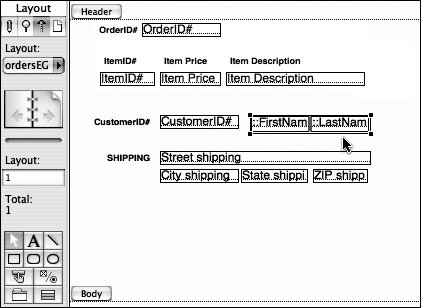
| 6. | Switch to Browse mode ( in Windows, in Windows,  on the Mac) and the data for those linked fields appears in the portal. In our example, the customer's name, which is stored in the customersEG file, now appears in the ordersEG file (Figure 10.25). on the Mac) and the data for those linked fields appears in the portal. In our example, the customer's name, which is stored in the customersEG file, now appears in the ordersEG file (Figure 10.25).
Figure 10.25. Switch to Browse mode and the data for those linked fields appears in the portal. 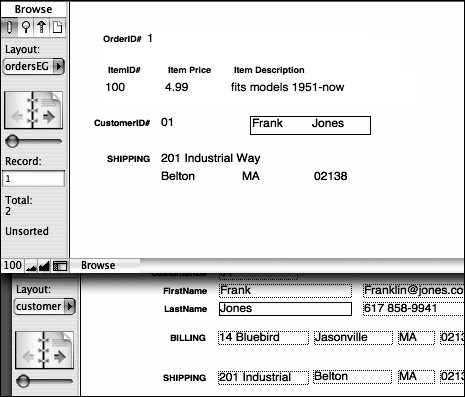
|
Tips In step 3 (Figure 10.22), you can use the Format panel's text windows and checkbox to choose how many rows (record listings from the related file) you want to appear in the portal. You can change these Format options later if need be. You can create portals to different source files in the same destination layout. This would allow you, for example, to display the billing status for a customer within your orders layout. If the portal data is cut off at the end, switch back to Layout mode and click-and-drag the corner of the field to expand the view.
|