Positioning and Resizing Objects
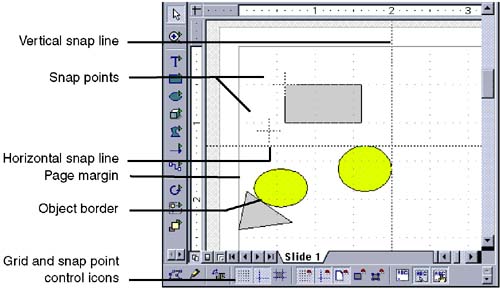
| Draw provides a variety of tools that let you position, align, resize, and group objects with precision. Snap/grid features are illustrated in Figure 29-18. Figure 29-18. Snap/grid object positioning features Aligning ObjectsYou can align all objects to uniform lines using the grid or snap points, or align one group at a time.
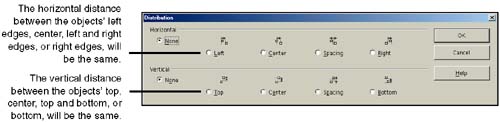
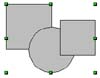
Distributing Objects EvenlyYou can position objects evenly, horizontally or vertically, using the Distribute window. The selected objects will be distributed so that the object's borders (or their center) maintain the same distance from each other. The objects that are located on the outsides (the first and fifth of five objects, for example), vertical or horizontal, will be considered as borders. That means that they won't be moved when the distribution takes place. The inner objects will be moved to evenly space the objects.
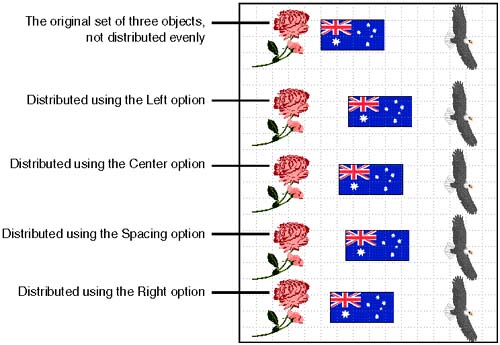
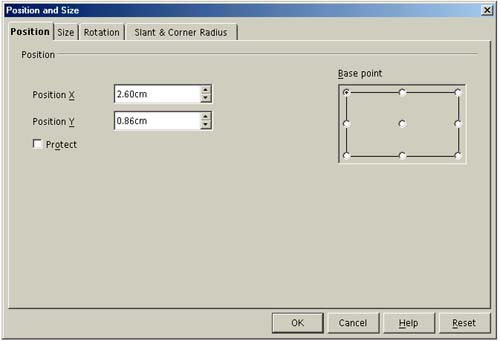
Figure 29-20 shows how each of the four Horizontal options works when you're distributing objects with different shapes . The grid is shown so you can see the contrast in positioning more easily. Figure 29-20. Effects of the four Horizontal distribution options Positioning ObjectsUse the arrow keys, or the Position and Size window. The following procedures include more detail on both approaches. Moving Objects a Small AmountTo move an object a very small distance in one direction, select the object, then hold down the Shift key. Press the up, down, left, or right arrow key on your keyboard to move the object. Protecting Objects From Being Moved With the Mouse or Arrow KeysUse the steps in Positioning Objects Using the Position and Size Window. Select the object, then mark the Protect option. Positioning Objects Using the Position and Size Window
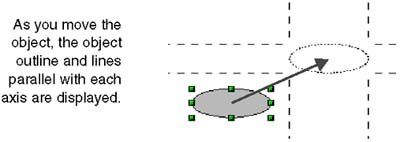
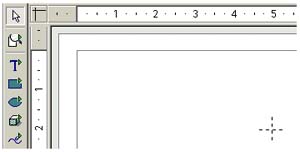
Showing Extended Object Lines When Moving ObjectsYou can display objects with lines coming out of both axes when you move them, to show more clearly where the object will be (see Figure 29-22). Figure 29-22. Displaying extended object lines To use this feature, choose Tools > Options > Drawing > Layout, then select the Guides when moving option. Bringing Objects to Front or Back (Arranging)To determine what objects appear in front of others in your work, you can use Draw's arranging features. The features let you put an object on top or bottom, as well as move it up or down one layer at a time.
Resizing ObjectsYou can do most resizing quickly with your mouse; for more precise resizing, use the Position and Size window. Using the MouseYou can resize Bezier curves as well as other shapes, using the mouse.
Using the Position and Size Window
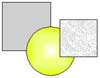
Grouping ObjectsTo more easily move objects that belong together, you can group them. Once grouped, you can manipulate the objects as one so that they are easier to move and apply attributes to. If you group three objects of different colors, for instance, you can simply select the group and apply one color to all of them in one step.
Editing Object Groups
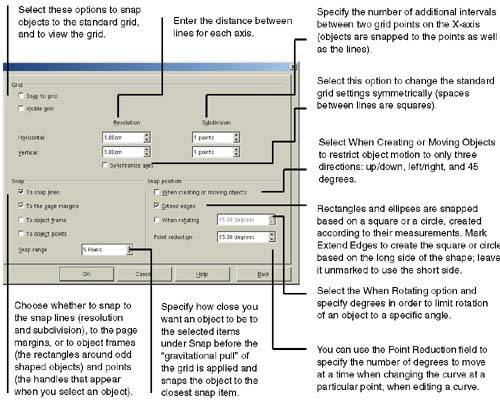
Setting Up the GridYou can use the grid to help you visually position objects, or "snap" objects to the grid to automatically position objects. Setting up the Grid
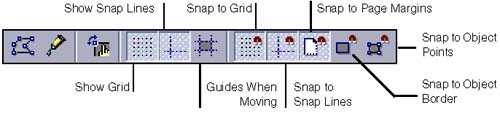
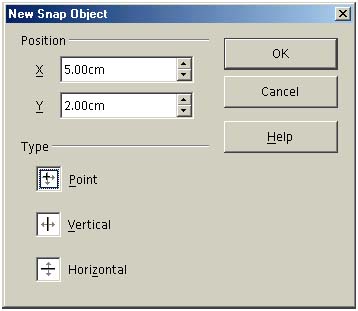
Using the GridOnce you've specified the dimensions and other options for the grid, you can show it and snap to it. Use the icons on the option bar, to control the grid functions shown in Figure 29-24. To display it, choose View > Toolbars > Option Bar. Figure 29-24. Grid option icons Displaying the Standard GridClick the Show Grid icon in the option bar (see Figure 29-24). Note If you click Show Grid and nothing seems to appear, have a closer look. The grid points are probably so far apart that the dots marking the lines and points are too light and intermittent to notice at first. Snapping Objects to a GridYou can make sure all objects you move or create are automatically aligned on the grid. This also helps you draw straight lines more easily. Just click the Use Grid icon in the option bar of the work area to activate that option. Note If you're set up to snap to the grid or other items but don't want to snap a particular object, hold down the Ctrl key while you create or move the object. Creating and Using Snap Points and LinesIn addition to the snap capabilities of the grid, you can set up specific snap points and lines in the work area to use as guidelines for creating and moving objects. How close you need to move an object to the point or line before it snaps is determined in the snap grid setup window (Figure 29-23).
If the point doesn't appear, click the Show Snap Lines icon in the option bar at the bottom of the work area. Use the Snap to Snap Lines icon in the same option bar to activate snapping objects to the points. Note If you're also snapping items to the snap grid, the snap grid takes precedence. To remove a snap point or line, just right-click on it and choose Delete. Snapping to the Page Margin and ObjectsYou can align objects to the page margin and to object borders or points . Page margins and object borders are relatively straight-forward; objects you draw or move are snapped to the nearest object's borders, or to the page margin, if you move the object close enough. When you snap to object points, you won't be able to draw or select anything that isn't an object point; your mouse will be drawn to the nearest point of the nearest object. This might be useful in some circumstances; however, we primarily found it annoying. To snap to any of the three options, just click the appropriate icon (see Figure 29-24 on page 780). |
EAN: 2147483647
Pages: 407