Formatting Text
| You have the combined capabilities of Draw, Writer, and a few extras that are only in Impress. Note Some features, like the features in Applying Standard Text Formatting on page 688, need to be applied to the text itself; others, like the formatting covered in Setting Text and Text Frame Options on page 683, need to be applied to the text frame. Be sure to select the appropriate item before you start formatting. It's a good idea to have the Preview window (choose View > Preview; see figure at right) displayed when you're doing any slide editing. It's particularly useful for seeing effects and animation, which you can't see in a static slide. Using the Right Slide LayoutWhile you can choose a completely unformatted layout for a slide, then use the Text tool to create a text frame for it, that's the hard way. A lot of automatic formatting that will make your life easier is included in the preset layouts (see Selecting a Slide Layout for a New or Existing Slide on page 673). If you don't like how the Outline 1 and other styles look, you can change them using procedures in this section. Using ColumnsYou can divide your slide into two or more columns using the Modify Layout window described in Selecting a Slide Layout for a New or Existing Slide, or by simply manually resizing and copying the text frames .
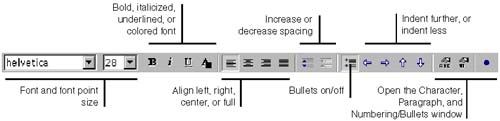
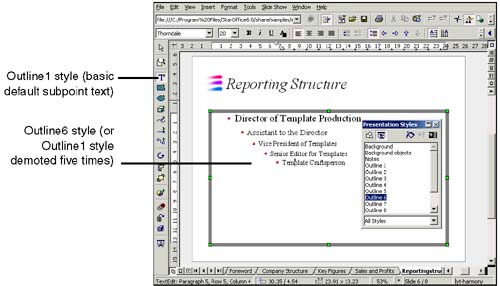
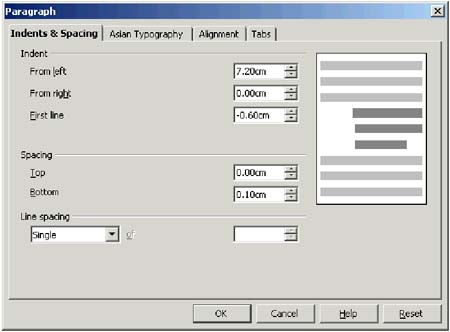
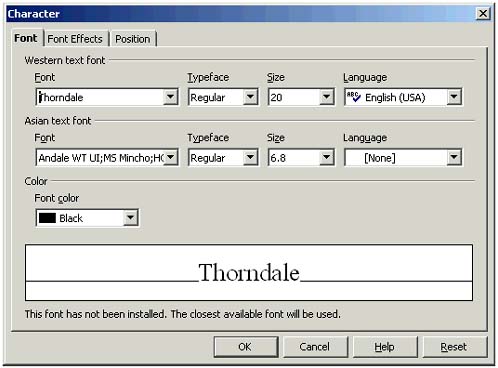
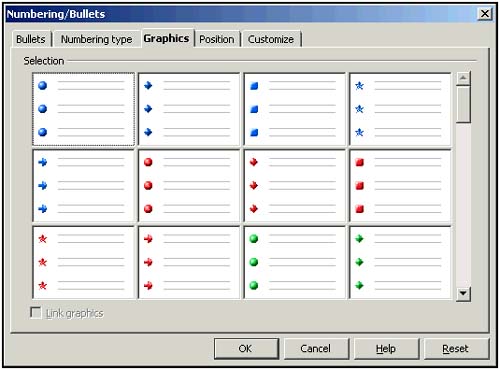
Using the Object Bar for General FormattingThe object bar for text (choose View > Toolbars > Object Bar; see Figure 26-11) lets you quickly apply features like bullets, alignment, and basic text formatting. Tool tips describe each function; most are also available in the other text- related window. Figure 26-11. Quick formatting using the object bar for text The default text values for any text that you enter is shown in the object bar. To change these values, first be sure no text is selected in the work area. Then choose Format > Character and make the appropriate selections. Working With Spacing and IndentsImpress has good automatic-indenting features; you can use several approaches, including just pressing Tab or using the indent/promote icons. Text Frame AdjustmentsResize or move the text frame so the farthest-left text starts where you want it. Justifying TextUse the alignment icons to left-justify, center, right-justify, or fully justify your text. Indenting Text to Make SubbulletsYou can press the Tab key to indent text, or use the Promote and Demote icons on the object bar. These are the most convenient methods for quickly indenting or "outdenting" any text. When you press Tab or use the Promote and Demote icons, the styles are automatically changed (one demotion changes Outline1 to Outline2, and so on). See Figure 26-12. Figure 26-12. Indenting subpoints The Paragraph WindowThis window (choose Format > Paragraph; see Figure 26-13) lets you set up spacing, indents, and tabs. Use this window in Drawing, Handout, or Notes view. See Using the Paragraph Format Window on page 210 for more information. Figure 26-13. Options controlling indent, alignment and tabs Applying Standard Text FormattingThe Character window (choose Format > Character; see Figure 26-14) lets you apply standard text formatting attributes like font and point size. Use this window in Drawing, Handout, or Notes view. See Using the Character Formatting Window on page 202 for more information. Figure 26-14. Options controlling text formatting Using Numbering and BulletsYou can quickly control these features on the object bar, or use the numbering and bullets formatting window. Note If you've got a dark background, be sure that your bullets are light-colored, or they'll be difficult or impossible to see. Choose Format > Number/Bullets and click the Customize tab to select light-colored bullet graphics from the gallery, or from a file you've created yourself. Turning Numbering and Bullets On and OffYou can turn this feature on or off for the text that's currently selected using the Bullets on/off icon in the object bar. If that doesn't work, you'll need to change the slide design to one that contains bullets, to add them, or doesn't contain bullets, to turn them off. Choose Format > Modify Layout and select a layout with the right contents. (For more information, see Selecting a Slide Layout for a New or Existing Slide on page 673.) Full Formatting CapabilitiesThe Numbering/Bullets window lets you choose what symbols or numbers appear next to paragraphs, and where they're positioned. Bullets and numbering are paragraph-specific; that is, each line in a list can have a different bullet or number style. Use this window (Figure 26-15) in Drawing, Handout, Outline, or Notes view. Refer to Numbering, Bullets, and Outlining on page 217 for more information. Figure 26-15. Options controlling bullet and numbering type and spacing Using StylesMost of your presentations will contain formatting that's already automatically applied through the slide layout or AutoPilot features, and each piece of text has a specific style assigned to it. Impress is very rigid about what styles it wants in a slide. You can't create new text-formatting styles, or add new styles through the Stylist. The only way you can make other styles available to a slide is to change the slide layout, or to modify existing styles. |
EAN: 2147483647
Pages: 407