Buy and Sell
|
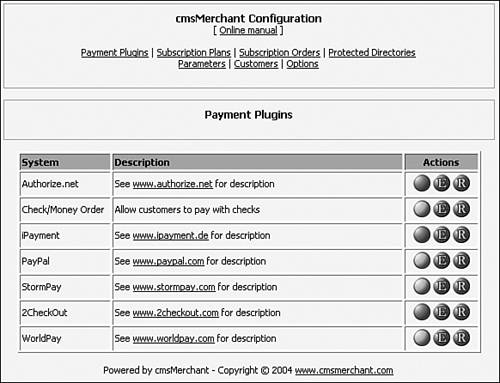
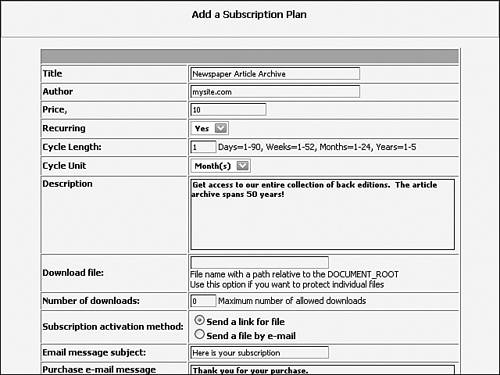
| Though most PostNuke sites are as free with their downloads as they are information, it is also quite possible to set up an e-commerce site using the Content Management System (CMS). A number of third-party modules are available that can help. The majority tie into other systems, such as CaféPress, PayPal, and eBay to use their built-in features. The two following modules are good examples of the type of systems currently available. The first, cmsMerchant, provides a variety of services using a generally subscription-focused model. It is a completely standalone module that is also commercially sold to its users. The second, PayPalCart, accesses the user feature of PayPal to create an online shopping experience. It ties into PayPal directly with only support for the one service, but PayPalCart is also a free module. For more e-commerce modules, consult the tables in Appendix B, "PostNuke Modules List." cmsMerchantThe cmsMerchant module provides an all-in-one style solution for your e-commerce needs. It provides regular sales functions for digital and physical products and services, provides donations support, and has a subscription system that can block out specific portions of your website and automatically charge recurring fees for user access. The module is one of the few commercial add-ons to PostNuke, but registration of cmsMerchant grants you a free installation and ongoing support. Following is a general overview of how cmsMerchant works. The examples were produced using version 2.0.1. Functional demos of the software have been made available through the cmsMerchant website (www.cmsmerchant.com) in the past, but at this writing only an online example is available for viewing. For more detailed information on the current version and to purchase the module, visit their site at the address listed previously. To begin, cmsMerchant is written in PHP but encoded using tools from ionCube. You have to install the ionCube Loader on your server prior to installing cmsMerchant so that the cmsMerchant files can be read. The Loader is a simple install that consists of copying the appropriate dynamic link library (DLL), for Windows, or Apache Module: for Linux and OSX, file to your operating system's binaries location and adding a Zend extension reference in your php.ini file. After that is completed, with a restart of your web server if required, you can initialize cmsMerchant and activate the module. The first step to creating a cmsMerchant storefront is to set up user groups. cmsMerchant uses the standard PostNuke group module. Go to the Group Administration page and create a new group called customers, subscribers, or another name you like. Access to different areas and features can then be managed by group name. Note Multiple groups can be created to add tiered access levels, such as regular and pro or bronze, silver, and gold. Back in the cmsMerchant Administration page, a series of links are used to navigate through the module's features:
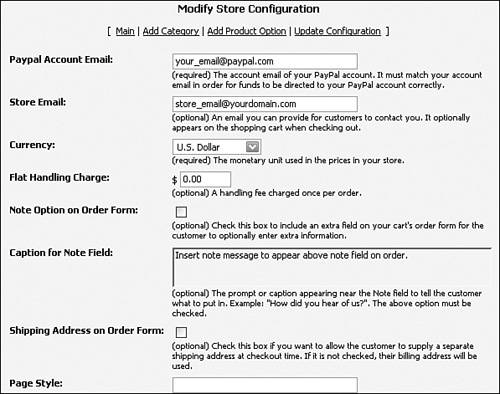
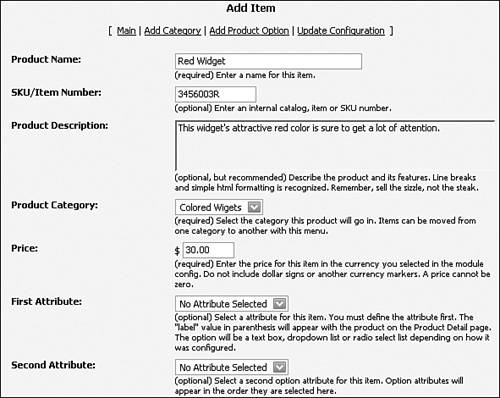
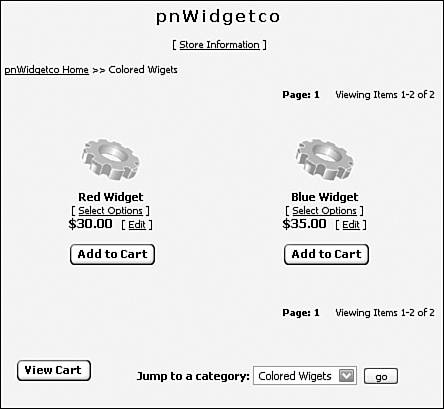
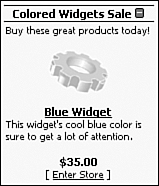
You can see cmsMerchant's design is focused mostly toward the subscription model, but the base functionality has been extended to include support for specific products and donations. cmsMerchant also includes four different block types you can use with your site. Two of the blocks deal with donations and work very similar to the blocks covered in previous sections. The Donation block is assigned a preconfigured plan and prompts your users to support the site. Top Donators are displayed in its companion block automatically; you need only select the number of users to display and whether the list is ranked by amount given or number of times a user has donated. Note The display of a cmsMerchant side block is required for cmsMerchant's subscription system to function. The block allows the tracking of users against the subscription database and prevents access to materials when a subscription has expired. Another cmsMerchant block is called "Show Merchant Goodies" and displays an item of your choice with its name, description, price, and thumbnail image. Further information is displayed for subscriptions, such as the duration of the service per payment. The final module provides a link into the current subscriptions and products for your site. A similar link can also be accomplished by adding the standard line in a Menu block with [cmsMerchant] in the URL. Users of cmsMerchant should also take a good look through the online manual. Although most modules include their documentation in a pnDocs folder, you can find this module's manual at /modules/cmsMerchant/lang/eng/manual.html The documentation has been placed under the language folders to provide better multilingual support using different versions of the manual. PayPalCartThe PayPal service includes a free service in which members can create a shopping cart for items they are selling on their site. The problem is that PayPal's system requires each item to be added separately to your site in a series of button scripts. This can be cumbersome to manage, especially on large sites with many items. This is where PayPalCart comes in. This PostNuke module is an administration tool for your PayPal shopping cart entries. You can create categories and register your item information in PayPalCart, and it dynamically generates all the hooks you need into PayPal. Note You must have a PayPal account to use the PayPalCart module, but the account setup and configuration is free. This section walks through the setup of this handy module to see how it all works. PayPalCart version 1.0.1 is available with the book's online materials, and you can also find current versions at its creator's site: www.natewelch.com/. After the archive is downloaded, review its contents. Three main directories are included in the zip: images, includes, and modules. The files in each directory need to be placed in their respective folder off of your site's root. You can also decompress the file from your site's root to accomplish the proper distribution. Now browse to your PostNuke Module Administration page and both initialize and activate the module. After this is done, return to the main Administration Menu and click the new PayPalCart icon. A series of links are at the top of the module's main page. Click the far right link labeled Update Configuration to set up your PayPal information and preferences. As you can see from the form in Figure 13.11, PayPalCart offers an extensive list of configuration options. Each field includes a clear description of its function and whether it is required. Customize the content in the fields to suit your new store. Figure 13.11. Setting up your online store. Next, upload a couple of images for your sample products. The main PayPal Administration form includes a handy Image Upload field. With it, you can browse to your image on your local machine and upload it directly to the remote server directory you entered in the configuration form. You can, of course, alternatively copy the images to the directory manually if you find that easier. Thumbnail images and their larger-sized counterparts are included with the book materials as samples. Upload some of the example images, or a set of your own images for use later. Click the Add Category link at the top to create a new department for your products. The Category options are also very straightforward and provide inline descriptions of their functions. Add a category name and complete a short description. Be certain the Active check box is checked, and submit the form. The new category is in the resulting table on your PayPalCart main page. At the right of the row is a link to Add Item. Select the option to add a few samples. The Add Item page allows you to define your products in great detail (see Figure 13.12). Along with the regular item descriptions and price, you can define selectable attributes for your product and override default shipping settings. Now use the images you uploaded earlier to pick out a thumbnail and full-size view of your product. Your images dynamically appear as you choose them. Figure 13.12. Adding items for customers to purchase. After adding your inventory, you need to make it easy for your customers to get to your products. PayPalCart provides three ways to make it happen. First add a link to the Main Menu block. Edit the Main Menu in the Block Administration and add a new line. For the title, enter something like "Buy Widgets," and use "{PayPalCart}" as the URL. Submit the menu and click your new link. The first page is the main storefront. If you added images to your store, they appear here with the title and main description. Your categories are listed below the store information with the number of items available. Click the category name to browse your items (see Figure 13.13). Figure 13.13. Customers can browse your products by category. The second way your customers can find your products is through the PostNuke site search. To enable product searches, copy the paypalcart.php plug-in file to your site's /includes/search/ folder. If you installed the PayPalCart files completely, the file will already be in place. Tip Does your site have an integrated search field built in to your layout? Add this hidden input to your site's search form to include PayPalCart items in user searches: <input type="hidden" name="active_paypalcart" value="1">. The third way you can get more customers to your products is through the PayPalCart side block. The block randomly displays an item from the category you select or can alternatively show a single specific product you define (see Figure 13.14). Figure 13.14. Highlighting specific items with the PayPalCart block. All of the PayPal code is dynamically integrated into the shopping experience. When a user adds items to his cart, the module interfaces with your PayPal account to create the cart. It's a very straightforward and user-friendly interface that works with most online store needs. |
|
EAN: 2147483647
Pages: 207
