Downloads
|
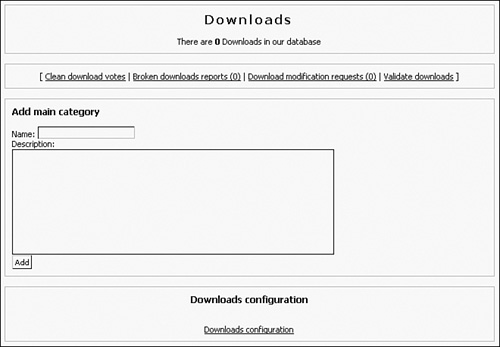
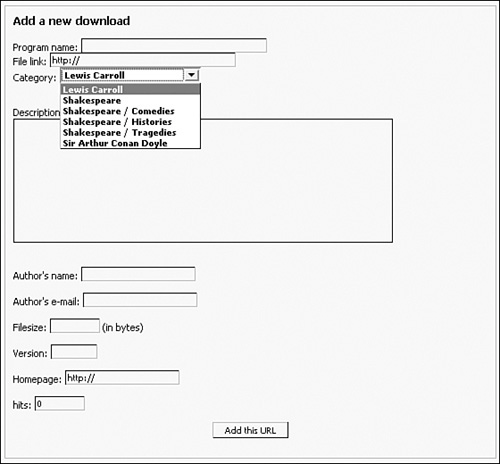
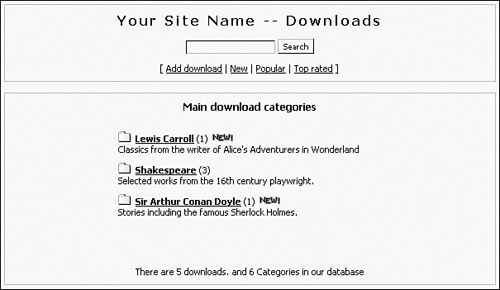
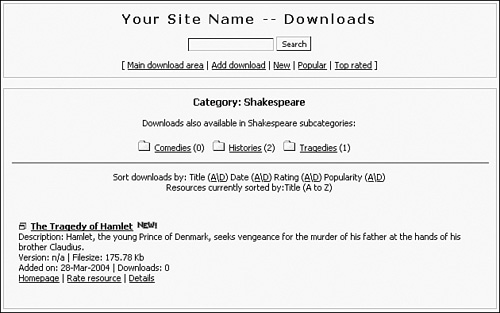
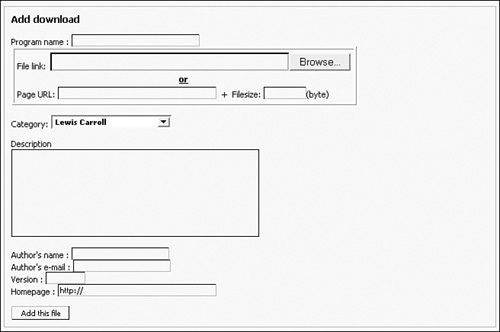
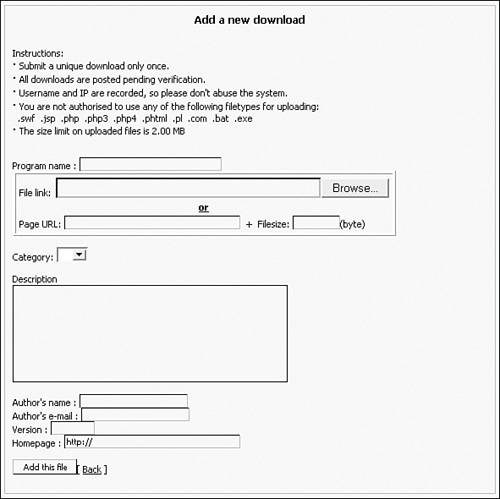
| You can add files to your site and make them available to your users through the Downloads module. You can allow any file type, and the module supports the creation of categories and subcategories to organize your files. Each file object includes a number of informative fields, such as Description and Filesize. Continuing with your book site example, create a Downloads section that allows site visitors to browse and select different texts. Edit the Downloads module settings through the Administration page. Your initial screen looks similar to Figure 6.7. All uploaded files must be grouped by categories, so you must first create a main category before any files can be added for download. Figure 6.7. Grouping your downloads by category. For this example, use selected classic works no longer in copyright, which are in this text's additional materials, and they can be found at their original source in the Project Gutenberg site (www.gutenberg.net). Create a main category called Shakespeare with the description "Selected works from the 16th century playwright." Upon submission, the page expands to include three new forms: Add Subcategory, Add a New Download, and Modify a Category. To see how the structure works, add two more main categories using the top form called "Lewis Carroll" and "Sir Arthur Conan Doyle" using the respective descriptions "Classics from the writer of Alice's Adventures in Wonderland" and "Stories including the famous Sherlock Holmes." Next create three subcategories under Shakespeare named Comedies, Histories, and Tragedies. You need to use the second form for this operation, and with subcategories, descriptions are not required. Downloads categories are always displayed alphabetically, so you don't need to be concerned with the order in which you add them to PostNuke. Note When you delete a download link, the file is not deleted. If it resides on your server, you must delete it separately. The stock Downloads module references files as though they are web-accessible. This means your files need to be uploaded to your server to complete the module form and add the file to your site. Connect to your server using File Transfer Protocol (FTP) or your local share, and create a directory called downloads at your root web folder. Place the files you will be linking to in that folder. Now use the third form to add a new download to your site. This module was originally designed to link to application downloads; the Program Name text box is a legacy of the older design. In the Program Name text box, type "The Tragedy of Hamlet." The next text box, File Link, defines the file location. Clear the default http:// and enter the web path to your file. For this example, the path is /downloads/Shakespeare-Hamlet.txt. The http:// is also a clue for you that you can also link to external files. Many PostNuke sites use their Downloads module to provide handy links to files on other websites. Tip You could also use your server's fully qualified domain name (FQDN) in the link, such as http://www.yourserver.com/downloads/Shakespeare-Hamlet.txt, but the full domain is not necessary with local references, and it hard-codes that domain into your links permanently. If, at a later time, you want to change your domain or share your links between multiple domains using the Multisites module, you must update every link to get them to work. Using the simplified, shorter link is easier in the long run. Place the file link into a category using the drop-down menu. Using the examples outlined previously, you should now see six choices in the drop-down menu (see Figure 6.8). Subcategories are listed under their parent group alphabetically. Choose Shakespeare/Tragedies from the list. Figure 6.8. Picking a category for your link. The Description field is also required, so type in a short comment about the file. The remaining six fields are not required to complete the link, but they do add additional description for your file. The Filesize and Version text boxes appear with the link and are blank if no information is entered. To keep your site looking polished, you should, at a minimum, complete these two additional fields. Add additional links to the module structure using the files provided or by adding more files of your own. After you are done, click the Downloads link in your site's Main Menu to go to the module's user interface. The page should look similar to Figure 6.9. Figure 6.9. User's view of your downloads. Tip The Hits text box is automatically incremented as your files are browsed, but if you have to move links or rebuild your site, the count might be lost. You can manually populate a link's hits using this form. Enter in your link's old hit total to create continuity between site changes. The New! image is automatically placed by sections with recently added links. The number in the parentheses is the current total count of links within the category. Subcategories are not visible until a user clicks into one of the main sections. Within a main category, links are listed with their short information and any subcategories are available at the top of the page. For the sake of example, the Hamlet document was added twice, once under the Tragedies subcategory and once under the main Shakespeare category (see Figure 6.10). This illustrates how files are displayed using this system. Figure 6.10. Files and subcategories in Downloads. Users can submit links to your site using the Add Download link beneath the top search form. Their suggestions are queued just like news article submissions, and you can approve them individually through the Administration page. The only limitation to this system is that files cannot be physically uploaded to your server using the module, so users must suggest links to files hosted remotely on other web servers. UpDownloadUpDownload is designed to solve the file upload problem with the Downloads module. It provides users with the ability to transfer a file to your server using a web form. Version 1.82 is included with this book's materials, and the module's current home is found at http://www-users.rwth-aachen.de/jens.goebbert/, where a new version might be available. Copy the module files into your PostNuke's modules directory. This module needs to be activated after initialization to make it available for use. Next go into the Administration page for the UpDownload notice; it appears identical to the regular Downloads, even having the title of "Downloads" on the page. Tip Look at the UpDownload module files in the folder path UpDownload/docs/extra_features/. You can unlock additional features using those files; you can add UpDownload files to the site search and add blocks that show recently added or popular files. The UpDownload module is not an add-on to Downloads; it's an alternative module that can completely replace the core Downloads. To see exactly how UpDownload is different, duplicate your category structure used with the Downloads module. Compare Figures 6.11 and 6.8. The UpDownload form in Figure 6.11 has boxed out its key difference. Files can be linked using the same system possible with Downloads, or the new Browse feature allows files to be uploaded directly to the server. Figure 6.11. Adding an UpDownload. UpDownload files are kept in the store_folder in the module's directory. Browsing the folder also shows how files are placed in a directory tree mirroring your category structure. When users submit new downloads, they queue up just like the link versions. When you have approved them, they finally go live and are visible to everyone. For security reasons, a few file types are restricted from being sent to your server using the UpDownload module. Those types are
These formats are also listed for users in the user upload screen (see Figure 6.12), and an automatic limit for uploads is set at 2MB. Figure 6.12. Now, users can upload files directly. |
|
EAN: 2147483647
Pages: 207
