AutoTheme
|
| Many PostNuke users also use the AutoTheme (or AT) system (spidean.mckenzies.net) to theme their websites. AutoTheme is a third-party template system that is installed as an alternative to Xanthia and legacy PostNuke themes. It does not outright replace core theme functionality; it adds support for AT themes, which are then available for use alongside any other installed themes. AutoTheme is available in two versions. AT-Lite is a free download released under the General Public License (GPL). AT-Lite provides a solid foundation for theme development and contains most of the functionality of its commercial cousin. The full version of AutoTheme is a commercial module you must purchase to use. It provides the complete AT-Lite feature set with the addition of these extras:
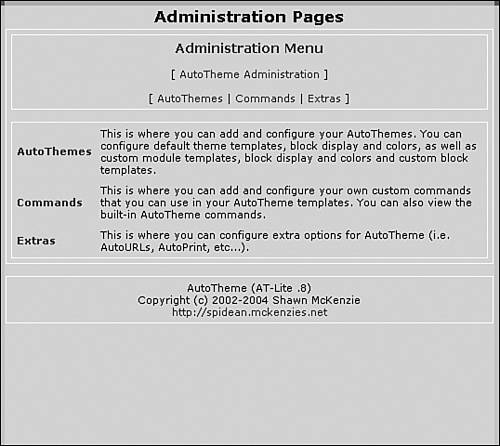
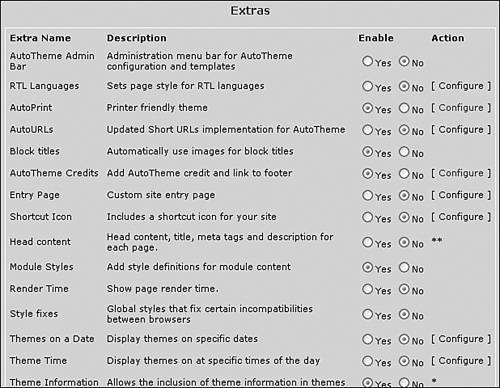
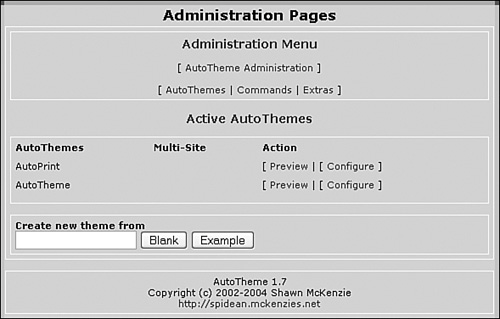
AT-LiteThe free version of AutoTheme is, nonetheless, packed with features. The download for ATLite .8 is available with the download materials, or you can browse to the official site mentioned previously for the current release. The AT-Lite installs quite easily. The files in the archive come arranged in folders respective to your PostNuke site's root. You can move the files over separately, or simply decompress the archive from the root folder. After you have all the files in place, initialize and activate the module from your Module Administration table. Note AutoTheme comes with a theme called AutoPrint. This additional theme is actually a customizable print interface for your pages that can be used to provide printer-friendly versions of your content. Now browse to your site's Website Configuration page using the Settings link on the Administration Menu page. To use the AutoTheme administration system, you need to use a non-Xanthia theme. The ExtraLite default theme works fine, but you might find it easier to select the AutoTheme theme that comes with the module. The screenshot examples for this chapter use the AutoTheme theme. Now return to your Administration screen and select the AutoTheme link. You are taken to the main page shown in Figure 15.6. There are three main components to the management of AutoThemes: Themes, Commands, and Extras. Figure 15.6. Administrating your AutoThemes. AutoTheme ExtrasFirst look at the Extras screen. Extras are additional add-on features you can toggle on and off for your theme. The management screen is shown in Figure 15.7. AutoPrint, Block Titles, AutoTheme Credits, Module Styles, and Theme Information are all enabled by default. ATLite provides very clear documentation on how each Extra works, but especially notable features include the following:
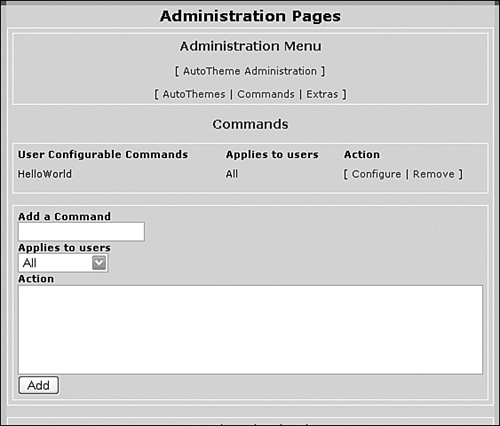
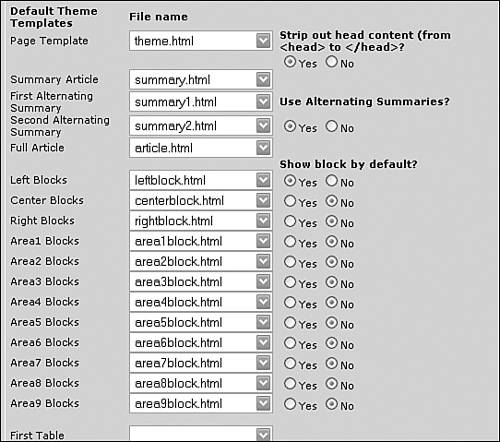
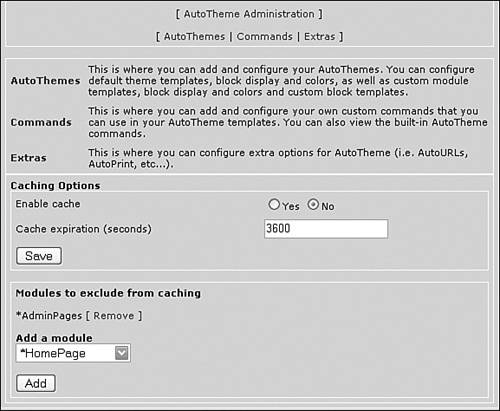
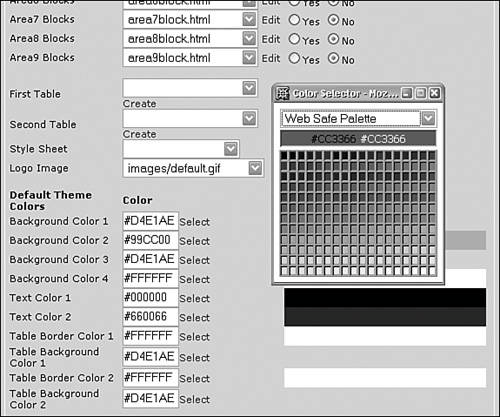
Figure 15.7. Selecting additional Extras plug-ins to enhance your AutoTheme. Select different Extras and test their effects. The Head Content and Theme Information Extras are both configured under the AutoThemes section covered later. AutoTheme CommandsAutoTheme makes configuration of additional Commands very easy. This feature is identical to the way Xanthia themes pass scripts and Extensible Hypertext Markup Language (XHTML) to template pages. You take a bit of code you want to reuse, such as a JavaScript drop-down menu or an email address link, and assign it to a variable name such as "myMenu." From within your XHTML template code, you make a call to the variable name within a comment block as follows: <!-- [myMenu] --> AutoTheme knows to check all comments and will recognize the call as a Command. When the page is rendered, the script code is inserted at the named reference. The main difference between how Xanthia handles the variables and AutoTheme's version of the Commands is that AutoTheme provides a user-friendly interface to manage the scripts (see Figure 15.8). You can edit the script source manually too; Commands are saved in the autotheme.cfg file in the AutoTheme module folder. But most users should find the clean administration interface refreshing. Figure 15.8. Managing your script Commands with ease. Note Global Commands are stored in the AutoTheme module's configuration file, and do not transfer with your theme should you try to move it to another server or want to release it to the public. If you want to include Commands with your theme, add them using the theme-specific Commands editor. Manage AutoThemesNow click on the AutoThemes link on the left of the navigation bar to manage the installed themes. By default with AT-Lite, you only see the AutoTheme and AutoPrint themes. Upon entering the management area for a specific theme, you are presented with five main options. The General link allows you to configure the default settings to be used for all pages and blocks that do not otherwise have specific settings. Figure 15.9 shows how you can set specific themes using the easy select menus. From this area, you can also select a block by title from those you have created and define a specific custom theme as well as enter the color codes you want for the theme by hex code. Figure 15.9. Setting custom theme templates for each block. Custom Modules is a section identical to the General area, but it lets you define the options with relation to specific modules. Every module can be configured uniquely, much like the Xanthia system, but in addition, AutoTheme has the Module Options field that makes this ability exponentially more powerful. To see how it works, look at these sample PostNuke News article URLs: /modules.php?op=modload&name=News&file=article&sid=2 /modules.php?op=modload&name=News&file=index&catid=&topic=15 PostNuke commonly has a number of options tacked onto the URL to identify the different specific pages in the CMS. In these examples, you can see the options, such as sid=2 and topic=15, describe the content at that URL. When theming modules, you can add option references like those to the Module Options field to define the theme templates for specific pages. The more options you chain together, the more specific the page you are defining becomes. For example, using topic=15 applies the look to all content connected to that topic, whereas the more specific file=article&sid=2 applies the templates to just the one page. Because you can turn blocks on and off using the theme configuration, and because AutoTheme lets you define unlimited additional AutoBlock objects, you can use this feature to define specific pages with their own custom look that display their unique collection of blocks not found on any other page. You can create the additional AutoBlocks using the next management link. In Figure 15.10, you can see how the new myAutoBlock and myAutoBlock2 objects have been added to the system. After being defined here, templates can be assigned to the AutoBlock areas in either the General or Custom Modules pages. Figure 15.10. Adding unlimited additional AutoBlock objects. The Commands link works identically to the global Commands interface shown previously. Scripts entered using this form are applied to the configuration file for the specific theme. They are available to your theme if you want to transfer its files to a different server, but the Commands are not available to other AutoTheme themes. Theme Information includes a series of fields you can use to add title, version, description, and credit information to your theme. The information can be set to be written dynamically into the code of your pages as an XHTML comment. Edit TemplatesNow that you are familiar with the management interface of the AutoTheme system, browse the files included with the default AutoTheme sample theme. The XHTML files in the theme root include the following examples: admin.html area1block.html area2block.html area3block.html area4block.html article.html centerblock.html leftblock.html ... . Each file is the template used to theme a given area you have defined with AutoTheme. If you make additional AutoBlocks past the default nine, you need to make more files here, such as area10block.html. If you elect to use a style sheet file, enter the cascading style sheets (CSS) code into the styles directory and choose it from within the theme administration form. In addition, all images you reference in your templates need to go in the images directory. AT-Lite is an impressive theme system that provides unprecedented control of your PostNuke site interface. But AT-Lite is just the free release; the following section looks at the additional features available in the full commercial version. AutoTheme FullAs mentioned previously, the full commercial version of AutoTheme includes additional features beyond those in AT-Lite. These examples were produced using the 1.7 release of AutoTheme, available from the Spidean main site at spidean.mckenzies.net. The first additional feature is quite obvious when you initially load the Administration screen in the 1.7 release. In Figure 15.11, you can see the configuration fields for AutoTheme Caching. In the first box, you can toggle caching activity as well as set the number of seconds before a page is expired and loaded anew. Figure 15.11. Caching your pages to boost your site speed. The second box allows you to define specific modules you want to exclude from the caching system. This is especially useful for admin screens, user data, forums, and perhaps your home page news if it frequently changes. The exclusion is by module, so all pages associated with the module are cached or not. Caching can speed up the load time of your site by as much as 10 times the noncached standard, so you'll want to enable this for the majority of your pages. Figure 15.12 shows the additional Preview links found in the Theme Administration area. You can click the links to open up a new window with the selected theme applied over your site. This feature, like the caching, provides generally the same benefits found in Xanthia. Figure 15.12. Previewing your theme changes. Editing templates and your primary palette is made much easier in 1.7 with the integrated online editors. Next to every template selection box is a new link appropriately labeled Edit that opens the selected XHTML file in a separate window with a browser WYSIWYG (What You See Is What You Get) editor. This is very nice for environments in which changes need to be made by nonprogrammers with no knowledge of XHTML. The color-editing system with the full AutoTheme also gains another Xanthia-like feature in the pop-up color selector (see Figure 15.13). This selector is superior to the Xanthia palette editor in that it lets you select between Web-Safe, System, and Grey Scale options, responds to selections much more swiftly, and still allows you to enter in hex codes directly for exacting color control. The only way to change your colors as quickly in Xanthia is to edit the initialization file and reload your theme. Figure 15.13. Clicking through your changes with the online pop-up editors. Besides the dedicated support and access to new releases, the full version of AutoTheme includes more Extras you can only add to the commercial release. New Extras available for 1.7 include the following:
This latest commercial release is still very new as of this writing, and you can expect to see many more Extras as they are completed. |

|
EAN: 2147483647
Pages: 207