Changing Knoppix Without Remastering
Remastering — the rebuilding of a Live CD — is a complicated and time-consuming process, as you'll see in Chapter 10. Although plenty of fun, it is overkill for minor modifications because there are ways to save your Knoppix changes on floppy disk, USB flash drive, or one of your hard disk partitions. You can run the saveconfig script, which uses knoppix.sh to unpack an archive of modified configuration files on one of those writable media, for instance, or you can run the knoppix-mkimage script, which is much like the older mkpersistent home script that saves the files in your home directory, using a writable image or a whole partition. Let's take a closer look at those two methods.
Using the saveconfig Script
The saveconfig script, written by Klaus Knopper, is a graphical tool for saving the configuration of your Knoppix Live CD on a floppy, USB flash drive, or hard disk partition. You can either run it as root from the Live CD via a terminal or you can start it from the KDE menu: select Knoppix → Configure → Save Knoppix configuration.
When you start saveconfig (see Figure 9-3), you can choose to save the following:
-
Personal configuration (all your dot files in the /home/knoppix directory that have been changed)
-
Desktop files (everything that has changed in /home/knoppix/Desktop)
-
Network configuration files, including dial-up and ISDN files
-
X Window system configuration, defining your screen resolution and video card driver
-
Any other files from /etc that have been changed
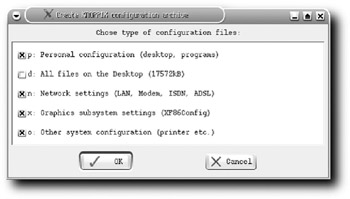
Figure 9-3: The saveconfig script shows the selection of save options.
Choose what you want to save and then specify where you want to store your files (see Figure 9-4). The script saves the selected files, wraps them together, and saves the resulting archive on the selected media.
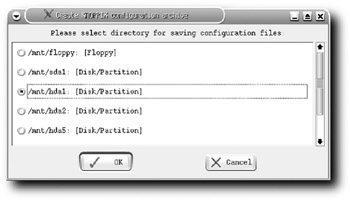
Figure 9-4: Specify where your files should be stored.
For Knoppix to find your saved files, you need to use a cheatcode at boot time. Use knoppix myconfig=scan to have Knoppix search all your inserted media for the saved configuration files, or use knoppix myconfig=/dev/hda1, where hda1 is the device on which you saved your files. The second command skips searching all your devices, which speeds up the time required to boot Knoppix. After you've booted Knoppix, you can use saveconfig again to overwrite your changes on the same writable media.
saveconfig seems like quite a bit of magic. How does it work? It creates two files — knoppix.sh and configs.tbz. These files are saved on the media specified. Knoppix searches for the knoppix.sh shell script at startup and runs it when it's found. That script extracts configs.tbz, which is a bzip2-compressed tarball containing the modified files. If you know a bit of shell scripting, it's easy to modify and extend the knoppix.sh script to do more complicated or location-specific tasks.
The configs.tbz file contains the files from the home directory (/home/knoppix) and certain files from /etc that were writable. Its contents are extracted by knoppix.sh onto the writable portions of the Knoppix Live CD, which has certain directories loaded on a RAM disk. You can modify this yourself if you want to add more files in different locations; just remember that the whole tarball is extracted into RAM. This works fine for smaller files, but you don't want to save your entire home directory in this tarball because you can quickly run out of RAM, leaving your Knoppix Live CD unbootable when using the myconfig cheatcode.
Using the knoppix-mkimage Script
The knoppix-mkimage script is similar to saveconfig, but it is more useful for saving larger files in your home directory when booted from the Knoppix Live CD.
knoppix-mkimage is opened from the KDE menu: Select Knoppix → Configure → Create a Persistent Knoppix Home Directory. The script starts, showing an introduction screen (see Figure 9-5) with all the details.
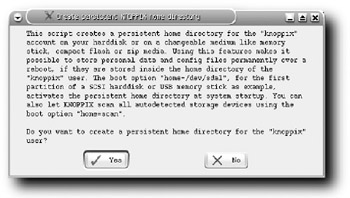
Figure 9-5: The introduction screen
Choose the writable media on which you want to store your files (see Figure 9-6).
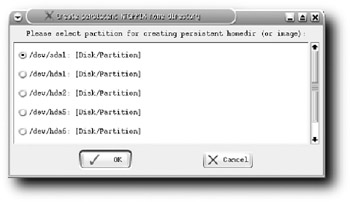
Figure 9-6: Specify where your files should be stored.
Then decide whether you want to use the entire filesystem (see Figure 9-7). Select yes only if you want to remove all existing files on the partition! Even if you have an existing Linux partition set up on the selected media, using the entire partition removes all your files.
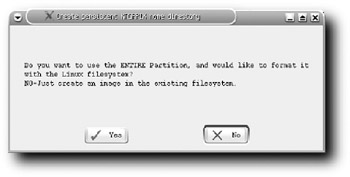
Figure 9-7: Warning! Don't click Yes right away!
Click No and you get the option to create a file on the writable media that contains all the files in your home directory, and you can specify how large the persistent home directory should be (see Figure 9-8).
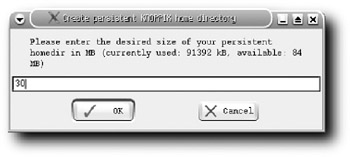
Figure 9-8: Make sure you have enough free space before continuing!
knoppix-mkimage then either makes the home directory file or formats the selected partition and then copies over all the files in /home/knoppix. You can choose to encrypt your home directory file, which is useful if you run the risk of losing your media or if you are paranoid.
To use your new persistent home directory, you again need a cheatcode at boot time: knoppix home=scan has Knoppix search for your persistent home directory at boot time; knoppix home=/dev/hda1 tells Knoppix to use the persistent home directory on the hda1 partition. If you are using the whole partition, Knoppix detects this and mounts the partition as the knoppix user's home directory; otherwise, it finds the persistent home directory file and makes that the knoppix user's home directory.
knoppix-mkimage enables you to save applications that have been downloaded and installed as described earlier. If you save your home directory, those programs are available upon reboot — you won't have to redownload the applications every time.
EAN: 2147483647
Pages: 118