Section 8.6. File Transfer Protocol Services
8.6. File Transfer Protocol ServicesThe File Transfer Protocol (FTP) service is one of the most venerable Internet services in existence. Its presence on the Internet predates HTTP, and it's still one of the best options users have to transfer large files across a WAN. Indeed, some sites have begun offering HTTP-based downloads because of corporations that block both outgoing and incoming FTP ports, but FTP remains the more efficient transport mechanism of the two. However, FTP has some inherent security issues, the most prominent of which is its nature to transmit password information in clear text through the Interneta huge security hole and a grab bag for packet sniffers. Beware of that, and use FTP when and where that problem is not severe or applicable enough for you to worry about. IIS 6 comes complete with an FTP service and includes some new security features that harden FTP against unwanted access from the Internet. IIS 6 includes FTP user isolation mode, which restricts an FTP client's ability to move around in directory structures outside of his home directory. You need to set up an FTP site to either use isolation mode or disregard it, and in this section, we'll tackle both and discuss where it might be appropriate to use one or the other. 8.6.1. Creating FTP SitesLet's create a new FTP site. Unfortunately, FTP does not support host header names, so if you need to distinguish between multiple FTP sites on one machine, you'll need to segregate content using either virtual directories (which are supported), multiple unique IP addresses, or unique TCP/IP ports. To create a new site, follow these steps:
Your site is now created. 8.6.2. Master FTP Site PropertiesNow that we have created a site, let's look at the default properties that can affect all sites on a machine. To access the master properties of all FTP sites, right-click the FTP sites node in the left pane on IIS Manager, and select Properties. You'll be greeted with the screen shown in Figure 8-23. Some settings apply only to individual sites and not to all sites on a certain machine, and those options are grayed out. For the most part, all master settings work identically to those settings for individual sites, except that their scope is broader. In fact, configuring a setting inside the master properties means that all sites on the machine will inherit that setting except those that already have a value explicitly definedin other words, no existing configurations will be overwritten. The exception to this is the Service tab, on which you can throttle the bandwidth that all FTP sites use in total. This can be an effective way of restricting an FTP site from overtaking the total throughput of a leased line. You set the throttle based on KB per second. You can't set throttles on individual FTP sites; the option is available per machine only. Figure 8-23. IIS FTP master properties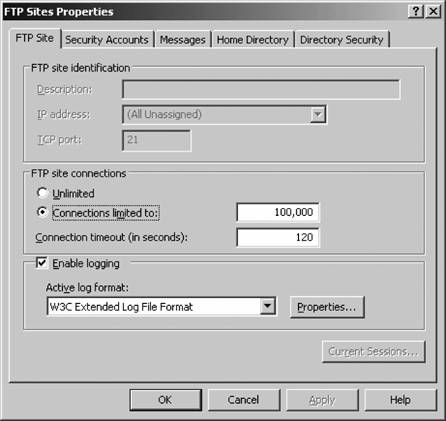 8.6.3. Individual FTP Site PropertiesTo open the properties sheets for an individual web site, select the site with IIS Manager under the FTP Sites node in the left pane. Right-click the site listing and select Properties. You'll see something similar to Figure 8-24 on your screen. In this section, much like the discussion on web site properties, I'll step through each tab and show you the meaning of each setting. 8.6.3.1. FTP SiteFigure 8-25 shows the FTP Site tab . On the FTP Site tab, you can specify the identification information for your site, including the friendly description, its assigned IP address if in use, and the port number on which the site operates. In addition, you can choose to limit connections to a certain number and forcibly end connections that don't generate activity for a certain number of seconds. Here, you also can enable logging, and choose the log format that best suits your needs. (I discussed these formats in the web site properties section earlier in this chapter.) Figure 8-24. Individual FTP site properties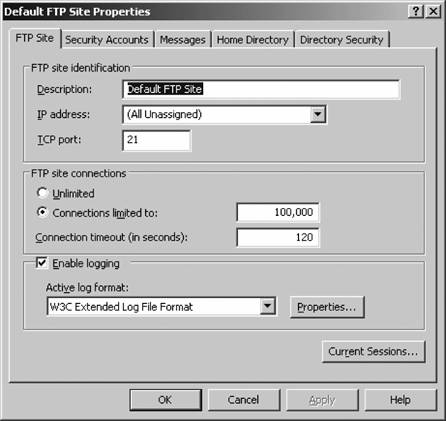 The Current Sessions button enables you to view who is currently connected to your FTP site, their login context if any, their source IP address, and how long their connection has been active. You also can click an active connection and disconnect it manually using the Disconnect button, or use Disconnect All to completely clear connections to your site. 8.6.3.2. Security AccountsFigure 8-26 shows the Security Accounts tab . On the Security Accounts tab, you can enable or disable anonymous access to your site and define what user account anonymous users will use when accessing your FTP site. Much like with the web server, anonymous users are actually logged on to your machine in the context of a specific user on the local computer or in Active Directory. This makes it easier to lock down filesystem content from external users and provides another layer of securitythe NTFS permission systemon top of the basic IIS permissions available. Figure 8-25. The FTP Site tab Figure 8-26. The Security Accounts tab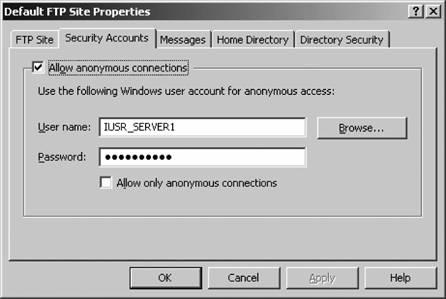
The Allow only anonymous connections checkbox restricts normal users from logging on with an otherwise valid local or Active Directory accountperfect for a simple FTP site with small programs and documents. By doing so, you can completely disconnect the FTP site from Active Directory or your SAM database on the IIS machine itself, which adds an extra layer of security. 8.6.3.3. MessagesFigure 8-27 shows the Messages tab . Figure 8-27. The Messages tab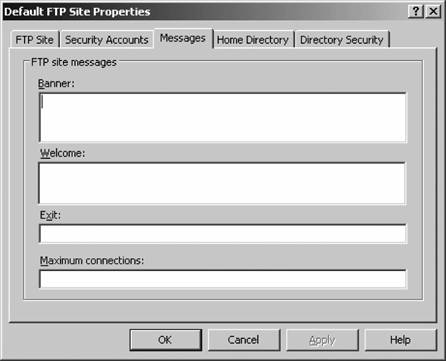 The Messages tab enables you to define blocks of informational text that can be sent to a user's FTP client. Most browser-based FTP sites display the banner message, which is shown when users initially connect before logging in, and the welcome message, which follows a successful authentication. However, most people don't bother to display an exit message when the user disconnects properly. You also can specify a custom message to be displayed when the maximum connection limit has been reached. 8.6.3.4. Home DirectoryFigure 8-28 shows the Home Directory tab . Figure 8-28. The Home Directory tab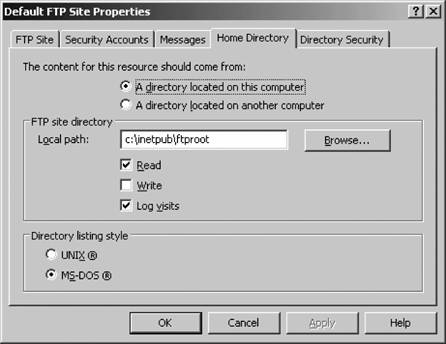 On the Home Directory tab, you can configure the physical location where FTP content is stored. You can specify via the two radio-button options under "The content for this resource should come from:" that the home directory is located in a folder on the current computer or a file share somewhere over a network. You can type the local directory name or the network file share name in the Local Path or Network Directory box just beneath the radio buttons. If you're connecting via a network, you can click the Connect As button to enter credentials. You can grant or deny the following permissions for the current FTP site:
You also can configure the style of the directory listing returned to a browser. Choose Unix to display a four-digit year when the date of the file differs from the year of the FTP server. Click MS-DOS to display a two-digit year in any case. 8.6.3.5. Directory SecurityFigure 8-29 shows the Directory Security tab . Figure 8-29. The Directory Security tab On the Directory Security tab, you can grant or deny access to a site based on the client's IP address. This is useful if you have an abusive or compromised group of external hosts that continually attack your network, or if you want to restrict users of a site to internal hosts only. First you select whether all users will be granted or denied access to the site by using the radio buttons at the top of the window. Then, you can configure individual exceptions to this rule in the white list box. Click Add to include an address in the exceptions list. You'll be prompted with a dialog box asking whether you want to exclude a single computer or a group of computers (an IP subnet). Select the appropriate response, and then type in the actual IP address or network number and subnet. You can click the DNS Lookup button to perform a reverse lookup on a certain domain name to obtain its appropriate IP range.
When you're finished, click OK, and you'll be returned to the restrictions box. Now, keep in mind that if you've configured default access for everyone to your site, the excluded addresses will be denied access. Conversely, if you've denied access by default to all IP addresses, the excluded addresses will be allowed access. This might seem obvious, but during a quick change it's easy to become a little confused at the quasi-backward logic. Click OK once you're finished. 8.6.4. Virtual FTP DirectoriesVirtual directories are great ways to make an FTP site's structure easy to navigate for your users, even if the actual content stored on physical disks is located in several different locations on several different computers. It also provides a layer of security through obscurity because the virtual directory need not correspond directly to a physical directory on a hard disk. To create a virtual directory, follow these steps:
You can adjust the properties of a virtual directory much like an FTP site itself: right-click the virtual directory inside IIS Manager and select Properties. You'll be presented with dialogs functionally equivalent to the ones I covered earlier in this chapter pertaining to web sites. One other issue with virtual directories deserves some commentary: any virtual directories you create will not show up inside a command-line FTP session, whether through a directory listing initiated by the user or any kind of transfer activity. They'll be displayed only when a graphical FTP client requests a directory listing because it interfaces directly with IIS: the dir or ls commands inside an FTP client interact directly with the physical filesystem, which virtual directories are not a part of (hence the term "virtual"). To use a virtual directory, the user needs to navigate directly to it. This is a bit of security through obscuritycertainly not impermeable, but still of value. 8.6.5. FTP User IsolationUser isolation is a new feature of IIS 6 in which users are sent directly to a home directory upon logging in that appears to them to be the root of the entire FTP server. In this scenario, users have no idea of any directory structures that exist outside of their own home directory. This is great for FTP sites used by multiple people, particularly those with privacy concerns over the data they would be uploading. To set this up, you must take a few preliminary steps. First, determine where you want the location of the user home directories. This must be a directory named LocalUser (which can be hosted on a local or remote file server), the subdirectories of which will belong to each individual user. Do note that the previous name is not a variable for the userit is actually the directory name you need to create. The specific name tells IIS where to look for subdirectories for the users, so it's important the name not change. Next, create the directories under LocalUser. The names must correspond to user accounts either in the local SAM database or inside Active Directory.
Continue by running the FTP Site Creation Wizard. This time when it prompts you for the user isolation configuration, choose Isolate Users. Then specify the path that you created earlier, grant the necessary read and write permissions (remember, this affects only the user's home directory and not any other directories), and finish the wizard. If as with most networks you want a public area where anonymous users can get access, create a folder called Public under LocalUsers. Now, if you decide to allow anonymous access to a site, you can have authenticated users sent directly to their home directories and anonymous users sent to a single readable and (possibly) writeable directory. (This anonymous user uses the same account as anonymous web users: IUSR_COMPUTERNAME.) 8.6.5.1. Integrating Active Directory into user isolationTo extend the isolation functionality further, you can integrate the properties of a user account within Active Directory so that all user FTP directories don't need to reside in the same volume. IIS then reads a user's information from within Active Directory upon connecting to the server and, assuming he or she successfully authenticates, places him directly in their home directory as configured in his profile. You'll need to make sure the user's home directory is explicitly defined with his or her Active Directory profile; redirection of a home directory only through Group Policies isn't sufficient. IIS looks for two attributes--FTPRoot and FTPDir--within the profile to enable this feature, so the value must be present with the Active Directory account itself. The best way to do this is to use a script included with IIS and located by default in %SytemRoot%\System32 called iisftp.vbs. You can call it directly from the command line, and the syntax to set these properties is as follows: iisftp /SetADProp nameofuser FTPRoot pathtodirectory iisftp /SetADProp nameofuser FTPDir pathtodirectory For example, to enable the home directory value for user ljohnson, you might use the following set of commands: iisftp /SetADProp ljohnson FTPRoot \\mercury\users\ljohnson iisftp /SetADProp ljohnson FTPDir \\mercury\users\ljohnson Once these are set, you can run the FTP Site Creation Wizard one last time, and when prompted with the user isolation configuration, you can select Isolate Users using Active Directory. You'll then need to specify an account with credentials to read from the directory and the default domain to be used when users authenticate. (Keep in mind that users from different domains still can use their own domain by using the DOMAIN\username syntax.) Then, grant the appropriate access rights and finish out the wizard. Your user isolation mode is now integrated with Active Directory.
One caveat when using Active Directory user isolation mode is this: once you've configured a site in that mode, you can't adjust any settings on the Security Accounts or Home Directory tabs of the site properties. The Site Creation Wizard will never prompt you to permit or deny anonymous access, so you'll never have a chance to explicitly set that option. So, what happens if anonymous access is actually turned on even though you never set it that way? Two events can occur: for one, if the IUSR_COMPUTERNAME account that is used for anonymous access does not have data for the FTPRoot and FTPDir attributes, anonymous access simply won't workthe user will be denied. If, however, the account contains that data, the user will be directed there, just as expected. |

EAN: 2147483647
Pages: 171