Creating a Transformation
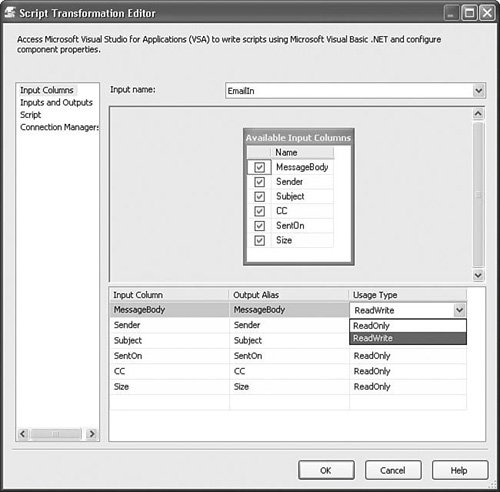
| SSIS doesn't provide a lot of functionality in the box for dealing with BLOBs in the data flow. Yet, I've got some emails that are huge because they're either forum threads or loaded with Hypertext Markup Language (HTML) or from newsgroup posts. What I'd like to do is shorten the email body so that I only get the first few lines, which should be enough to capture the essence of the body. It would be nice to be able to change the length of the body retained based on a value in a variable. It would also be nice to replace any empty column values with a string value from a variable so, for example, instead of being completely empty, the CC field might contain the string "<Empty>. This is much easier to deal with than a NULL. Having the replacement value in a variable makes it easy to change later as well. Note You can also replace NULL values using a Derived Column transform, but then that wouldn't be as much fun. Creating the ComponentCreating the transform is similar to creating the destination adapter. You have to select the input columns, and so on, but you also need to create outputs like the source. Finally, there are two distinct types of transforms as discussed previouslysynchronous and asynchronous. First, you'll create a synchronous transform and then you'll learn how to create an asynchronous transform. Setting Up the Input ColumnsStart by creating the input columns:
Setting the Synchronous Input IDYou need to tell the Script Component that it is a synchronous transform. The way you do this is by explicitly linking the output with the input. As mentioned earlier, all objects in the data flow have IDs, including inputs. So, the way you link the output with the input is to specify in the SynchronousInputID property of the output the ID of the associated input. The following steps show you how to do this:
Figure 21.5. Setting up the SynchronousInputID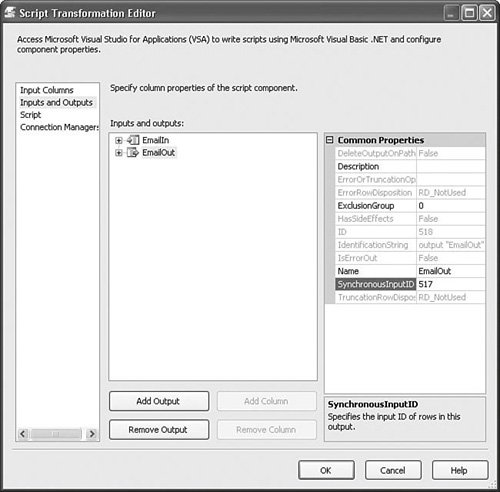 Setting Up the VariablesBefore adding the script, you need to create a couple of variables the Script transform will use as parameters. The first variable is the maximum body length. It's an integer. The second is the default string value you'll use to replace the empty string, which is a string type. Tip In the sample, these variables are created at data flow scope because they really have no use elsewhere in the package. Also, if the data flow ever needs to be copied and pasted to another package, the variables will go with the data flow, leaving it valid without the need for creating variables again. It's always a good idea to create variables at the most local scope possible. This helps avoid variable confusion and makes it easier to manage and update packages. To make the variables accessible within the script, you need to add them to one of the reserve lists. Because you don't need to change their values, you can place their names in the ReadOnlyVariables property. Tip If you do need to change their values, you should keep two things in mind. You must add the variable name to the ReadWriteVariables property and you can only change the value in the PostExecute method. Even better, you can use the VariableDispenser object to lock the variables directly in the code. This approach is more work, but has the virtue of only locking the variable for as long as it is absolutely needed. Figure 21.6 shows the Script Transformation Editor with the ReadOnlyVariables correctly set. Figure 21.6. Adding the variables to the read list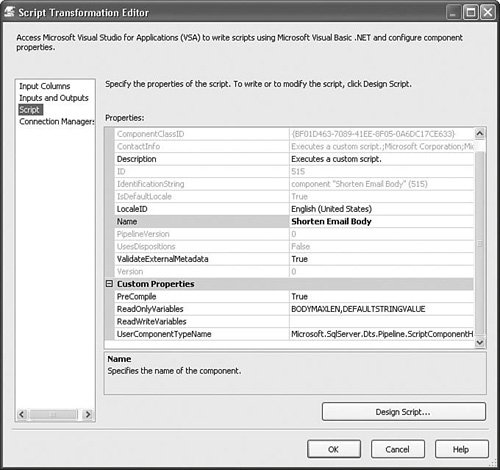 Adding the ScriptNext, you need to set up the script. Because this is a synchronous transform, you only need to modify the rows that are passed to the ProcessInputRow method. You don't need to add new rows. Essentially, the Script Component passes each row in succession, allowing the script to modify it in place. Because the Script Component already creates the template ProcessInputRow function for you, you need only add the processing code. The section of code that reads the message body and truncates it is as follows: If Row.MessageBody.Length > Me.Variables.BODYMAXLEN Then Dim dBytes As Byte() = Row.MessageBody.GetBlobData(0, Me.Variables.BODYMAXLEN) Row.MessageBody.AddBlobData(dBytes) End If The code tests if the length of the message body is greater than the maximum body length. If it is, it retrieves the message body BLOB, but only the maximum body length bytes. Then, it overwrites the message body BLOB with the shorter value. The following code, repeated for each string column, checks if the given column is empty. If it is, it replaces it with the string in the DEFAULTSTRINGVALUE variable. If Row.Sender Is Nothing Then Row.Sender = Me.Variables.DEFAULTSTRINGVALUE End If |
EAN: 2147483647
Pages: 200