Creating a Destination Adapter
| Destination adapters provide the opposite function than source adapters do, of course. They take data from buffers and write it to their output medium. One valid complaint folks have had about the SQL Server Integration Services (SSIS) component offering is that there is no ADO.NET destination adapter. It's been a real problem for some who have attempted to load into ODBC or ADO.NET adapters for systems that don't support OLE DB. Fortunately, you can use the Script Component to work around the issue by writing a destination adapter. In this section, you create a destination adapter that will take the email inputs from the source just discussed and send them to a table using an ADO.NET Connection Manager. Get started by dropping a Script Component onto the designer and selecting Destination. Drag a path from the source you just created to the new destination adapter and open the editor. The first thing you'll likely notice is an additional node in the left pane called Input Columns. This is where you tell the component which columns you want to be available in the buffer. If you don't select one of the columns, the Script Component will not create accessors for you. Also, select the Usage Type in the lower-right column. In Figure 21.2, ReadOnly is selected for all the columns because this is a destination and there will be no downstream components that will be impacted by these settings. Figure 21.2 shows the Script Transformation Editor with the input columns selected. Figure 21.2. Selecting the input columns Next, click the Inputs and Outputs node in the left pane of the Script Transformation Editor. Here, there are no outputs because destinations are the inverse of sources; they read the data in the buffers on the input and output the data to their respective media. There are no outputs because there are no downstream components to consume them. Note Strangely enough, you can create a new output on a destination, but then it ceases to be a destination and becomes a transformation. Figure 21.3 shows the Script Transformation Editor with the selected input columns showing. Figure 21.3. Viewing the selected input columns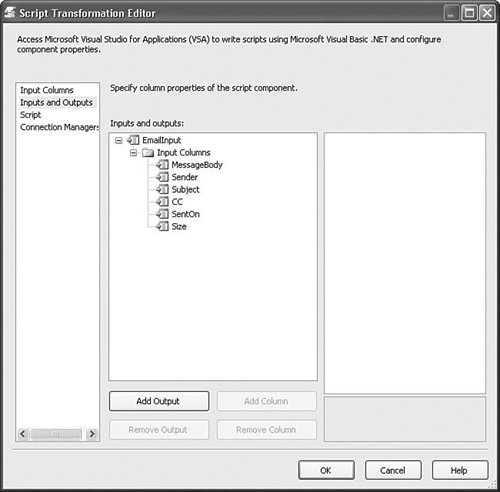 Creating the ComponentSelect the Script node in the left pane of the Script Transformation Editor to see the properties. This is where you add references to variables if you want to use them in the script. You can also set the PreCompile property and LocaleID, if the defaults don't suit your needs. Note As a rule, you should turn the PreCompile setting on. It eliminates the compile step that happens at the beginning of package execution and must be set for packages that will run on 64-bit machines. The one drawback is that it can make a package's disk size substantially larger. Using Connection ManagersIf you're creating this package as you read, you'll need to click the Connection Managers node in the left pane and add a new connection manager. In the sample package, an Execute SQL Task creates a table called Email in the TempDB database and executes before the Data Flow Task. The script to create the table is as follows: USE [TEMPDB] GO IF OBJECT_ID('dbo.Email') IS NOT NULL DROP TABLE dbo.Email GO CREATE TABLE [dbo].[Email] ( [MessageBody] [ntext] NULL, [Sender] [nvarchar](250) NULL, [Subject] [nvarchar](250) NULL, [CC] [nvarchar](250) NULL, [SentOn] [datetime] NULL, [Size] [int] NULL ) Note The table name is hard-coded in the script. That's not a good practice because it means that the package must be changed every time you need to modify the table location, and so forth. Ideally, you should create a property expression on the SQL Task that builds the query with the value of the database passed in from a configurable variable. The sample has the table name hard-coded to simplify the code. The destination adapter requires an ADO.NET Connection Manager that references the table. You'll need to do the same. Click the Design Script button to open the development environment. The component needs to use an ADO.NET Connection Manager. It's important that you call the AcquireConnections method on connection managers at the appropriate time. The Data Flow Task has a certain order it follows when validating and executing. To ensure that you're playing nicely in the Data Flow Task sandbox, you should override the AcquireConnections method in the Script Component any time you need to use a connection manager and call the connection manager's AcquireConnections method there. The ADO.NET Connection Manager is named ADONETConnection, so the code looks like this: Public Overrides Sub AcquireConnections(ByVal Transaction As Object) connMgr = Me.Connections.ADONETConnection sqlConn = CType(connMgr.AcquireConnection(Nothing), SqlConnection) End Sub Note Notice that the way you access the Connections collection is different than in the Script Task. The Script Component does not have a DTS object, so to access the collections, you simply self-reference. For example, to access the Log method, use Me.Log ; for the Connections collection, use Me.Connections ; and for variables, use Me.Variables. You can also access the component's metadata using the ComponentMetadata object. This is useful for things such as firing events, Me.ComponentMetadata.Fire<Event>(), or getting the description of errors, Me.ComponentMetaData.GetErrorDescription(). Adding the ScriptNext, you need to add the script for processing the incoming rows. Because destinations actually have inputs, you implement the ProcessInputRow method instead of the CreateNewOutputRows method like you do in source adapters. The code is essentially the opposite of what you have in the source. Because you're trying to output data to an ADO.NET provider, you need to create a reference to it. Because the ADO.NET provider you'll use is housed in an assembly that's already in the References collection, that is, System.Data, all you need to do is create an Imports entry, as follows: Imports System.Data.SqlClient Next, you need to create an INSERT command and add parameters as follows: sqlCmd = New SqlCommand("INSERT INTO dbo.Email(MessageBody, Sender," & _ " Subject, CC, SentOn, Size) VALUES(@MessageBody, @Sender, @Subject," & _ " @CC, @SentOn, @Size)", sqlConn)" sqlParam = New SqlParameter("@MessageBody", SqlDbType.NText) sqlCmd.Parameters.Add(sqlParam) For each column, you add a parameter. Note In the sample package, the INSERT command and parameters are created in the PreExecute method, but it can be done in the ProcessInputRow method as well. The ProcessInputRow method passes each row in for you to process, so it's easy to get the column value from the row and set the parameter value, as follows: .Parameters("@Subject").Value = Row.Subject After setting up all the parameters, you can execute the insert: .ExecuteNonQuery() Now you have an ADO.NET destination adapter that writes your email out to a table. Hopefully, this gives you a pretty good idea how to create a destination adapter with the Script Component. Open the sample and study it. Try changing it around for different metadata, and so on. The sample package is Destination.dtsx and can be found in the S20-ScriptTransform sample solution in the Samples folder. |
EAN: 2147483647
Pages: 200