Section 8.2. Promoting and Demoting Headings
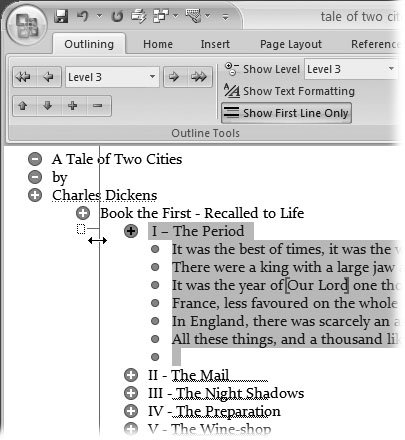
8.2. Promoting and Demoting HeadingsPlanning a document is a little bit like putting a puzzle together. You try a piece here and then over there. A topic you thought was minor suddenly looms larger in importance. When you're brainstorming and plotting, it's important to keep an open mind. Word's helpful because it's so easy to try things out, and you can Ctrl+Z to undo whenever you need to. When you promote a topic, you move it toward the left margin. At the same time, it moves up a rank in the headings hierarchy; so, a Level 3 header becomes a Level 2 header, and so forth. For most documents that means the formatting changes too. Higher-level headers typically have larger or bolder typesomething that distinguishes them from their less impressive brethren. To demote a heading is the opposite ; you move a heading toward the right, usually making it a subordinate of another topic. For you, these promotions and demotions are easy. In fact, you encounter a lot less complaining here than you'd find in promoting and demoting employees in your company. The easiest way to promote and demote is to click a header and move it to the left or to the right. When you move it a little bit, a vertical line appears, providing a marker to show you the change in rank, as shown in Figure 8-2. Note: When you promote or demote a heading, the body text goes with it, but you have a choice whether or not the subheads move below it. When you're brainstorming and pushing ideas around in your document, you don't want to get distracted by the mechanics. When it comes to outlines, you may be grateful that Word provides so many different ways to do the same thing. You get to choose the method that works best for you, and keep your focus on shaping your document. Word gives you three ways to manipulate the pieces of your outline:
Table 8-1.
Tip: Another keyboard shortcut helps with outlining: the / key on the number pad. That one little key conceals any fancy character formatting you've applied so you can focus on your outline. See Section 8.4.2 for more on the Show/Hide Text Formatting command. 8.2.1. Controlling Subheads During Promotion or DemotionWhen you promote or demote an outline item, any subheads and subtopics below it move with that item, but only if you collapse the items below, so that they're hidden. In other words, when you move the header above, the subheads keep their relationships even though you can't see them. When you drag topics, the subheads go along, because when you select a topic, you automatically select the subtopics, too. Word gives you a number of ways to move the header but leave everything else where it is. Here's a step-by-step description of the ways you can promote or demote a heading all by its lonesome:
Note: Working with outlines is actually a lot simpler to do than it sounds. Want to test drive Word's outline features? To check out the screencastan online, animated tutorialof the examples in this chapter, head over to the "Missing CD" page at www.missingmanuals.com. |
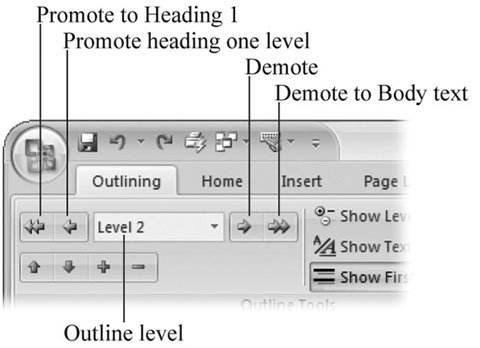
 Outline Tools group give you quick, visual access to the commands for promoting and demoting headings and for showing and hiding all the bits and pieces of your document. Its a bit more mechanical than just clicking and dragging the pieces where you want them (Figure 8-3).
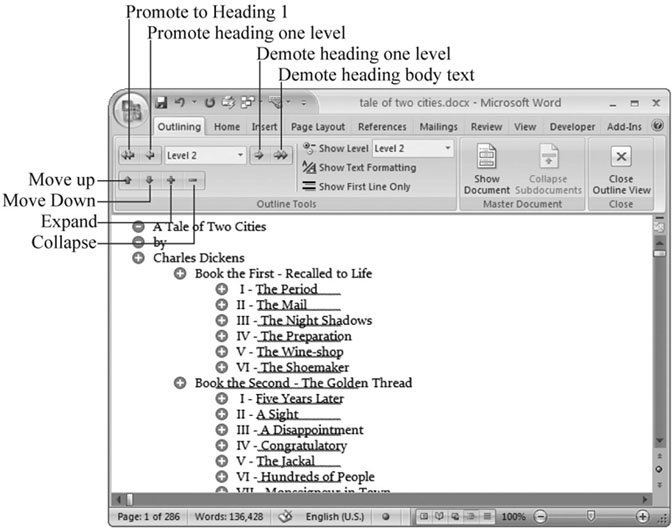
- ERP System Acquisition: A Process Model and Results From an Austrian Survey
- Enterprise Application Integration: New Solutions for a Solved Problem or a Challenging Research Field?
- Intrinsic and Contextual Data Quality: The Effect of Media and Personal Involvement
- Healthcare Information: From Administrative to Practice Databases
- A Hybrid Clustering Technique to Improve Patient Data Quality