16.1. Adding Comments Collaborating is all about clear communication, so Word lets you attach easy-to-read comments directly to the text you're referring to. What could be clearer? Even better, for documents with several reviewers, Word keeps track of who said what, when (Figure 16-1). That makes it a breeze for authors to follow up on a comment and get more details. When you select text and add a comment, Word marks it with the date, time, and your name or initials , and connects it to the selected text. Word lets you (and your readers) choose how you want to see these comments: as balloons, marked up in the text itself, or in the separate Reviewing Pane. See Figure 16-2 for details. 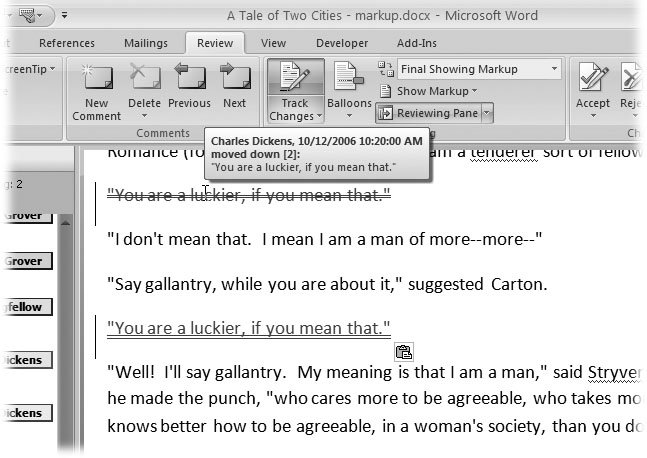 | Figure 16-1. Hold your mouse cursor over a comment or a change in your document and a pop-up note appears, showing who added the annotation and wheneven if that's you. | |
UP TO SPEED
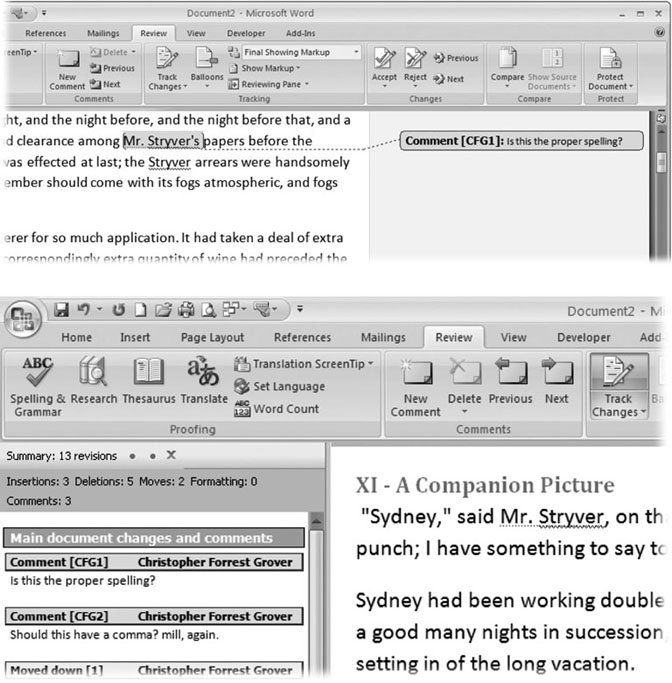
Three Views for Review | | Microsoft is seldom content giving you a single way to do anything, and this philosophy holds when it comes to reviewing comments and changes to a document. Depending on the amount of edits and your personal preferences, you can choose to display them in one of three ways: -
Balloons are like notes written in the margin. Show balloons by choosing Review  Tracking Balloons Show Revisions in Balloons. Comments and changes show up in the right margin preceded by the reviewers initials. A line from the balloon creates a visual link to the highlighted text. Tracking Balloons Show Revisions in Balloons. Comments and changes show up in the right margin preceded by the reviewers initials. A line from the balloon creates a visual link to the highlighted text. -
Inline revisions appear with the text itself, as if inserted with a colored pen. To see inline revisions, choose Review Tracking Balloons Show All Revisions Inline. With Track Changes on (Review Tracking Track Changes Track Changes), each change and comment creates a highlight or a mark in the document. When you hold your mouse cursor over a comment or a change, a pop-up note appears with the name of the reviewer and the time and date of the change (Figure 16-1). -
The Reviewing Pane shows comments and changes in a more formal, all business-style panel. This view lets you read comments and simultaneously see your document in its pristine, unmarked-up state. To display the Reviewing Pane, choose Review Tracking Reviewing Pane. From the drop-down menu, you can choose between a vertical pane that appears on the left of your document, and a horizontal pane that appears at the bottom. In the document, comments are highlighted and initialed. The actual comment appears in the Reviewing Pane. |
 | Figure 16-2. Top: Balloon notes are like when you circle text, and then draw a line to a note in the margin.
Bottom: The Reviewing Pane opens either on the left or on the bottom of your document. When you click the highlighted text that indicates there's a comment, the Reviewing Pane scrolls to show the related comment. | |
Each comment you enter into a document is anchored by a word or a group of words. Here are the steps to insert a comment into a document: -
Select the part of the document you want to comment on by dragging to select the text . You can select as much or as little text as you want. If you don't select anything, Word automatically chooses a word near the insertion point. -
Choose Review Comments New Comment, or use the shortcut Alt+R, C to insert your comment . Word highlights the selected text and links it to a comment on the Reviewing Pane and in a balloon on the right margin. (You can choose which way you want to see comments and edits, as shown in Figure 16-2.) Comments from different reviewers appear in different colors, making it easy for you to quickly pay special attention to the VP's comments while ignoring the comment from the crazy guy in the cubicle next to the copy machine. -
Type your comment . It's best to be both specific and concise , to avoid losing your readers' attention or cluttering your document with superfluous commentary . You can edit comments after you've inserted them. Say you've decided to reword your criticism to be more diplomatic. Click the text in the comment balloon or in the Reviewing Pane, and then edit just like any other text. Or select and delete text, and then type in new remarks. If you're working away without either the Reviewing Pane or the Balloons showing, you can jump to comment editing by right-clicking the highlighted text, and then choosing Edit Comment from the pop-up menu. 16.1.1. Adding Voice Comments You can add voice comments to documents provided your computer has a microphone. Be warned , though: Voice messages make a document increase in size, quickly and steeply. For example, even a brief voice comment can easily quadruple the size of a five-page document. Voice comments work well for documents that are shared on a network within your office, but they may be too big to send by email.
Note: When you add a voice comment (Figure 16-3), you're simply inserting a sound clip. As described in Section 11.6, you can add sound and other media clips to any document using the Insert Text Object command, but that method is a little cumbersome when youre reviewing a document. To save time, add the Insert Voice command to the Quick Access toolbar, as described in the box in Section 16.1.2.
To insert a voice comment, first select the text in your document where you want to attach the comment, and then follow these steps: -
Click the Insert Voice command on the Quick Access toolbar to open the Sound Object box . The Insert Voice icon looks like a folder with a microphone on it. If you have trouble telling one icon from another on the Quick Access toolbar, just mouse over an icon for a couple seconds. A text box pops up with the name of the command. -
In the Sound Object box, click the Record button, and then speak your message . The Sound Object box sports control buttons that may remind you of a VCR or DVD player. Click the round Record button on the far right to record your message. The square button next to Record stops the recording. Use the triangle button in the middle to listen to your comment. -
Review and edit your comment if necessary . A sound graph of your message shows in the black box in the middle of the box. The vertical bar shows the location in the sound clip. You can use the bar and the buttons to edit and add to your sound clip until you're happy with the message. -
In the upper-right corner of the Sound Object box, click the X button to close the box . 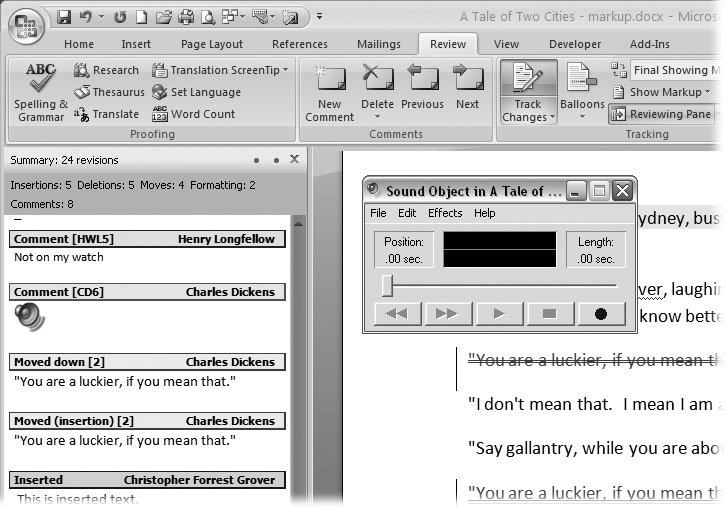 | Figure 16-3. When you click the Insert Voice command, the Sound Object box appears with its VCR-style controls. You can record, stop, and play back a message. | |
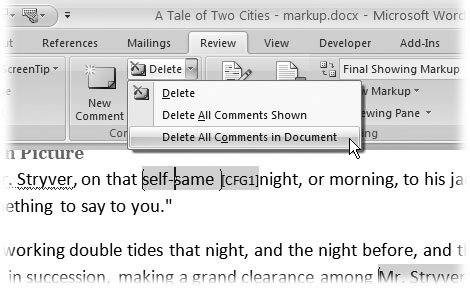
Voice comments show up in the balloons and the Reviewing Pane as icons that look like an audio speaker. To listen to a comment, just double-click the speaker icon. (Naturally, anyone who wants to listen to the comments needs to have a sound card and speakers connected to their computer.) 16.1.2. Deleting Comments It's easy to delete a single comment. Just right-click the comment, and then choose Delete Comment from the shortcut menu. You can also click a comment's text, and use the same shortcut menu command. The keyboard shortcut to delete a single comment is Alt+R, DD, and the corresponding ribbon command is Review Comments Delete (Figure 16-4). Notice that the Delete command on the Comments ribbon is actually a drop-down menu giving you two more handy ways to remove those helpful suggestions from your precious manuscript. You can remove all the comments in one fell swoop: Review Comments Delete Delete All Comments or Alt+R, DO. Or you can remove only the comments that are currently showing: Alt+R, DA. This last option gives you an easy way to remove the comments from a specific reviewer while leaving comments from others in place. It's a two-step process: First, display the comments you plan to delete and hide the others. Then, choose the Delete All Comments Shown command. POWER USERS' CLINIC
Setting Up Word to Insert Voice Comments | | To make voice comments quick and easy, you need to add the Insert Voice command to your Quick Access toolbar. The Quick Access toolbar always appears in the upper-left corner of the Word window, so its commands are available no matter what ribbon tab is showing. Follow these steps to add the Insert Voice command to your Quick Access toolbar: -
Choose Office Word Options Customize to show the panel where you customize your Quick Access toolbar. The panel has two large boxes with lists of Word commands. The box on the right lists the commands that appear in the Quick Access toolbar. The box on the left lists the commands you can add. -
In the "Choose commands from" drop-down menu at the top left, choose All Commands. The left box shows every available Word command in an alphabetized list. -
Scroll down the list, and then double-click the Insert Voice command. -
When you double-click the command, it is automatically added to the list on the right. -
Click OK to close the Word Options dialog box. After the Word Options box closes , you see the Insert Voice icon in the Quick Access toolbar in the upper-left corner. |
 | Figure 16-4. The Delete Comment drop-down menu lets you delete the selected comments, the visible comments, or all the comments in a document. | |
Here's a more detailed step-by-step: -
Go to Review Tracking Show Markup Reviewers and choose your reviewers. Put a checkmark next to a name, and you see that reviewers comments and edits in your document . The comments of reviewers without checkmarks are hidden. You can show or hide any combination of reviewers. -
16.1.3. Highlighting Text When you insert a comment in a document, you do two things: You select the text, and then you type the attached comment. But sometimes, all you need to do is call attention to some words in the text, just like you'd use a highlighter pen on a paper document. You can find Word's highlighter equivalent on the Home ribbon: Home Font Text Highlight Color . You can either select text and then click the command, or you can click the command and then drag your cursor over the text that you want to highlight. It works either way. If you want to get fancy, you can use different highlights colors for different issues. Word gives you a palette of 12 colors to choose from (Alt+H, I). |