Working with Objects
Illustrator offers keyboard shortcuts for selecting objects; changing their stacking order; transforming them; and grouping, locking, and hiding them.
Keyboard Shortcuts for Selecting Objects
Windows [Ctrl]-[A], Mac [ z ]-[A]
Select all objects
Windows [Ctrl]-[Shift]-[A], Mac [ z ]-[Shift]-[A]
Deselect the selection
Windows [Ctrl]-[6], Mac [ z ]-[6]
Reselect the selection you ve just deselected
Windows [Ctrl]-[Alt]-[]], Mac [ z ]-[Option]-[]]
Select the next object above the current object
Windows [Ctrl]-[Alt]-[[], Mac [ z ]-[Option]-[[]
Select the next object below the current object
Windows [Ctrl], Mac [ z ]
Select the last-used of the selection tools
Windows [Ctrl]-[Tab], Mac [ z ]-[Tab]
Toggle between the Selection tool and the Direct Selection tool or the Group Selection tool
When you press this shortcut from the Selection tool, Illustrator switches to whichever tool was last used ”the Direct Selection tool or the Group Selection tool. Press this shortcut again to switch back to the Selection tool.
Windows [Shift]-click, Mac [Shift]-click
Add the clicked object to, or subtract it from, the current selection
This shortcut works with the Selection tool, the Direct Selection tool, the Group Selection tool, and the Magic Wand tool.
Windows [Shift]-drag, Mac [Shift]-drag
Add to the selection with the Lasso tool
Windows [Alt]-drag, Mac [Option]-drag
Subtract from the selection with the Lasso tool
Keyboard Shortcuts for Moving Objects
Windows [], [], [], [], Mac [], [], [], []
Move the selection by one increment
When you press an arrow key, Illustrator moves the selection by the increment defined in the Keyboard Increment text box on the General sheet of the Preferences dialog box.
Windows [Shift]-[], [Shift]-[], [Shift]-[], [Shift]-[], Mac [Shift]-[], [Shift]-[], [Shift]-[], [Shift]-[]
Move the selection by ten increments
Illustrator moves the selection by ten of the increments defined in the Keyboard Increment text box on the General sheet of the Properties dialog box.
Windows [Shift], Mac [Shift]
Constrain the movement to a 45-degree angle
This shortcut doesn t work with the Reflect tool.
Keyboard Shortcuts for Changing the Stacking Order of Objects
Windows [Ctrl]-[]], Mac [ z ]-[]]
Bring the object forward by one object in the stack
Windows [Ctrl]-[Shift]-[]], Mac [ z ]-[Shift]-[]]
Bring the object to the front of the stack
Windows [Ctrl]-[[], Mac [ z ]-[[]
Send the object backward by one object in the stack
Windows [Ctrl]-[Shift]-[[], Mac [ z ]-[Shift]-[[]
Send the object to the back of the stack
Keyboard Shortcuts for Transforming Objects
Windows [Alt]-click, Mac [Option]-click
Set the origin point and display the appropriate dialog box
This shortcut works with the Rotate tool, the Scale tool, the Reflect tool, and the Shear tool. For example, with the Rotate tool selected, [Alt]-click to set the origin point and display the Rotate dialog box.
Windows [Alt]-drag, Mac [Option]-drag
Duplicate the selection and transform it
This shortcut works with the Selection tool, the Scale tool, the Reflect tool, and the Shear tool.
Windows [~]-drag, Mac [~]-drag
Transform the pattern independent of the object
This shortcut works with the Selection tool, the Scale tool, the Reflect tool, and the Shear tool.
Windows [Ctrl]-[D], Mac [ z ]-[D]
Transform again
Press this shortcut to repeat the previous transformation.
Windows [Ctrl]-[Shift]-[M], Mac [ z ]-[Shift]-[M]
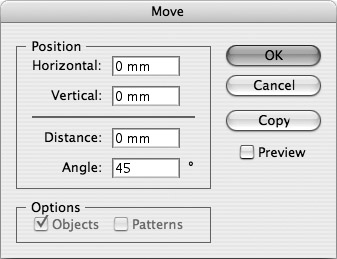
Display the Move dialog box
In the Move dialog box (the Mac version is shown here), specify how to move the object, and then press [Enter] or [Return].
| Tip | After selecting an object, you can also display the Move dialog box by double-clicking the Selection tool, the Direct Selection tool, or the Group Selection tool. |
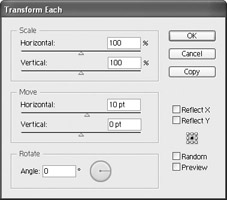
Windows [Ctrl]-[Alt]-[Shift]-[D], Mac [ z ]-[Option]-[Shift]-[D]
Display the Transform Each dialog box
Use the Transform Each dialog box (the Windows version is shown here) to move multiple objects by the same amount. You can also use the Random option to move the objects randomly up to the distances you specify in the Horizontal text box and Vertical text box in the Move group box.
Keyboard Shortcuts for Grouping and Ungrouping Objects
Windows [Ctrl]-[G], Mac [ z ]-[G]
Group the selected objects together
By grouping two or more objects together, you can treat them as a single unit ” for example, so that you can move them and format them as if they were a single object.
Windows [Ctrl]-[Shift]-[G], Mac [ z ]-[Shift]-[G]
Ungroup the selected group of objects
Keyboard Shortcuts for Locking and Unlocking Objects
Windows [Ctrl]-[2], Mac [ z ]-[2]
Lock the selected object or objects
Lock an object when you want to make sure you don t select it or edit it.
Windows [Ctrl]-[Alt]-[2], Mac [ z ]-[Option]-[2]
Unlock all objects
Unlock locked objects when you need to work with them again.
Windows [Ctrl]-[Alt]-[Shift]-[2], Mac [ z ]-[Option]-[Shift]-[2]
Lock all deselected artwork
Keyboard Shortcuts for Hiding and Showing Objects
Windows [Ctrl]-[3], Mac [ z ]-[3]
Hide the selection
Hide a selection when you want to prevent yourself from selecting it or modifying it or when you simply want to remove it from view so that you can work with objects that it overlaps.
Windows [Ctrl]-[Alt]-[3], Mac [ z ]-[Option]-[3]
Show all hidden items
Press this shortcut to display hidden items so that you can see them and work with them again.
Keyboard Shortcuts for Joining and Averaging Paths
Windows [Ctrl]-[J], Mac [ z ]-[J]
Join the endpoints of the selected open path
Windows [Ctrl]-[Alt]-[J], Mac [ z ]-[Option]-[J]
Average two or more anchor points
Use the Average command to move selected anchor points to a new position derived from the average of their current positions . The points can be on different paths or the same path.
Keyboard Shortcuts for Making and Releasing Compound Paths
Windows [Ctrl]-[8], Mac [ z ]-[8]
Make a compound path from the selected paths
Windows [Ctrl]-[Alt]-[8], Mac [ z ]-[Option]-[8]
Release the selected compound path
Keyboard Shortcuts for Blending Objects
Windows [Ctrl]-[Alt]-[B], Mac [ z ]-[Option]-[B]
Issue a Make Blend command
Press this shortcut to have Illustrator create intermediate objects between the objects you ve selected.
Windows [Ctrl]-[Alt]-[Shift]-[B], Mac [ z ]-[Option]-[Shift]-[B]
Release the blended objects
Keyboard Shortcuts for Envelope Distort
Windows [Ctrl]-[Alt]-[Shift]-[W], Mac [ z ]-[Option]-[Shift]-[W]
Display the Warp Options dialog box
In the Warp Options dialog box (the Mac version is shown here), choose the warp style and other options, and then press [Enter] (on Windows) or [Return] (on the Mac).

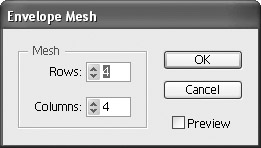
Windows [Ctrl]-[Alt]-[M], Mac [ z ]-[Option]-[M]
Display the Envelope Mesh dialog box
In the Envelope Mesh dialog box (the Windows version is shown here), specify the number of rows and columns for the mesh, and then press [Enter] or [Return].
Windows [Ctrl]-[Alt]-[C], Mac [ z ]-[Option]-[C]
Make an envelope with the top object
Windows [Ctrl]-[Shift]-[V], Mac [ z ]-[Shift]-[V]
Edit the contents of the selected envelope
Keyboard Shortcuts for Making and Releasing Clipping Masks
Windows [Ctrl]-[7], Mac [ z ]-[7]
Make a clipping mask
Windows [Ctrl]-[Alt]-[7], Mac [ z ]-[Option]-[7]
Release the selected clipping mask
Keyboard Shortcuts for Painting Objects
Windows [X], Mac [X]
Toggle between fill and stroke
Windows [D], Mac [D]
Set the fill and stroke to the default setting
Windows [Shift]-[X], Mac [Shift]-[X]
Swap the fill and the stroke
Windows [.], Mac [.]
Select Gradient Fill mode
Windows [,], Mac [,]
Select Color Fill or Stroke mode
Windows [/], Mac [/]
Select No Stroke or No Fill mode
Windows [Ctrl]-[/], Mac [ z ]-[/]
Add a new fill
Windows [Ctrl]-[Alt]-[/], Mac [ z ]-[Option]-[/]
Add a new stroke
Windows [Alt], Mac [Option]
Toggle between the Paint Bucket tool and the Eyedropper tool
Press this shortcut when the Paint Bucket tool is selected to change temporarily to the Eyedropper tool, and vice versa.
Windows [Shift]-click with Eyedropper tool, Mac [Shift]-click with Eyedropper tool
Sample the color
Use this shortcut to sample the color from a picture or an intermediate color from a gradient.
Windows [Alt]-[Shift]-click with Eyedropper tool, Mac [Option]-[Shift]-click with Eyedropper tool
Sample the style and append the appearance of the currently selected item
Windows [Ctrl]-click the Gradient button, Mac [ z ]-click the Gradient button
Restore the gradient to black and white
EAN: 2147483647
Pages: 91