Modifying Text


If you need to tweak your text a little more, you're in luck. Photoshop has even more options for typographic effects. These five options can take your typographic treatments even further.

Free Transform

Because our text is vector-based, it can be sized and modified using the Free Transform command with no loss of quality. The text will "redraw" itself after the command is applied. The Free Transform command lets you rotate, scale, skew, distort, and add perspective in one continuous operation. This will ensure the highest quality of your text. Let's experiment with this command:
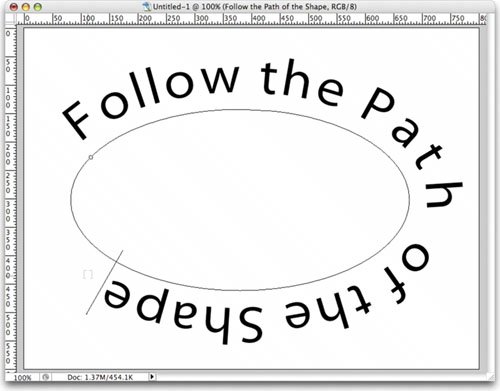
1.

Select your text layer and press Cmd+T (Ctrl+T) or choose Edit > Free Transform.

2.

Do one or more of the following options:

  • To scale by dragging, drag a handle.

  • Press Shift while dragging a corner handle to scale proportionately.

  • Press Option (Alt) while dragging a corner handle to scale from the center.

  • To rotate by dragging, move the pointer outside the bounding border. Notice that the pointer changes to a curved, two-sided arrow. Click and drag.

  • To distort freely, press Cmd (Ctrl) while dragging a handle.

  • To skew press Cmd+Shift (Ctrl+Shift) while dragging a handle.

  • To apply perspective change, press Cmd+Option+Shift (Ctrl+Alt+Shift) while dragging a handle. You may also need to combine this with scale to achieve a believable perspective change.

  • If you forget any of the above, right-click/Ctrl-click a corner of the transform box to display a pop-up list of options.

Note: Simple Design Rules

  • Limit total number of fonts used.

  • Use heavier fonts if designing for screen display (Web, presentations, or video).

  • Make sure text is readable. Print it out or at least get a few feet away from the computer screen and take a fresh look.

  • Be consistent with capitalization and justification.

  • Do not overuse Layer Styles.

3.

Click the Commit button (checkmark in the Options bar).

Text on a Path

Placing text along a vector path used to be a job for Illustrator. This would allow you to make text follow a curved line or other geometric shape. Starting in Photoshop CS, this ability moved into Photoshop.
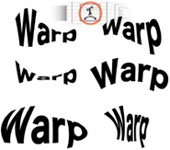
1.

Add a path to your document using the Pen tool or Shape tool.

2.

With your Horizontal Type tool selected, move over the path until your cursor changes to a new icon (an I-bar with a curved path).

3.

Click and start typing.

4.

Use the Direct Selection tool to move the margin of the text for repositioning. You can also pull up or down to move the text to the inside or outside of the path.

5.

Adjust the baseline and tracking as needed for improved readability.

Warped Text

With names like Flag, Fish, and Wave, the Warp Text dialog box doesn't scream useful. However, a lot of powerful (and useful) distortions are available. These vector distortions allow you to reshape text, which is particularly helpful for advertisingstyle type effects:

Video Training

Warped Text


1.

Select an existing text block.

2.

Click the Create Warped Text button in the Options bar.

3.

Choose a Style for the Warp and specify Horizontal or Vertical.

4.

Additionally, experiment with the Bend, Horizontal Distortion, and Vertical Distortion properties.

5.

Click OK when you're satisfied.

6.

To modify the effect in the future, double-click the T icon in the Layers palette.

Using Layer Styles

Text often needs a little style, and Layer Styles allows you to add a stroke, shadow, bevel, or even texture to your text. At the bottom of the Layers palette you'll see a small f inside a circle. This is the easiest way to access Layer Styles. But be sure to show good taste and not go wild with effects. Let's work with some prebuilt Styles to see the possibilities available to you:

1.

Select or create a text layer.

2.

Choose Window > Styles to open the Styles palette.

3.

From the palette's submenu (the triangle in the right corner) choose Text Effects.

4.

Click a style's thumbnail to apply the effect; just click another to apply an additional effect.

Some of these effects are attractive and useful; many are gaudy (but that is my personal taste). The best approach is to create your own styles. Be sure to see Chapter 13, "Layer Styles," for more information.

Filters on Text

If you want to run a filter on text, Photoshop will rasterize the text. This process converts the text from being vector-based (and scaleable) into pixel data (which cannot be enlarged without visible softening of the edges due to blowing up pixels). When you have a text layer selected and you want to apply a filter, Photoshop will warn you that it is going to rasterize the type and leave it uneditable. Click OK if you are sure. I recommend making a duplicate text layer as a backup (with the visibility icon turned off) before filtering text, or try to create the effect using Layer Styles and Warped Text instead. Open the file Light.psd to see an effect that combines the Radial BlurZoom filter with Layer Styles.

Tip: System Performance

Having too many fonts active can impact performance of your system by hogging RAM and slowing system boot and application launch times. Instead, use a font manager like FontBook or Suitcase to better manage your font collection.
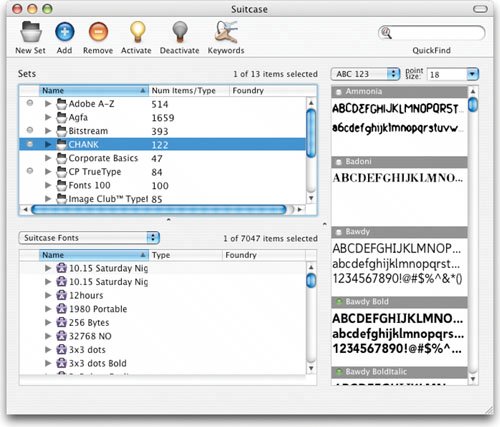


Understanding. AdobeR PhotoshopR. Digital Imaging Concepts and Techniques
Understanding Adobe Photoshop: Digital Imaging Concepts and Techniques
ISBN: 0321368983
EAN: 2147483647
Year: 2004
Pages: 129

flylib.com © 2008-2017.
If you may any questions please contact us: flylib@qtcs.net