| Several tools are available for painting inside of Photoshop. While these tools have subtle differences, they have one important thing in common: use of Photoshop's dynamic brush engine. Before we explore the unique tools, let's discuss how to control your brushes. Brushes Palette The Brushes palette contains several options. Most of these will be well beyond what you'll need to get started. We'll cover the options in brief, but be sure to return to this palette as you grow in skill and confidence. 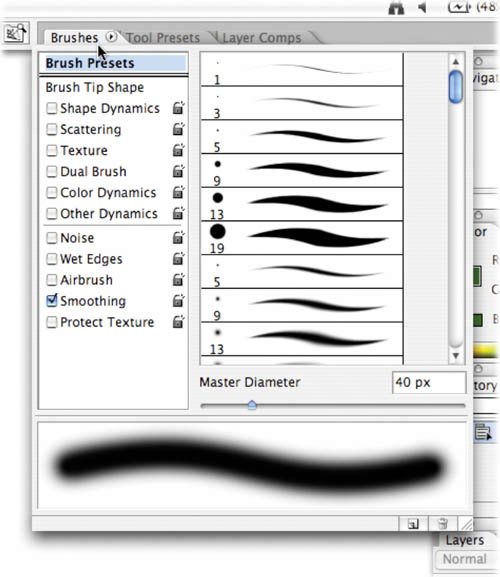 Brush Presets Photoshop has several brush presets to get you started right away. These presets are accessed from the Brushes palette; several are loaded and more are in storage. Let's check them out. 1. | Create a new document. Since this is for practice and we won't be printing the file, choose the 800 x 600 preset from the New Document dialog box.
| 2. | Press D to load the default colors of black and white.
| 3. | Select the standard Brush tool by pressing B.
| | | 4. | Click the Brushes palette tab (by default it is docked in the palette well in the Options bar).
| 5. | Click the words Brush Presets. Photoshop will show you a list and thumbnails of several brush styles.
| 6. | Scroll through the list and pick a style to try.
| 7. | Draw a stroke in your blank document to see the brush preset in action.
| 8. | Repeat using different presets and create strokes to get familiar with your options.
| 9. | Click the Brushes palette submenu (the triangle in the upper-right corner) and load a new Brush library.
| 10. | Experiment with these brushes.
| 11. | Load additional presets and continue to get familiar with your many options.
| 12. | When done, you can restore the default set of brushes. Click the palette's submenu and choose Reset Brushes.
|
Video Training  | Creating Custom Brushes |
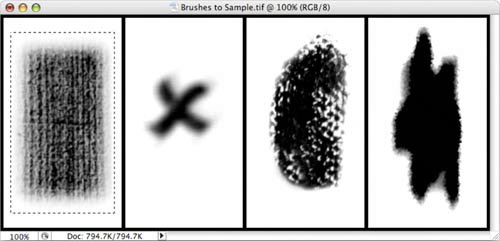
Creating Custom Sampled Brushes You can use an image to create a custom brush. This can be a scan that you input or a stroke that you draw using other brushes. Let's give it a try: 1. | Open the file Brushes to Sample.tif from the Chapter 6 folder.
| 2. | Select the first brush shape with the Rectangular Marquee tool. You can sample an image in size up to 2500 pixels x 2500 pixels.
| 3. | Choose Edit > Define Brush Preset.
| 4. | Give the brush a name, and click OK. The brush is loaded into the set you currently have loaded in the Brushes palette.
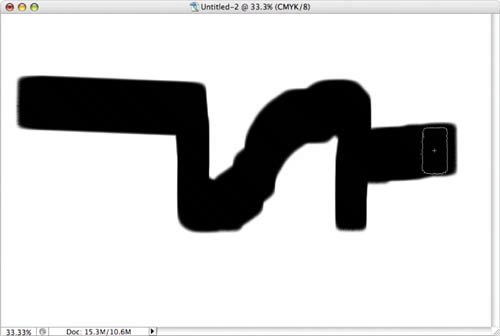
| 5. | Activate the new brush and paint in a new document to try it out. You may want to adjust the Spacing option to taste.
| 6. | Repeat for the other three brush shapes.
|
  |
Brush Tip Shape While the brush presets are readily available and very diverse, they won't cover all your needs. Fortunately Photoshop offers a flexible interface for customizing existing brushes as well as creating new ones. 1. | Make sure you have the Brush tool selected.
| 2. | Bring the Brushes palette forward and make it active.
| 3. | Choose a brush preset (from the thumbnail icons) that you'd like to modify. You can see the changes in the preview area, or click your test canvas to try the brush out.
|
You can modify the following brush tip shape options in the Brushes palette: 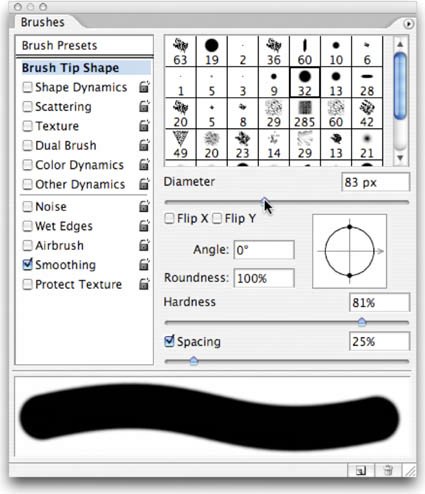 Diameter: Controls the size of the selected brush. You can enter a value in pixels (px) or drag the slider to a new size. Use Sample Size: Resets the brush to its original diameter. If the brush was created by sampling pixels (such as part of a photo or a scanned stroke), you can use the sample size. Flip X: Changes the direction of a brush by flipping it on its X axis (essentially making a mirrored image). This is useful if the brush is asymmetrical. Flip Y: Flips the brush on its Y axis. Angle: Specifies the angle of a brush. This works well for sampled or elliptical brushes. You can type in a number of degrees or visually change the angle of the brush by dragging the arrow in the brush preview interface. You can use angled brushes to create a chiseled stroke. Roundness: Specifies the ratio between the short and long axes. A value of 100% results in a rounder brush, whereas 0% creates a linear brush. Elliptical shapes can be used to create natural-looking strokes. Hardness: Creates brushes with soft edges. This can be useful to create more natural-looking strokes. You can adjust between 0% (very soft) and 100% (no feathering). You cannot adjust hardness for sampled brushes. Spacing: Controls the distance between brush marks when you create a stroke. You can adjust spacing using the slider or type in a number. If you uncheck the box, the speed of your cursor will determine spacing. 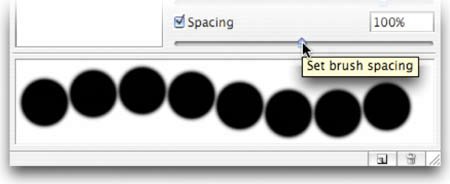
Shape Dynamics To create a more natural brush, you should adjust the Shape Dynamics of the brush. This can create natural variances that make the brush more realistic. The Shape Dynamics option adjusts the currently selected brush; therefore, be sure to choose one from the Brush Presets or Brush Tip Shapes area. Size Jitter and Control: This option specifies how much variety Photoshop places in the size of the brush. You can specify a total size of jitter in percentage. Additionally, you can specify how to control the jitter from the Control pop-up menu: 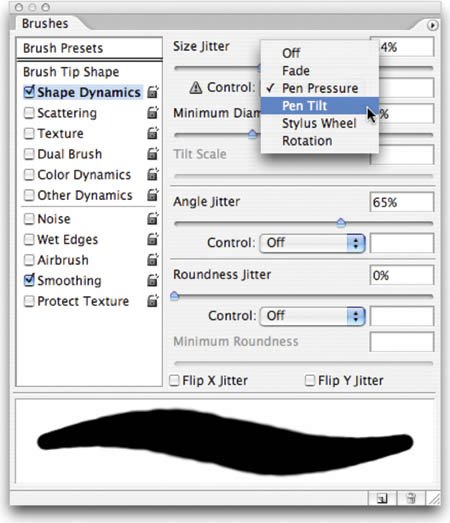 Off: This option places no control over the size variance of brush marks. The jitter is random. Fade: If you want the brush to taper off (like it ran out of ink or paint) then choose Fade. The brush will get smaller based on a specified number of steps. Each step is one mark of the brush tip. If you specify 15, the brush will fade out in 15 steps. Pen Pressure, Pen Tilt, Stylus Wheel, or Rotation: Some Photoshop users unlock more features by hooking up a stylus and graphics tablet. The most popular manufacturer of tablets is Wacom (www.wacom.com). These options let you tie jitter to different features of the pen. 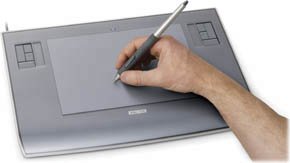
Minimum Diameter: This option sets a limit on how much variation in scale can be introduced in the brush. An option of 0% lets the brush shrink to a diameter of 0, whereas 25% would let the brush range from full size to a quarter of its starting width. Tilt Scale: This option ties the amount of scale to the tilt of the pen (or stylus). You must have a graphics tablet attached to utilize this feature. Angle Jitter and Control: You can specify how much variety in the angle of the brush can occur. A larger number creates more variety. The control area ties the jitter to your pen. Roundness Jitter and Control: You can introduce jitter into the roundness of the brush. Additionally, you can control the jitter with a pen. Minimum Roundness: This option limits the amount of jitter.
Scattering Enabling Scattering can add variation to the placement of strokes. This can simulate splattering or wilder strokes. There are a few options to work with: 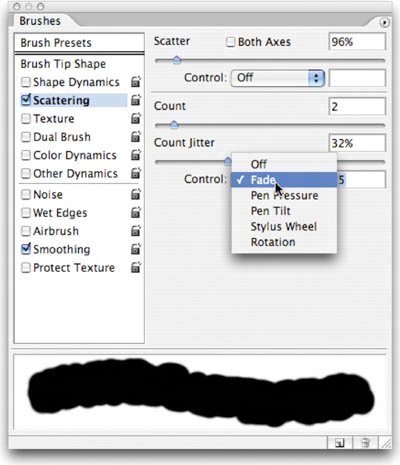 Scatter and Control: You can distribute brush strokes from the center of the click. The Both Axes option distributes strokes radially. When the option is unchecked, the strokes are distributed perpendicular to the stroke path. Count: This option specifies the quantity of brush marks applied at each spacing interval. This option works in conjunction with the Spacing option from Brush Tip Shape. Count Jitter and Control: You can specify how much variety there is in the number of brush marks for each spacing interval. A high value will put more brush marks into the stroke. These are controlled in the same way as Shape jitter.
Texture You can enable the Texture option to introduce a pattern into your strokes. This can help simulate canvas in your texture. Click the pattern sample to choose from one of the loaded patterns. Click the triangle menu to open the pattern picker to choose from the loaded textures. If you'd like to load additional textures, click the submenu in the pattern picker to load a built-in texture library. You can adjust several other options in the window and examine their effects in the preview area. 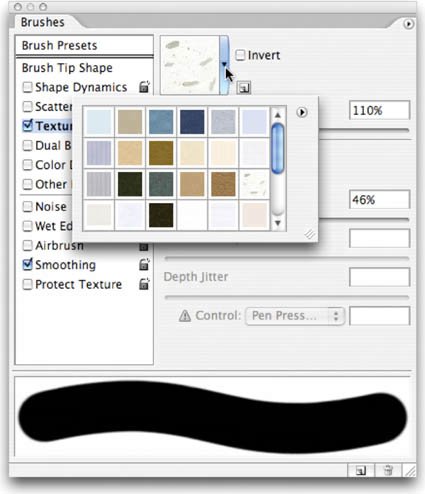 Dual Brush What's better than one brush? Two, of course. By using a dual brush, you can use two brush tips to create a more dynamic brush. When selected, you'll have the option of choosing from a thumbnail list of presets for the second brush. You'll also see several options to modify the brush tip. You can modify the diameter of the second brush as well as specifying spacing and scatter amounts. 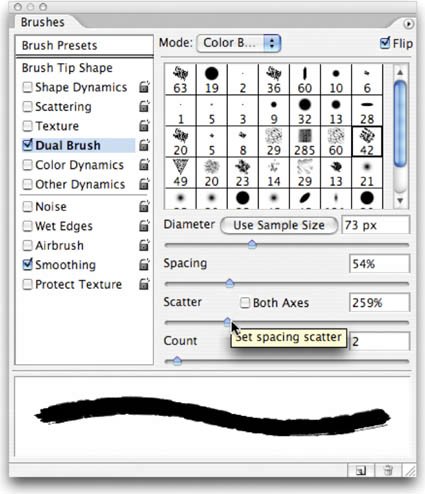 Color Dynamics By now you might be thinking, "Those brushes are pretty dynamic, what else can Photoshop change?" Well, color, of course. When you check Color Dynamics, you can enable several options that will produce subtle (or dynamic) variations in color. 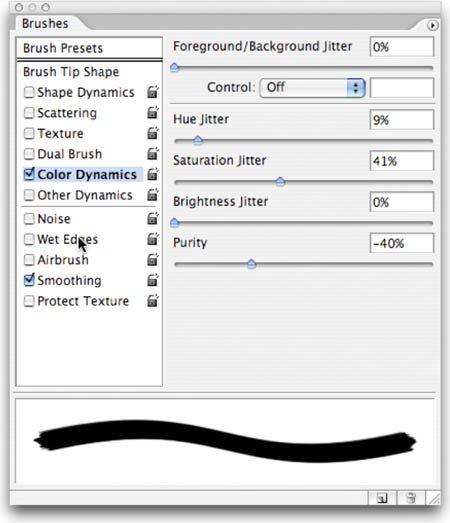 Foreground/Background Jitter and Control: This option allows the brush to utilize both the foreground and background colors that you have loaded. This can create a nice variation in color by loading lighter and darker shades of one color as your foreground and background color swatches. Hue Jitter: Hue jitter allows you to specify how much variety of color can be introduced. Low values create a small change in color and higher values create greater variety. Saturation Jitter: This option introduces variation in the intensity of the selected color. Brightness Jitter: This option adds variety in brightness. A low value creates very little change in the brightness of the color. A higher value creates greater variations.
This butterfly was drawn with Color Dynamics enabled. Notice the subtle variations of color within the stroke. 
Other Dynamics The Other Dynamics section offers additional styles of jitter that can be added. Opacity Jitter and Control: You can add variety to the brush so the opacity varies throughout the stroke. You can tie the opacity variation to a pen and tablet for greater control. Flow Jitter and Control: Flow affects how paint flows through the brush. A larger number means more paint flows through. The default value is 100%, which creates even strokes. A lower value causes less ink to be applied with each stroke. 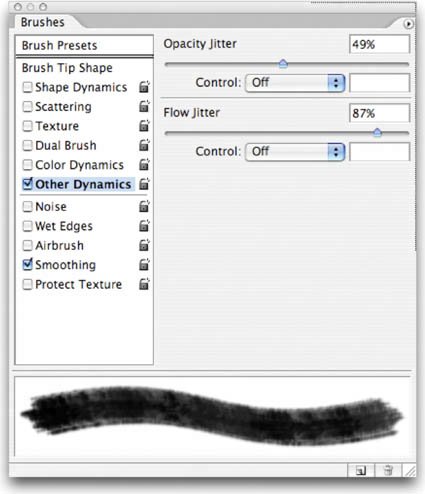 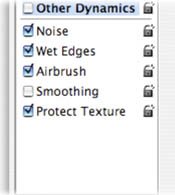
Other brush options A few Other options can affect your active brush. These are either enabled (checked) or disabled (unchecked); they have no modifiable properties. Noise: This option places additional grain into the brush tip. It works well with soft-tip brushes. Wet Edges: This option causes the paint to appear darker at the edge of the stroke. It simulates the effect of painting with watercolors. Airbrush: This option allows you to simulate a traditional airbrush (a device that uses pressurized air to spray paint out of a nozzle). The airbrush applies gradual tones and allows the paint to build up. You can also access this option by clicking the Airbrush option in the Options bar. Smoothing: This option produces better curves in your brush strokes when painting. Protect Texture: If you are using Texture in your brush strokes, this is a good option to enable. It keeps the pattern and scale consistent when switching between textured brushes. This will make your strokes more consistent.
Table 6.2 shows the frequently used Brushes palette keyboard shortcuts. Table 6.2. Shortcut Keys for Using the Brushes PaletteDesired Result | Macintosh | Windows |
|---|
Decrease/increase brush size | [ or ] | [ or ] | Decrease/increase brush | Shift + [ | Shift + [ | softness/hardness in 25% increments | or Shift + ] | or Shift + ] | Select previous/next brush size | , (comma) or .(period) | , (comma) or .(period) | Display precise crosshair for brushes | Caps Lock | Caps Lock | Delete brush | Option-click brush | Alt-click brush | Rename brush | Double-click brush | Double-click brush | Toggle Airbrush option | Shift + Option + P | Shift + Alt + P |
Brush Tool After all this talk of brushes, there are still a few important things to say about the Brush tool. Be sure to look in the Options bar for important brush controls. From left to right, these options are the most useful controls for brushes. 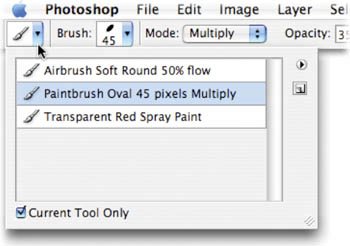 Tool Presets: You can save a frequently used brush configuration for convenient access. Brush Preset Picker: This area is a greatly reduced Brushes palette. You can access thumbnails of the loaded brushes, as well as adjust diameter and hardness. Mode: The Mode menu lets you change the blending mode of your painted strokes. Blending modes attempt to simulate real-world interactions between two elements. For example, Multiply allows the strokes to build up, much like a magic marker. You'll find much more on blending modes in Chapter 9, "Using Blending Modes." 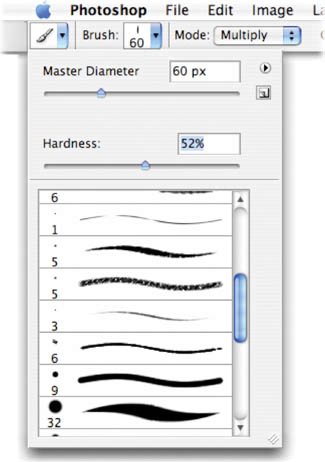 Opacity: This option affects the opacity of your strokes. Flow: This option reduces the amount of paint flowing to the brush. Airbrush button: This button enables the Airbrush. Brushes Palette button: This button toggles visibility on the Brushes palette. Click it and it will open the Brushes palette, which gives you greater control over the brush shape and dynamics.
Pencil Tool The Pencil tool is similar to the Brush tool. It shares many of the same options and controls. The fundamental difference is that it can only be used to create hard-edged strokes. While there is a Hardness setting available, it does nothing to change the stroke. There is one unique option for the Pencil tool: Auto Erase. Enabling it via the Options bar will tell the Pencil tool to erase previously drawn strokes if you draw over them a second time. 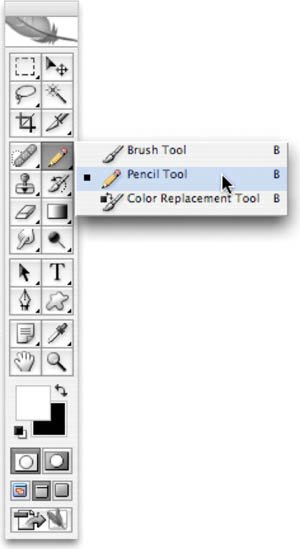 Color Replacement Tool The Color Replacement tool can replace a selected color with a new, user-specified color. This tool was first introduced with Photoshop CS, and was originally positioned as a way to remove "red eye" from photos. Photoshop CS2 added a new Red Eye tool specifically for that purpose, yet the Color Replacement tool remains somewhat useful. Let's try it out: 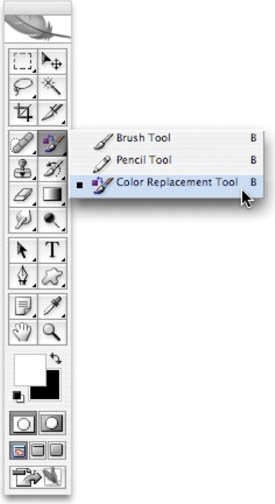 1. | Open the file Balloons.tif from the Chapter 6 folder.
| 2. | Select the Color Replacement tool from the Toolbox. It is nested with the regular Brush tool's well
| 3. | Choose a soft brush tip from the Options bar. Leave the blending mode set to Color.
| 4. | Select one of the three Sampling options:
- Continuous: This option updates with each drag of the brush.
- Once: In this mode, you must make an initial click. Photoshop will replace the targeted color only in areas that closely match the initial click.
- Background Swatch: This mode requires you to change the background color swatch. You can do this by choosing the Eyedropper (I) and Option-clicking (Alt-clicking) on a color in your document. Photoshop will then replace only areas containing the current background color.
For this image, let's use the Once option.
| | | 5. | You can place additional color replacement limits using alternatives in the Options bar:
- Discontiguous: This option replaces the sampled color in all places that it occurs in the whole image.
- Contiguous: This option requires that colors are contiguous to, or touching, the color immediately under the pointer.
- Find Edges: This option attempts to replace color while preserving the sharpness in the detail of the edges.
For this image, let's use the Discontiguous option so we can get the widest range of colors.
 | 6. | Enter tolerance as a percentage (between 0 to 100%). Lower values require the colors to be very similar to the pixels you click. Higher values have a greater tolerance and will modify more colors. For this image, we'll go towards the middle of the road with a setting of 40%.
| 7. | Check the Anti-alias box to reduce any fringe in the color-corrected regions.
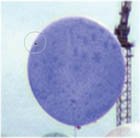
| 8. | Pick a foreground color to replace the unwanted color. For this image, we'll change the orange balloons and make them blue.
| 9. | Zoom into the image near the orange balloon near the top of the image.
| 10. | Click and start to paint; be careful not to get too close to the edges.
| 11. | Some spotting may occur, so you'll need to click in the center of any spotting and paint additional strokes.
| 12. | When you complete the first balloon, move on to the additional orange balloons and paint them in as well.
 |
Alternative Color Replacement While the Color Replacement tool is effective, using it can be a bit time-consuming. An effective alternative is to use the Select > Color Range Command. For more practice you can try it out on the Balloons. tif image as well. This command allows you to select a color, then add additional colors to the selection. For more on this useful tool, be sure to see Chapter 5, "Selection Tools and Techniques." |
History Brush Tool The History Brush is easy to use, but a little hard to understand at first. Essentially, it allows you to paint backwards in time. This can be very useful as it enables you to combine the current state of an image with an earlier state. For example, you can process an image with a stylizing filter, then restore part of the image to its original state. The History Brush is directly tied to your History palette. This useful window shows you each action you have taken on an image. You can then move backwards through your undos by clicking them. By default you have 20 levels of undo, but you can change this by increasing the number of History States in your general preferences. Let's put the History palette and History Brush into action: 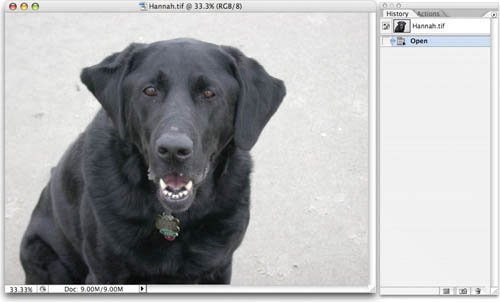 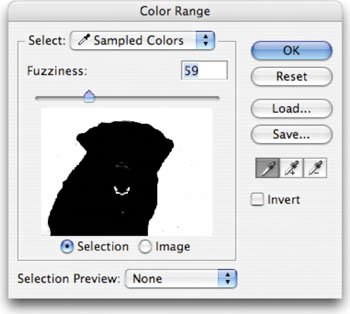 1. | Call up your History palette, so it is active (Window > History).
| 2. | Open the file Hannah.tif from the Chapter 6 folder.
| 3. | Use the Select > Color Range Command to select the sandy beach area. When you have most of the beach selected, click OK to make a selection.
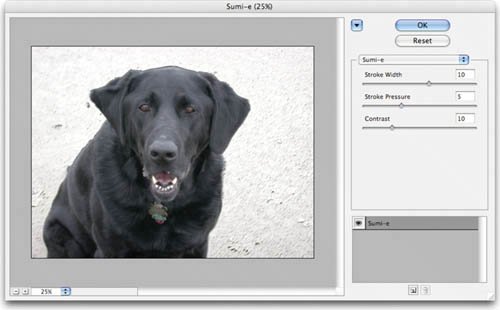
| | | 4. | We are now going to run a Brush Stroke filter to stylize part of the image. Filters can be used to create special effects in an image. (For more on filters, see Chapter 14, "Filters"). Choose Filter > Brush Strokes > Sumi-e. Adjust the sliders to taste. Click OK to apply the filter.
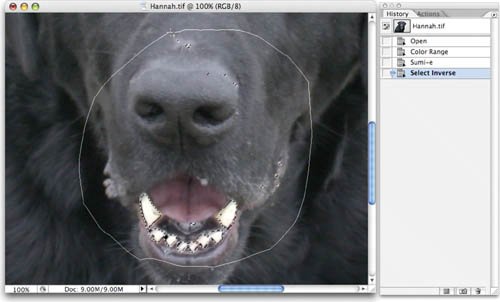
 | 5. | Choose Select > Inverse to select the dog in the photo.
| 6. | Most of the image is selected; you can select the stray area by using the Lasso tool and holding down the Shift key to add to the selection.
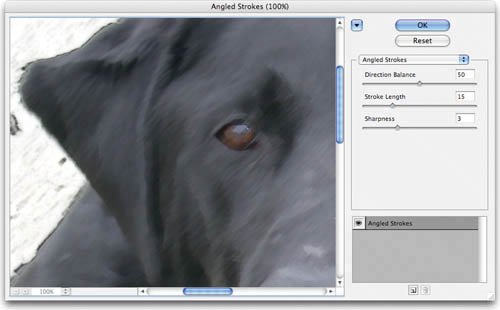
| 7. | Choose Filter > Brush Strokes > Angled Strokes. The default settings are fine for this purpose (but feel free to adjust as needed). Click OK to apply the filter.
 | 8. | Choose Select > Deselect to clear the active selection.
| | | 9. | Examine the image and the History palette. The image looks more like a painting at this point, but some key areas (like the eyes and mouth) are too heavily stylized. The History palette shows you all of the actions you have performed on the open image.
 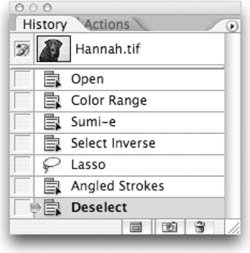 | 10. | Look at the top of the History palette; you will see a Snapshot for the document. It was automatically created when the document was first opened. The brush icon next to it indicates that it has been set as the source for the History Brush.
| 11. | Choose the History Brush from the Toolbox or press Y. Be sure to not choose the Art History Brush.
| 12. | Select a soft-edged brush, sized approximately 30 pixels.
| 13. | Zoom in on the eye area. Paint in the eyeball to restore the original detail of the eye.
| 14. | Hold down the Spacebar to access the Pan tool. Pan around the image to access the other eye. Restore the second eye.
| 15. | Pan down to the mouth area and paint back the original detail.
The History Brush can be used to paint back original details after running an image-processing command (such as a filter). This can restore parts of the image that improve its appearance. 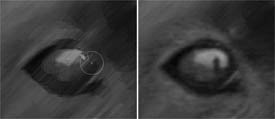 |
The History Brush can be very useful when either filtering an image or performing color correction tasks. It allows you to selectively paint back in time to restore lost or important details. 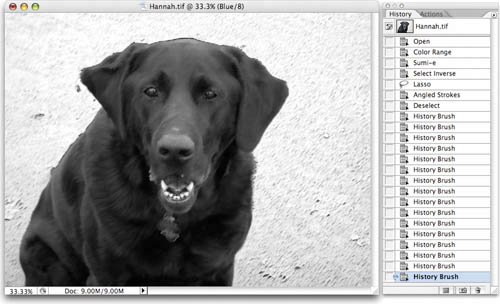 More Snapshots Snapshots can also be used as "digital breadcrumbs" so you can find your way back to earlier versions of the image. You can add more snapshots so you can quickly jump back to specific points in time by Clicking the Create new snapshot button (camera icon) at the bottom of the History palette. Changing the preferences for the History palette. Click the submenu icon for the History palette and choose History Options. You can choose to Automatically Create New Snapshot When Saving.
Remember, History States and Snapshots are temporary. When you close the open document, they are discarded. |
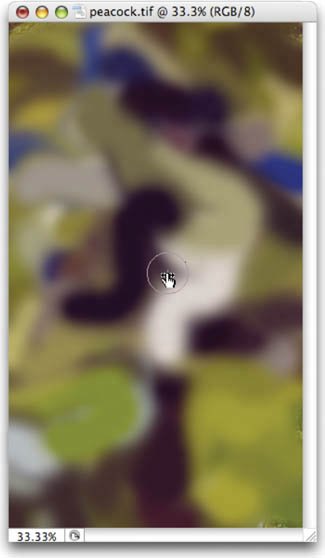
Art History Brush Tool Officially, the Art History Brush tool can be used to create stylized paintings. Unofficially, it doesn't work very well. The Art History Brush tool is very similar in setup to the regular History Brush. It requires you to select a snapshot to paint from.  1. | If you'd like to try this tool out, open the image Peacock.tif from the Chapter 6 folder.
| 2. | In the History palette, choose a Snapshot or History State to use.
| 3. | Select the Art History Brush tool from the Toolbox.
| 4. | Select a small, soft brush from the Brush Presets picker.
| | | 5. | Choose a method from the Style menu. The tight methods work better than the loose ones.
Painting Alternatives If you are looking for a solid alternative for creating digital paintings, you might want to check into some alternative programs. Both of these programs have downloadable demos that you can try out. - Studio Artist: www.synthetik.com
- Painter: www.corel.com
|
 | 6. | Set the area number to a low value. This reduces the number of strokes and gives you better control over the tool.
| 7. | For Tolerance, enter a low value to constrain the strokes to a tighter area.
| 8. | Drag in the image to paint.
|
What you should see could be loosely called "impressionistic." Chances are this tool won't become part of your regular work flow. Paint Bucket Tool The Paint Bucket tool allows you to quickly fill an area of adjacent pixels with a new color. The command is quick, but not extremely accurate. The Paint Bucket tool works similarly to the Magic Wand tool, but instead of creating a selection, it fills with a color. The Paint Bucket tool works well if you have an easy to select area, but not well on complex images. Let's try it out: 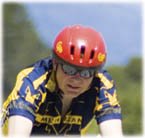 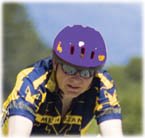 1. | Open the file Helmet.tif from the Chapter 6 folder.
| 2. | Select the Paint Bucket (G) tool from the Toolbox.
| 3. | Load purple as your foreground color.
| 4. | Set the Tolerance setting to 90. A high tolerance fills more pixels within a broader range on the first click.
| 5. | To make a smoother selection, make sure the Anti-aliased box is checked.
| 6. | Click with the Paint Bucket tool on the red helmet. The colors will change, but it will look flat and unnatural.
| 7. | Choose Edit > Undo and go back to before using the Paint Bucket.
| | | 8. | In the Options bar, change the Paint Bucket's blending mode to Color. This will paint with the color you've selected, but blend it with the existing luminance and saturation values.
|
Using blending modes can make painting tools more useful. In this case, the Paint Bucket tool was set to use Color mode, and it created a gentle shifting of the color in the helmet. 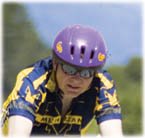 Working with Gradients A gradient is a gradual blend between two or more colors. You can use gradients to create a photo-realistic backdrop or to draw in areas like a blown-out sky. The Gradient tool is extremely flexible and offers the versatile Gradient Editor for creating custom gradients. Before we utilize the Gradient tool, let's explore how gradients are formed. Gradient Editor All gradients are edited using the Gradient Editor (which becomes available when you activate the Gradient tool). To access it, click the thumbnail of the gradient in the Options bar. Presets: You have several preset gradients to choose from and you can browse them by thumbnail. Additionally, you can load other gradients by clicking the palette's submenu. Name: Giving each gradient a name can make them easier to sort through. Type: The two major categories of gradients are Solid and Noise. Solid gradients use color and opacity stops, with gradual blends in between. Noise gradients contain randomly distributed colors within a user-specified range. Each has a unique interface.
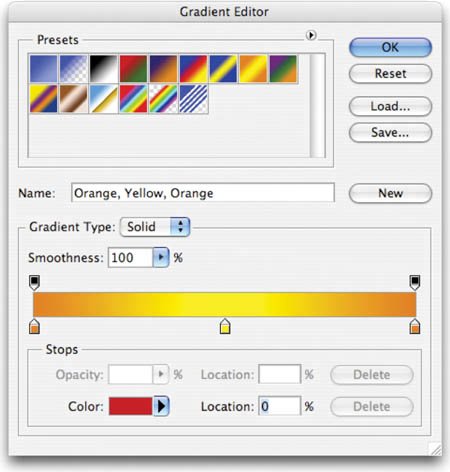 Solid Editor Solid gradients blend from one color to another, providing a traditional gradient type. 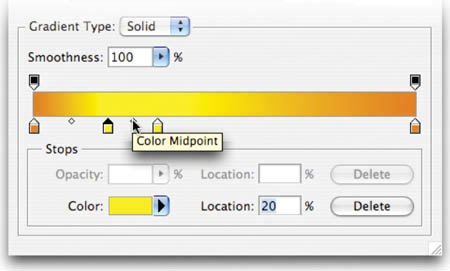 Smoothness: This option controls the rate at which the colors blend. You can set it to be gradual or steep. The larger the number, the more Photoshop optimizes the appearance of the blend. Opacity stops: A gradient can contain blends between opacity values. To add a stop, click in an empty area on the top of the gradient spectrum. To adjust a stop, click it, and then modify the opacity field. Color stops: A simple gradient contains only two colors. However, you may want to use a more complex gradient in your project. You can click below the gradient to add another color stop. Double-click a stop to edit its color with the Adobe Color Picker. Stop Editor: Selected gradient stops can be adjusted numerically. You can edit the opacity, color, and location (0100%, read left to right.) Midpoint: Between stops are midpoints. By default, the midpoint is halfway between two stops. You can adjust the midpoint to shift the balance of the gradient.
Noise Editor Noise gradients use a specified range of color to create noise. These gradients do not blend smoothly between colors, but rather create a new gradient each time the Randomize button is clicked. 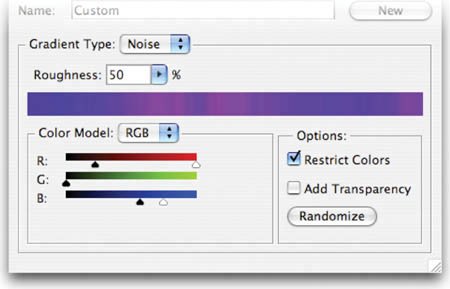 Roughness: Noise gradients use a roughness setting to determine how many different colors are used to create noise. Color Model: You can choose between three models: Red-Green-Blue, Hue-Saturation-Brightness, or Lab. Color Range sliders: Adjust the range of colors available to the gradient. Bring the black and white sliders closer together to limit the amount of color present in the noise gradient. Options: You can choose to further restrict colors as well as introduce random transparency. To create a new gradient, click the Randomize button. Every time you click, a new gradient will be generated. New button: To add a gradient to the Presets window, type a name into the name field then click the New button. This new gradient is not yet permanently saved, but stored temporarily in the Preferences file. You must click the Save button and navigate to your Presets folder (inside the Photoshop application folder). Be sure to append the file name with .grd to inform Photoshop that it is a gradient set.
Gradient Tool You can use the Gradient tool to manually draw a gradient on a layer. To access the Gradient tool, select it from the Toolbox, or press G. The Paint Bucket shares the same well as the Gradient tool, so if you don't find the Gradient tool, press Shift+G to cycle through your tools. The Gradient tool can use any gradient you create in the Gradient Editor or from the Presets menu. To select a gradient, you can choose from available ones in the Options bar. You can also load preset libraries or manually load gradients by accessing the palette's submenu. You must choose one of these five methods to build your gradient: 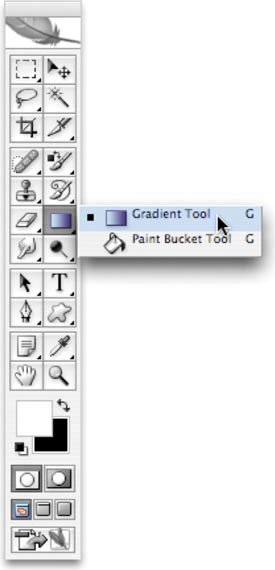 Linear Gradient (A): This gradient blends from the starting point to the ending point in a straight line. Radial Gradient (B): This gradient blends from the starting point to the ending point in a circular pattern.   Angle Gradient (C): This gradient blends in a counterclockwise sweep from the starting point. Reflected Gradient (D): This gradient blends symmetrically on both sides of the starting point. Diamond Gradient (E): This gradient blends in a diamond-shaped pattern outward from the starting point.
You have a few available options to further modify the gradient: You can specify a blending mode to affect how the gradient is applied to the layer. (For more on blending modes, see Chapter 9.) To reverse the direction of colors in the gradient, check the Reverse box. To create a visually smoother blend by adding noise, check the Dither box. To use a gradient's built-in transparency, check the Transparency box.
Let's use the Gradient tool to fix a common problem, a washed out sky: 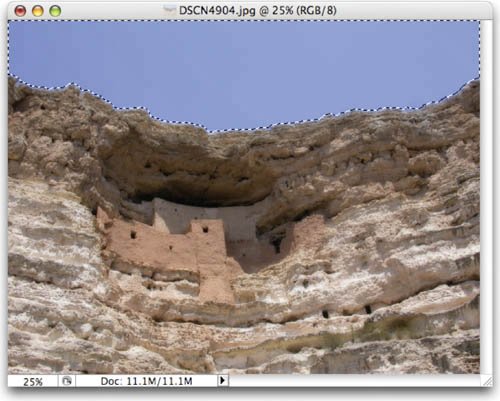 1. | Open the file Cliff.tif from the Chapter 6 folder.
| 2. | Use the Select > Color Range Command to create an active selection in the sky area. Adjust Fuzziness to get a gentle selection.
| | | 3. | Load a dark blue as your foreground color and a lighter blue as your background color.
 | 4. | Choose the Gradient tool and select a Linear Gradient.
| 5. | Select the Foreground to Background gradient from your preset list (it's the first one).
| 6. | Click at the top of the sky and drag down towards the rocks.
|
The sky should look more natural now with greater variation in colors. 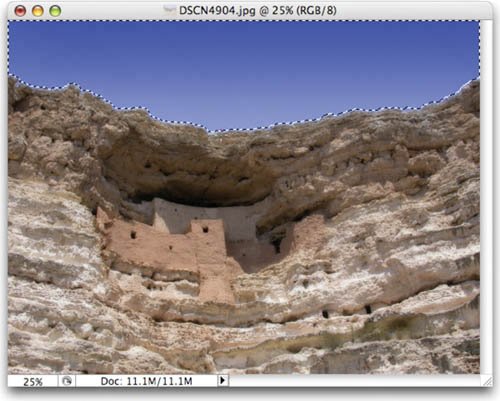 Gradient Maps Offer Unique Color Gradient Maps are another way to harness the power of gradients to enhance an image. The Gradient Map can be applied as an adjustment layer or image adjustment command (stick with the adjustment layer for greater flexibility). You can create a new Gradient Map by choosing Layer > New Adjustment Layer > Gradient Map. 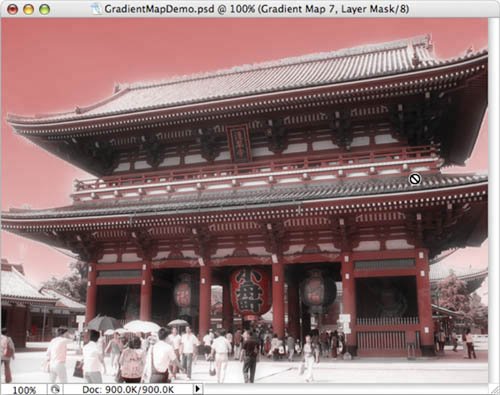 The Gradient Map will map a new gradient to the grayscale range of an image. A two-color gradient produces a nice duotone effect. Shadows map to one of the color stops of the gradient fill; highlights map to the other. The midtones map to the gradations in between. A multicolored gradient or noise gradient can add interesting colors to an image. This is an effective technique for colorizing textures or photos. 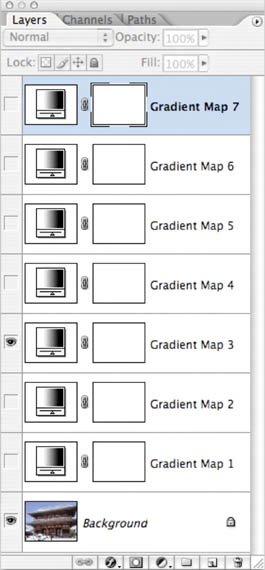 Open the file GradientMapDemo.psd to see Gradient Maps in action. Turn on each map one at a time to see their effect. By using blending modes in conjunction with the Gradient Map, you can get a more pleasant effect. |
|