Working with Color


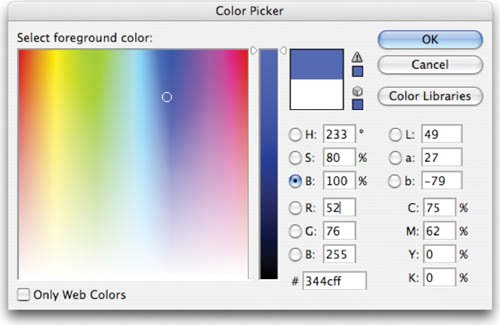
Working with painting and drawing tools requires you to use color. Photoshop offers several flexible ways to choose colors. You can sample a color from an open image, choose a color from a library, or mix a new color by entering numerical values. Which method you use will depend on a mixture of personal choice and the job at hand. Let's explore the different options.

Adobe Color Picker

The Adobe Color Picker is a consistent way to choose colors while using any Adobe software program. Both Macintosh and Windows systems have their own color pickers, but its best to stick with the standardized Adobe Color Picker as it is more full-featured and cross-platform.

You can choose a color from a spectrum or numerically. Use the Adobe Color Picker to set the foreground color, background color, and text color. Additionally, you can use the colors for gradients, filters, or layer styles.

Double-click a color swatch (such as in the Toolbox) to open the Color Picker. In the Adobe Color Picker, you can select colors based on:
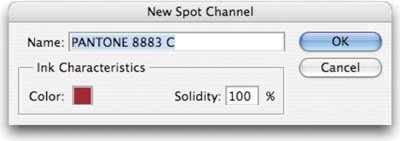
  • Hue Saturation Brightness (HSB)

  • Red Green Blue (RGB)

  • Lab color

  • Cyan Magenta Yellow Key (or Black) (CMYK)

Color Libraries

In some cases, designers need to access specific colorsthose that come from a particular color and brand of ink. This is most often to match colors used by a specific company. For example, McDonald's always uses the same red on all of its printed materials. This helps create a specific look or identity by branding based on color.

A designer can keep color consistent by specifying Pantone colors. The Pantone Matching System (PMS) is the most widely accepted color standard in the printing industry (www.pantone.com). Each color is assigned a PMS number, which corresponds to specific ink or mixing standard, thus ensuring that a client will get consistent printing results. Accessing Pantone colors within Photoshop is easy:
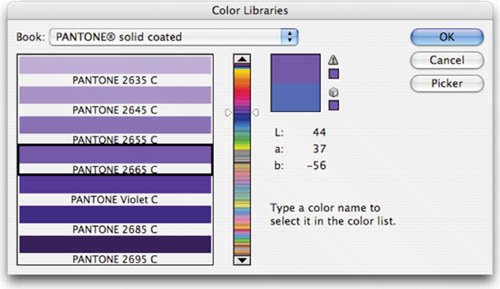
1.

Activate the Adobe Color Picker by double-clicking the foreground or background color swatch.

2.

Click the Color Libraries (or Custom) button. The Color Libraries window opens.

3.

From the Book menu, you must choose among several options. Always ask your clients for specific color information. You can quickly jump to a specific color by typing in its number.

4.

When you have a color selected, click OK.

5.

Photoshop loads the closest equivalent color into your color picker. Essentially, the Pantone color will be simulated as accurately as possible by an RGB or CMYK equivalent.

6.

If you need to have the exact color for printing, you will need to make a spot color channel.

Creating Spot Color Channels

While most jobs use a four-color process to simulate colors, you may need to use a special printing technique called spot colors. Spot color channels are specialty channels used by a printer to overprint special inks on top of your image. You can create a new spot channel based on a selection.

Color Libraries can also be loaded as color swatches. Just click the submenu (triangle) in the upper-right corner of the Swatches palette. Choose the library you need from the pop-up list.

Video Training
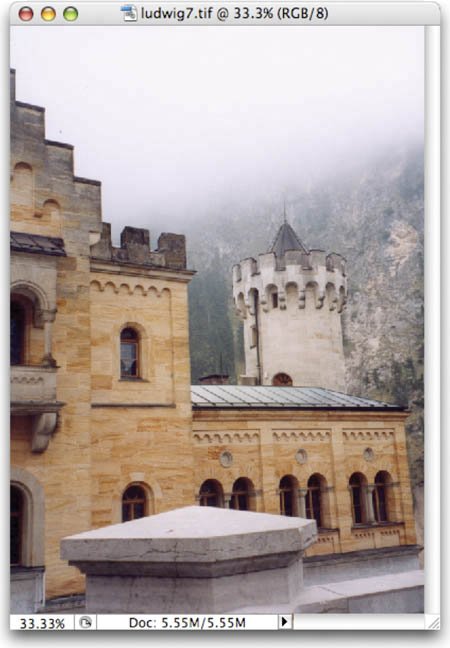
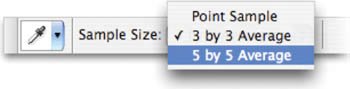
Spot Color Channels


1.

Open the file Postcard.tif from the Chapter 6 folder on the DVD-ROM. This layered TIFF file has been mostly prepped for printing at a commercial printer (note that it's in cmyk mode). One of the last steps is to specify the spot color ink for the type.

2.

Choose Window > Channels to display the Channels palette.

3.

Select the layer Surf - PMS 8883 C. Cmd-click (Ctrl-click) on the layer's thumbnail to create an active selection.

4.

Switch to the Channels palette. Cmd-click (Ctrl-click) on the New Channel button in the Channels palette.

5.

If you made a selection, that area is filled with the currently specified spot color. If you want to modify the color, click the swatch next to the word Color.

6.

Enter a name for the spot color channel. If you've chosen a custom color, the channel automatically takes the name of that color.

7.

Set Solidity to 100%. This will simulate the spot color within your Photoshop file.

8.

Click OK to create the spot color channel.

Eyedropper Tool

The Eyedropper tool lets you sample colors from an open document. This can be a useful way to choose colors that work well with an image. Let's try out the tool:

Using the Eyedropper tool, you can sample the color of the castle's bricks. This can be useful for painting as well as color correction. For example, you can check the color details of the bricks on two different shots of the castle. You could then adjust color to make the images better match. For more on adjusting color, see Chapter 10, "Color Correction and Enhancement."
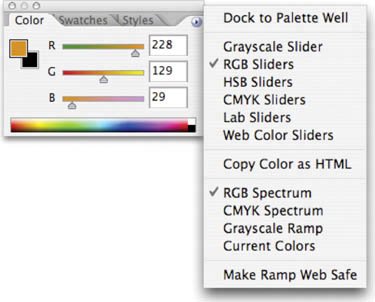
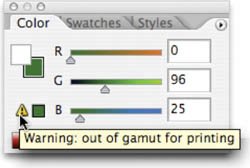
1.

Open the file Ludwig7.tif from the Chapter 6 folder.

2.

Select the Eyedropper tool from the Toolbox or press the keyboard shortcut I.

3.

Adjust the sample size in the Options bar:

  • Point Sample: This reads the value of a single pixel. It is very sensitive to clicking as you can have slight variation in color at the pixel level. For example, if you clicked on a blue sky, adjacent pixels could vary from each other.

  • 3 by 3 Average: This reads the average value of a 3 x 3 pixel area. This is a more accurate method for selecting a color using the Eyedropper tool.

  • 5 by 5 Average: This method reads the average value of a 5 x 5 pixel area. It creates a more representative color sample.

4.

Click the brick area to set the Foreground Color.

5.

Option-click (Alt-click) the sky area to set the Background Color.

Color Palette

The Color palette is another way to access color without having to load the Adobe Color Picker. The Color palette shows you the values for the Foreground and Background colors. You can quickly mix or pick new colors from within the palette.

  • You can adjust the sliders to mix a new color. To change color models, click the palette's submenu.

  • You can click the spectrum across the bottom of the palette to pick a new color.

The Color palette may display two alerts when you select a color:

  • An exclamation point inside a triangle means the color cannot be printed using CMYK printing.

  • A cube means the color is not Web-safe for color graphics viewed on a monitor set to 256 colors.

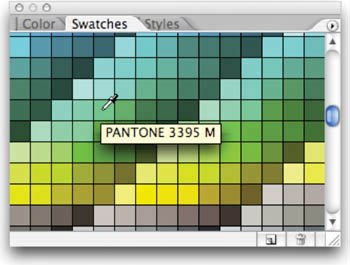
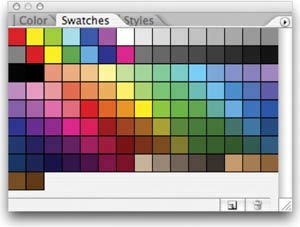
Swatches

The Swatches palette holds color presets. You can quickly access frequently used colors by clicking their thumbnails. You can load preset swatches by clicking the Swatches palette submenu (top-right arrow). Additionally, Table 6.1 shows several important shortcuts when working with the Swatches palette.

Table 6.1. Keyboard Shortcuts for the Swatches Palette

Result

Macintosh

Windows

Create new swatch from foreground color

Click empty area of palette

Click empty area of palette

Select foreground color

Click swatch

Click swatch

Select background color

Cmd-click swatch

Ctrl-click swatch

Delete color swatch

Option-click swatch

Alt-click swatch


Understanding. AdobeR PhotoshopR. Digital Imaging Concepts and Techniques
Understanding Adobe Photoshop: Digital Imaging Concepts and Techniques
ISBN: 0321368983
EAN: 2147483647
Year: 2004
Pages: 129

flylib.com © 2008-2017.
If you may any questions please contact us: flylib@qtcs.net