Input Elements
|
|
If you're unfamiliar with web lingo, the context in which we're using some terms might be confusing. Think of an HTML form as an element that accepts data. The input element is defined by a second tag, <input>. First, the <form> tag spells out specifics about where the input is going and how; the <input> tag defines the type of input element the page will use to collect that data. There are several types of input elements.
Submit button A Submit button sends the form contents to the server. For instance, the following statement displays a Submit button with the caption "Submit":
<input type="submit" name="Submit data" value="Submit">When you click the Submit button, the form element sends the form content (including user input) to the server for processing.
Reset button A Reset button clears all input and resets the form to its original settings. For example, the following statement displays a Reset button element with the caption "Reset":
<input type="reset" name="Reset" value="Reset">When you click the button, the form clears the accompanying form.
General-purpose button Clicking a general-purpose button executes a client-side script that defines and fulfills the button's purpose. You might display a button with the caption "OK" as in the following statement:
<input type="OKbutton" name="OK" value="OK", onClick="OKbutton()">The OKbutton() parameter is a custom routine that performs a specific task when you click the button. Specifically, when you click the button, the form executes your OKbutton() routine. (OKbutton() isn't a real routine; it's just a fictitious name we're referring to for the sake of the example.)
Checkbox control A checkbox control lets a user select more than one item in a list. For instance, the following statement displays a checkbox element with the text label "Show Frame":
<input type="checkbox" name="chkFrameOn" value= "FrameOn" checked>Show Frame</input>When selected, this element returns the value "FrameOn". The checked attribute selects the item when the page loads.
Radio button Use a radio button to limit a user to only one item in a list or group. For instance, the following statement displays two radio button elements with the text labels "Show Frame" and "Hide Frame":
<input type="radio" name="optFrame" value="Frame On" checked>Show Frame</input> <input type="radio" name= "optFrame" value="Frame Off">Hide Frame</input>When selected, either element returns the value attribute. The checked attribute selects the item when the page is loaded. You should give all items in the same radio group the same name.
Image control An alternative to the Submit button, the image control displays an image (or an icon) instead of the simple gray graphic button. For example, the following statement responds just as a submit button element, but displays a graphic file named OKcheck.jif instead of a button with a text caption:
<input type="image" src="/books/1/127/1/html/2/OKcheck.gif">Single-line text input Use a single-line text input element when you have a single line of user input to capture. For instance, the following statement accepts an entry that's 15 or fewer characters:
<input type="text" name="txtLastName" value="" maxlength="15">Password input This element is the same as the single-line text input, but the password input displays asterisk characters (*) instead of the actual text the user enters. The following statement disguises the password entry as the user enters it:
<input type="password" name="pwdLogOn" value="">Keep in mind that the password isn't disguised or encrypted when transferred to the server. A password form field isn't a secure way to transmit user identification information.
Multiline text input This element accepts several paragraphs of text. For example, the following statement displays a text element that's 20 characters wide and 5 rows deep:
<textarea name="txtNote" cols="20" rows= "5">Additional information</textarea>
Working with Input Elements
At this point, we want to actually display some of these input elements. To do so, you'll need to open Dreamweaver MX or a text editor to create the simple files and then display them in a browser. You'll also need to install a web server, if you haven't done so already. (See Chapter 2 for instructions on installing and setting up your web server.)
We'll save our example files in a folder off the local system's web root directory-C:\Inetpub\ wwwroot\MasteringDreamweaver\Chapter4.
On the CD-ROM We strongly encourage you to key in all the code to create the example files yourself. To check your work, compare your files with the example files on the CD accompanying this book.
The first step is to open Dreamweaver MX or a text editor and enter the script shown in Listing 4.1. In Dreamweaver MX, choose File ® New and then choose Dynamic Page from the Category list. Next, choose ASP VBScript from the Dynamic Page list and click Create. You can name the file anything you like, but be sure to save the file using the .asp extension if you're using a text editor. The example file is named ch4list1.asp.
At this point, we just want you to have the satisfaction of actually seeing a script work. In a real-world example, the form's action property would probably call a second script that performs a custom task or submits the form content to the server. Adding a second file to the mix might be a tad overwhelming for the novice. Our button simply calls the same file, although you do see a bit of action when clicking the button displays the button's value on the page.
Listing 4.1: Ch4list1.ASP
<%@ Language=VBScript %> <% Response.Write Request.Form("SubmitTest") %> <html> <head> <title>Chapter 4, Listing 1 Example</title> </head> <body> <form name="Click Me" method="post" action="ch4list1.asp"> ...<input type="Submit" name="SubmitTest" value="It worked!"> </form> </body> </html> | Tip | The double quotation marks surrounding each attribute aren't always necessary. HTML requires these quotation marks only when the value contains a space character. We recommend you get in the habit of enclosing all attributes in quotation marks because it's so easy to forget them. In contrast, XHTML and XML require these quotation marks, which is another good reason to include them all the time. If you upgrade your HTML script to XHTML or XML, you'll save a lot of debugging time if your code already includes all the necessary quotation marks. |
To run the .asp file, open your browser and enter the appropriate address. For our example, we're running Internet Information Services (IIS), Microsoft's web server, so the complete address is
http://localhost/MasteringDreamWeaver/Chapter4/ch4list1.asp
The result is the simple page shown in Figure 4.1. Click the button to display its value, "It worked!" and redisplay the button, as shown in Figure 4.2.
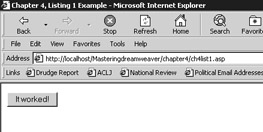
Figure 4.1: Our simple form displays a Submit button.
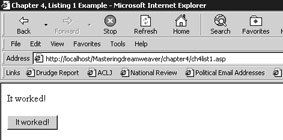
Figure 4.2: Clicking the button displays the button's value.
Now, let's run a more complex example-one that actually interacts with a sample database. Specifically, let's query the Northwind sample database that comes with Microsoft Access for orders pertaining to specific customers. (SQL Server has a version of this same database, named NorthwindCS.SQL, if you want to use SQL Server data.) A bit of preparation is involved before we can move on to the script.
First, copy the Northwind sample database to your web root folder. We'll be working from the folder C:\Inetpub\MasteringDreamweaver. You can work with almost any database; just be sure to copy it to the right web folder.
Then be sure the folder is shared by opening Windows Explorer and locating your sample web folder. Right-click the folder, choose Properties from the shortcut menu to open the Properties dialog box, and click the Web Sharing tab. Select the Share This folder option, and click OK. If Windows displays the Edit Alias dialog box, accept the default options and then click OK to close the Properties dialog box.
Any time you want a web page to connect to data, you need a data link. Our current example uses an Open Database Connectivity (ODBC) Data Source Name (DSN). A DSN stores data such as the database name, its path, and user and password information. This information is required in order to connect to the database. Although OLE DB connections are superior technology, DSNs are quicker and easier to create. A DSN is more than adequate for our example. (For more information on OLE DB connections, see Chapter 10.)
There are two types of DSN: System and File. A System connection is available to all users on the system. You choose System when creating website connections. A File DSN requires a corresponding driver, and only those users with the appropriate driver installed can connect via a File connection. To create a System DSN on a Windows 2000 or Windows 98 system, follow these steps:
-
Choose Start button ® Settings ® Control Panel to open Control Panel.
-
Double-click Administrative Tools to open the Administrative Tools folder. (Windows 98 users can skip this step.)
-
Double-click Data Sources (ODBC) to open the ODBC Data Source Administrator dialog box.
-
Click the System DSN tab, and then click Add to open the Create New Data Source dialog box.
-
Locate the appropriate driver in the list, and then click Finish.
-
Back in the ODBC Data Source Administrator dialog box enter a name for the new DSN.
-
Enter a description for the connection.
-
Click Select to locate the file to which you're connecting.
-
Click OK. Windows adds the new System DSN to the System Data Sources list.
-
Close Control Panel.
If you're using Windows XP's default display theme:
-
Choose Start ® Control Panel.
-
Click Performance and Maintenance, and then click Administrative Tools to open the Administrative Tools folder.
-
Double-click Data Sources (ODBC) to open the ODBC Data Source Administrator dialog box.
-
Follow steps 4 through 10 earlier in this sidebar.
Creating a Local DSN
Now you're ready to create a connection to the sample database. To do so, create a System DSN. Our example connects to the Northwind sample database in the web root directory C:\Inetpub\wwwroot\ MasteringDreamweaver. To complete this last preparation, follow these steps:
-
Complete steps 1 through 4 (appropriate to your operating system) in the accompanying sidebar.
-
Select the Microsoft Access Driver, and then click Finish.
-
Name the DSN NorthWindDSN and enter the following description, "Connection to North- wind for Examples," as shown in Figure 4.3.
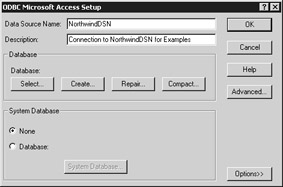
Figure 4.3: Name and describe the DSN. -
Click Select to open the Select Database dialog box and locate C:\Inetpub\wwwroot\ MasteringDreamweaver\Northwind.mdb or the appropriate path for your system.
Make sure Windows adds the new DSN to the System Data Sources list in the ODBC Data Source Administrator dialog box, as shown in Figure 4.4.
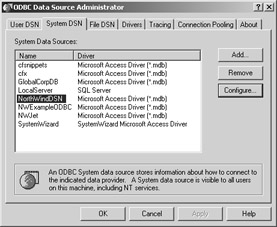
Figure 4.4: Windows adds the new ODBC DSN.
Now let's create a new form that queries the user for a specific customer name and then returns a list of orders for that customer. To do so, open your text editor, enter the script shown in Listings 4.2 and 4.3, and save the files as .asp files.
Listing 4.2: CH4LIST2.ASP
<html> <head> <title>Chapter 4, Listing 2 Example</title> </head> <body> <form name="frmChapter4Listing2" method="post" action="ch4list3.asp" > <p> Enter the customer's name and then click the Submit button to see a list of orders . <p> <tr> ...<td width="45%">Customer </td> ...<input type="text" name="txtcompanyname"> </tr> ...<input type="submit" name="Submit" value="Submit"> </form> ...
Listing 4.3: CH4LIST3.ASP
<% Dim companyname Set Conn = Server.CreateObject("ADODB.Connection") Conn.Open "NorthWindDSN" companyname = Request.Form("txtcompanyname") SQL = "SELECT Customers.CompanyName, Orders.OrderID FROM Customers INNER JOIN Orders ON Customers.CustomerID = Orders.CustomerID WHERE CompanyName = '" & companyname & "'" Set rst = Conn.Execute(SQL) %> <%Do While Not rst.EOF%> ...<%Response.Write rst("CompanyName")%>  ...<%Response.Write rst("OrderID")%> ...<BR> ...<%rst.MoveNext Loop %> Now, open ch4list2.asp in your browser, which displays a simple text input element and a Submit button. Enter the customer name Ernst Handel, as shown in Figure 4.5, and then click the Submit button.
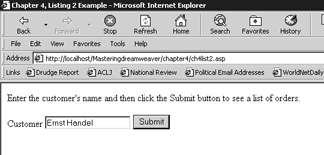
Figure 4.5: Enter a customer name.
The results are shown in Figure 4.6-this customer has several orders. Notice that the filename in the address has changed from ch4list2.asp to ch4list3.asp. That's because the script instructed your browser to open the new page, ch4list3.asp in the <form> tag.
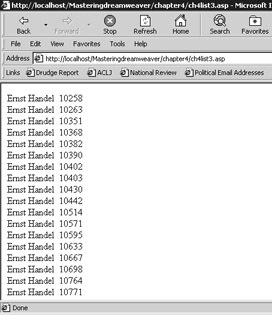
Figure 4.6: The page returns orders for the matching customer.
The form element and the input element in ch4list2.asp work together. The input element accepts data. When you enter a value in the input element named txtcompanyname and press Enter or click the Submit button, the action parameter in the form element passes that value to the script in ch4list3.asp.
The browser then opens ch4list3.asp and a connection to the NorthwindDSN data source (that we created earlier) and assigns the passed value to a variable named companyname. Next, the script opens a recordset named rst based on the SELECT statement, which includes the variable companyname in the statement's criteria. In the current example, this statement reduces to the following:
SELECT Customers.CompanyName, Orders.OrderID FROM Customers INNER JOIN Orders ON Customers.CustomerID = Orders.CustomerID WHERE CompanyName = 'Ernst Handel'
The Do While loop then displays the CompanyName and the OrderID values from each record in the resulting recordset in the browser. That's what you saw in Figure 4.6.
You don't have to use two .asp files to accomplish this task. Listing 4.4 combines both files. As you can see in Figure 4.7, your browser displays the results of the query in the same form instead of on a new blank page.
Listing 4.4: CH4LIST5.ASP
<%Response.Clear%> <body> <form name="frmChapter4Listing4" method="post" action="ch4list4.asp" > <p> Enter the customer's name and then click the Submit button to see a list of orders. <p> <tr> ...<td width="45%">Customer </td> ...<input type="text" name="txtcompanyname" value=""> </tr><input type="submit" name="Submit" value="Submit"> </form> <% Dim companyname Set Conn = Server.CreateObject("ADODB.Connection") Conn.Open "NorthWindDSN" companyname = Request.Form("txtcompanyname") SQL = "SELECT Customers.CompanyName, Orders.OrderID FROM Customers INNER JOIN Orders ON Customers.CustomerID = Orders.CustomerID WHERE CompanyName = '" & companyname & "'" Set rst = Conn.Execute(SQL) %> <BR> <%Do While Not rst.EOF%> ...<%Response.Write rst("CompanyName")%>  ...<%Response.Write rst("OrderID")%> ...<BR> ...<%rst.MoveNext Loop Set rst = Nothing %> 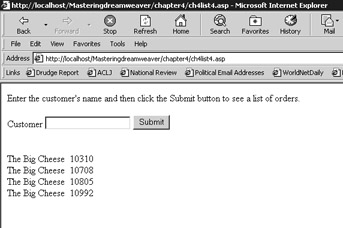
Figure 4.7: The results of combining our two previous scripts
Handling Hidden Values
There's one last type of element that you should know about-the hidden element. This element stores values that you don't want displayed on the web page. For instance, you might store a value that will be re-evaluated on a subsequent form. To save the user the trouble of re-entering the data, you can store the data as a hidden value.
Those stored values aren't invisible, because the user can still view your source script and stored values by choosing View ® Source. Consequently, you'll want to use this attribute carefully. Don't use it to store confidential information such as passwords, user names, and so on. To store a hidden value, use the input type element in the form as follows:
<input type="hidden" value=returnedvalue>
The returnedvalue parameter is the value you're hiding from view.
| Note | You'll learn more about implementing security on your website in Chapter 17. |
Working with Select Elements
The previous section discussed input elements that required the user to actually enter data. Sometimes the user need only choose an item from a predefined list. If you're familiar with the Windows environment, you're already used to these types of controls-they're known as combo and list controls. HTML offers combo and list equivalents known as the drop-down and fixed list, respectively, although both are really the same element-the Select element. The user can select only one item from a drop-down list . Even though lists, by default, restrict the user to only one item, the user can select more than one item from a fixed list.
To create a drop-down list control, use the <select> tag with its many attributes in the following form:
<select name=elementname> <option selected value=value>optiontext</option> <option value=value>optiontext</option> ... </select>
The elementname parameter is the name of the element, value is the option's value, and optiontext
is the text displayed along with the item. The control returns the selected item's value unless there's no value attribute. In addition, the selected attribute value is selected by default when the form data is submitted. In that case, the control returns optiontext.
| Warning | Don't forget to enclose the value parameter in double quotation marks if value contains a space character. Otherwise, the control returns only the first word as the control's value. |
Creating a fixed list requires an extra attribute, the size attribute, in the following form:
<select name=elementname size=numberofitems>
The numberofitems parameter specifies the number of items initially displayed in the fixed list. If the list allows for more than one selected item, add the multiple attribute in the following form:
<select multiple name=elementname size= numberofitems>
Now, let's add a select element to our previous example. Specifically, we'll exchange the original input control for a list control that displays specific customer names. Doing so limits the potential for human error because the user must choose an item from the list instead of typing a value. The script then uses the selected item's return value as the query's criteria. When choices are restricted to an existing set of items, a list element is always preferable to user input.
The script in Listing 4.5 displays a fixed list of only two items. When you choose an item, the script displays the appropriate order records for that particular customer, as shown in Figure 4.8. When you delete the size attribute from the <select> element statement, the browser displays a drop- down control similar to the one shown in Figure 4.9.
Listing 4.5: CH4LIST5.ASP
<%Response.Clear%> <body> <form name="frmChapter4Listing5" method="post" action="ch4list5.asp" > <p> Enter the customer's name and then click the Submit button to see a list of orders. <p> <tr> <td width="45%">Customer: </td><br> ...<select name="lstcompanyname" size="2"> ......<option value="Ernst Handel">Ernst Handel</option> ......<option value="The Big Cheese">The Big Cheese</option> ...</select> ...<input type="submit" name="Submit" value="Submit"> </form> </tr> <% Dim companyname Set Conn = Server.CreateObject("ADODB.Connection") Conn.Open "NorthWindDSN" companyname = Request.Form("lstcompanyname") SQL = "SELECT Customers.CompanyName, Orders.OrderID FROM Customers INNER JOIN Orders ON Customers.CustomerID = Orders.CustomerID WHERE CompanyName = '" & companyname & "'" Set rst = Conn.Execute(SQL) %> <BR> <%Do While Not rst.EOF%> ...<%Response.Write rst("CompanyName")%>  ...<%Response.Write rst("OrderID")%> ...<BR> ...<%rst.MoveNext Loop Set rst = Nothing %> 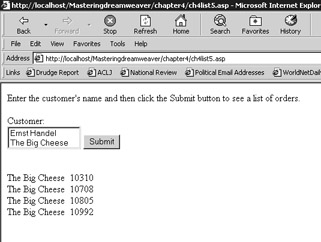
Figure 4.8: The <select> element displays a fixed list.

Figure 4.9: Use the <select> element to display a drop-down list.
|
|
EAN: 2147483647
Pages: 214