Adding Web Controls to a Form
|
|
A form isn't much use by itself—it's just a container. It's the objects, or controls, you put in that container that make functional pages possible. HTML provides several types of controls, and you'll find the basic controls all listed in Chapter 4. We're not going into detail about those controls here, but we will show you how Dreamweaver MX allows you to quickly add them to the form. And we'll cover a couple that Dreamweaver MX packages and provides as well.
You can add controls by typing the code in the Code window, by choosing Insert ® Form Objects, as shown in Figure 20.8, or by choosing the appropriate control from the Forms tab of the Insert bar, as shown in Figure 20.9. Figure 20.9 also points out the types of the controls corresponding to the individual icons.
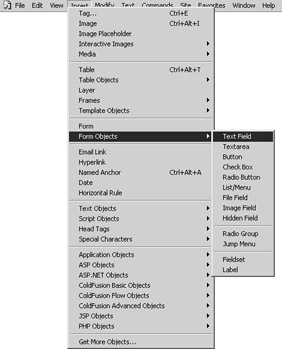
Figure 20.8: The Insert menu lets you add various form controls.
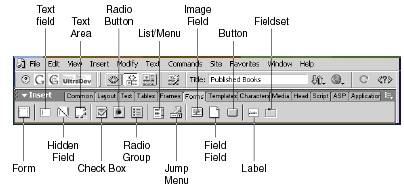
Figure 20.9: The Forms tab of the Insert bar lets you quickly add controls by clicking the proper icon.
Just as when you're adding a form, adding a form control to the form opens the Tag Editor dialog box, in which you can specify properties appropriate to that control. Dreamweaver MX provides a couple of nonstandard controls that help in the creation of forms: the Radio Group control and the Jump Menu control.
| Warning | If you try to add a form control to the page, Dreamweaver MX automatically adds a <form> tag around the control unless you're already inside a <form> tag when you add the control. Make sure your cursor is within the form to which you want to add a control before you insert it in the page. |
The Radio Group Control
Traditionally, when you want to create a radio button group—a group of radio buttons that act as one unit so that only one in the group can be selected—either you add a series of radio buttons to the form and then rename them all the same, or you copy and paste a single radio button. Dream- weaver MX lets you quickly add a series of buttons and actually format them just by clicking a single button. Click the Radio Group button to open the Radio Group dialog box, as shown in Figure 20.10. (You'll open this dialog box regardless of whether your cursor is in the Code window.)
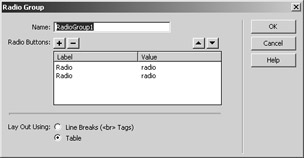
Figure 20.10: The Radio Group dialog box lets you quickly add a formatted group of radio buttons to your form.
You can control the quantity of buttons in the Radio Group by clicking the plus and minus symbols to add and remove buttons. You can change the label and the value of each button by clicking the text in the middle, as shown in Figure 20.11.

Figure 20.11: We've changed the label and value for each button to suit our application's needs.
The Lay Out Using option is a handy item that makes us wish Macromedia had included a Check- box Group as well. This option lets you control how the radio button group will be displayed in your HTML page, either by separating the items with line breaks or by putting the items in a table. Figure 20.12 shows an example of this behavior; you can see that indeed the group is enclosed within a table. You can see the table code in the Code window, as well.
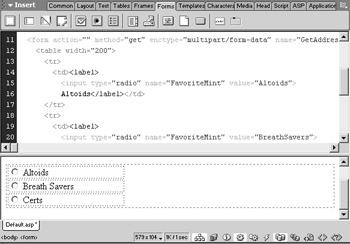
Figure 20.12: Dreamweaver MX will automatically put the button group in a table for you.
The Jump Menu Control
You can use the Jump Menu control to quickly and easily add a drop-down navigation menu to your pages. You specify the name and the URL for each item in the Jump Menu control, and Dreamweaver MX does the rest. It's that easy! You don't have to worry about creating all the JavaScript behind the scenes, because Dreamweaver MX does it for you. So let's add a Jump menu that let's the user jump to bookseller websites.
Click the Jump Menu icon to open the Insert Jump Menu dialog box, which is shown in Figure 20.13. We've added Amazon.com, Barnes & Noble, and Hawley-Cooke to our list. Notice that the URLs include http://. Without http://, the Jump Menu control assumes you're specifying a relative link—a link to a page that's on the same server as the menu's page. Once you test your menu, you'll see a functional drop-down list similar to that in Figure 20.14.
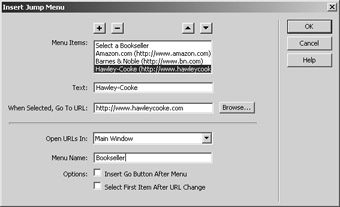
Figure 20.13: The Jump Menu control lets you quickly add a drop- down menu to your pages.
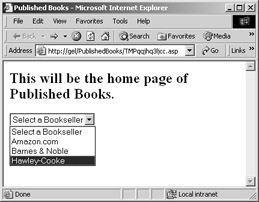
Figure 20.14: Our menu includes links to booksellers.
Now that we've covered the basics for adding an HTML form, let's look at how to make them useful. Next, we'll work with actual data.
|
|
EAN: 2147483647
Pages: 214
- Challenging the Unpredictable: Changeable Order Management Systems
- The Second Wave ERP Market: An Australian Viewpoint
- A Hybrid Clustering Technique to Improve Patient Data Quality
- Relevance and Micro-Relevance for the Professional as Determinants of IT-Diffusion and IT-Use in Healthcare
- Development of Interactive Web Sites to Enhance Police/Community Relations