Deploying a Sample Web Application
|
| < Free Open Study > |
|
We are now in the position of being able to pull together all of the information in this chapter as a complete example web application.
This section will cover all of the code required to produce a sample web application. Most of the code will not be explained in great detail, as we will be focusing upon the deployment of the complete application. We will however discuss the servlet code in the application, and all of the code required to run the example can be found in the code download for the book.
The Store Scenario
The example used in this section is the ubiquitous web store application. We will show a simple front page, a simple shopping cart, and a simple check out page. The pages will be output from servlets (since this is the theme of the book). The checkout page will be protected by a simple file based security mechanism.
In the following section we will show the servlet code for the application. In the next section we will examine the deployment descriptor for the system. After we have seen all of the necessary components, we will package it up into a WAR file. The container that will be examined is Tomcat 4.0.
Servlet Code from the Store Web Application
There are three servlets from the sample application that we are going to look at:
-
MainServlet - displays the store contents
-
CartServlet - implements the shopping cart
-
CheckOutServlet - handles product purchasing
Let's take a look at each of these in turn.
MainServlet
The MainServlet has the job of displaying the contents of our store.
package store; import java.io.*; import java.util.*; import javax.servlet.*; import javax.servlet.http.*; import javax.xml.parsers.*; import org.xml.sax.*; import org.xml.sax.helpers.*; import org.w3c.dom.*; public class MainServlet extends HttpServlet {
The init() method of MainServlet is called once when the servlet is first constructed (either when the server starts, or when the servlet is first requested). This method reads the name of the XML file describing the products, reading this filename from a ServletContext initialization parameter:
public void init() throws ServletException { ServletContext context = getServletContext(); InputStream productsFile = context .getResourceAsStream((String) context .getInitParameter("productsFile"));
It then instantiates a DocumentBuilder object, and uses it to parse the file:
DocumentBuilderFactory dbf = DocumentBuilderFactory.newInstance(); DocumentBuilder db = null; try { db = dbf.newDocumentBuilder(); } catch (ParserConfigurationException pce) { throw new ServletException(pce.getMessage()); } Document doc = null; try { doc = db.parse(productsFile); } catch (IOException ioe) { throw new ServletException(ioe.getMessage()); } catch (SAXException se) { throw new ServletException(se.getMessage()); }
Next it retrieves the products' names and values:
NodeList productsList = doc.getElementsByTagName("product"); HashMap products = new HashMap(); Node product; for (int ctr = 0; ctr < productsList.getLength(); ctr++) { product = productsList.item(ctr); NamedNodeMap attribs = product.getAttributes(); Node attrib = attribs.getNamedItem("name"); String name = attrib.getNodeValue(); attrib = attribs.getNamedItem("price"); String price = attrib.getNodeValue(); Product p = new Product(ctr, name, price); products.put(new Integer(ctr), p); }
The method then stores the product information in the ServletContext. Once this has happened, the list of products is available to all servlets in the application:
context.setAttribute("products", products); }
In our servlet, the doPost() and doGet() methods should perform the same function. Therefore, as shown below, they delegate their processing to the doGetOrPost() method:
public void doPost(HttpServletRequest req, HttpServletResponse res) throws ServletException, IOException { doGetOrPost(req, res); } public void doGet(HttpServletRequest req, HttpServletResponse res) throws ServletException, IOException { doGetOrPost(req, res); }
The following doGetOrPost() method implements the main functionality of our servlet, which is to display the products that we loaded earlier. The products are displayed in an HTML table, and a standard header and footer are included so that we can simply change the style of the page, without changing the code that displays products.
private void doGetOrPost(HttpServletRequest req, HttpServletResponse res) throws ServletException, IOException { PrintWriter out = res.getWriter();
Here's where we include the header:
RequestDispatcher dispatcher = req.getRequestDispatcher("/header.html"); dispatcher.include(req, res); HashMap products = (HashMap) getServletContext().getAttribute("products");
Having retrieved the products from the ServletContext, we then output a table containing a list of the products and their prices. The table contains hyperlinked so that the user can click and add a product to the cart if desired:
Iterator it = products.values().iterator(); out.println("<table>"); while (it.hasNext()) { out.println("<tr>"); Product product = (Product) it.next(); out.println("<td><a href='Cart?add=true&'>" + product.getName() + "</a></td><td>" + product.getPrice() + "</td>"); out.println("</tr>"); } out.println("</table>");
Finally, we include a standard footer:
dispatcher = req.getRequestDispatcher("/footer.html"); dispatcher.include(req, res); } }
As you can see this servlet is fairly large. This is not surprising, as it sets up our store. The init() method handles the initialization of this servlet. In this case the initialization includes loading our stores products from an XML file. This is achieved using the line:
InputStream productsFile = context .getResourceAsStream((String) context .getInitParameter("productsFile")); This is a demonstration of how to use the ServletContext object to load resources from our application. This means that to change the products that our store stocks, we merely have to replace our XML file with another of the same form, and specify its location (relative to the root of our web app) in the deployment descriptor. The XML file used to specify products is very simple, and is shown below:
<products> <product name="Fish" price="1.99"/> <product name="Dog" price="19.99"/> </products>
To add a new product, we simply add a new <product> line.
CartServlet
The cart in our store holds one type of each product only. Obviously this is a rather forced condition, specified primarily so that we can illustrate error pages for our sample application. The code that implements our cart is another servlet and is shown below:
package store; import java.io.*; import java.util.*; import javax.servlet.*; import javax.servlet.http.*; public class CartServlet extends HttpServlet {
As with the MainServlet, the doGet() and doPost() methods delegate to a method called doGetOrPost() to prevent duplication of code:
public void doPost(HttpServletRequest req, HttpServletResponse res) throws ServletException, IOException { doGetOrPost(req, res); } public void doGet(HttpServletRequest req, HttpServletResponse res) throws ServletException, IOException { doGetOrPost(req, res); }
The doGetOrPost() method implements the main functionality of the servlet. We first check to see if we are adding to the cart, or want to display the cart:
private void doGetOrPost(HttpServletRequest req, HttpServletResponse res) throws ServletException, IOException { String adding = req.getParameter("add"); PrintWriter out = res.getWriter();
Next we retrieve the cart, if it exists, from the session. If it doesn't exist we create a new cart:
HttpSession session = req.getSession(); Cart cart = (Cart) session.getAttribute("cart"); if (cart == null) { cart = new Cart(); }
Then if we either add to the cart using the addToCart() method, or display its contents using displayCart() (we'll look more closely at these methods in a moment):
if (adding.equalsIgnoreCase("true")) { addToCart(req, cart, out); } displayCart(cart, out); }
In the addToCart() method, the item is added, and then the cart is placed into the users HTTP session.
private void addToCart(HttpServletRequest req, Cart cart, PrintWriter out) throws ItemAlreadyAddedException {
We get the item to add from the request. First we retrieve the products from the servlet context:
HashMap products = (HashMap) getServletContext().getAttribute("products");
Then we find the product represented by the ID in the request, and add it to the cart. We then add this cart to the session and finally display a confirmation message, or an error message if something goes wrong:
try { Integer id = new Integer(Integer.parseInt(req.getParameter("id"))); Product p = (Product) products.get(id); cart.addItem(p); req.getSession().setAttribute("cart", cart); out.println("<b>Succesfully added product to cart!</b><br>"); } catch (NumberFormatException nfe) { out.println("<b>Can't add product</b><br>"); } }
As mentioned earlier, a cart can only contain one of each product. If the user tries to add more than one of the same item to the cart, an ItemAlreadyAddedException is thrown.
The displayCart() method allows us to display the contents of the cart. The contents of the cart are iterated through and displayed in an HTML table:
private void displayCart(Cart cart, PrintWriter out) { Iterator items = cart.getItems(); out.println("<h1>Current Cart Contents:</h1>"); out.println("<table>"); while (items.hasNext()) { out.println("<tr>"); Product p = (Product) items.next(); out.println("<td>" + p.getName() + "</td>" + "<td>" + p.getPrice() + "</td>"); out.println("<tr>"); } out.println("</table>"); } }
CheckOutServlet
Obviously, a store is only useful if you can actually buy the products that you put into your cart. In our example store the CheckOutServlet handles this. Obviously, being an example, you cannot really buy the items. The checkout process in our store simply allows the user to login, and displays the contents of their cart. The code behind our CheckOutServlet is listed below.
package store; import java.io.*; import javax.servlet.*; import javax.servlet.http.*; public class CheckOutServlet extends HttpServlet { public void doPost(HttpServletRequest req, HttpServletResponse res) throws ServletException, IOException { doGetOrPost(req, res); } public void doGet(HttpServletRequest req, HttpServletResponse res) throws ServletException, IOException { doGetOrPost(req, res); }
This servlet again does the bulk of its work in the doGetOrPost() method. The method simply includes the output of the CartServlet, and then presents a button for the user to click, which will take them to a confirmation page (not shown here):
private void doGetOrPost(HttpServletRequest req, HttpServletResponse res) throws ServletException, IOException { PrintWriter out = res.getWriter(); String userName = req.getUserPrincipal().getName(); out.println("<h1>Hello again " + userName + "</h1>"); RequestDispatcher dispatcher = req.getRequestDispatcher("/Cart?add=false"); dispatcher.include(req, res); out.println("<br>Please Click Confirm to check out"); out.println("<form action='confirmed.html'> <input type='submit' value='Confirm'></form>"); } }
Having seen all of the servlet code for our simple store application we will now look at the deployment descriptor required to deploy this application.
Deployment Descriptor
Now we have all of the code for our application written, it's time to deploy it. Let's walk through the deployment descriptor that we will be using to do this:
<?xml version="1.0" encoding="ISO-8859-1"?> <!DOCTYPE web-app PUBLIC "-//Sun Microsystems, Inc.//DTD Web Application 2.3//EN" "http://java.sun.com/dtd/web-app_2_3.dtd"> <web-app>
The first piece of this deployment descriptor to notice is the section below which adds an initialization value into the servlet context. This value is used in the init() method of the MainServlet to find out where to load the products XML file from, as we saw above:
<context-param> <param-name> productsFile </param-name> <param-value> products.xml </param-value> </context-param>
Next we set up our three servlets, providing both a <servlet> and <servlet-mapping> entry for each servlet. Notice that we map the MainServlet servlet to the name home.html. This means that to access the MainServlet, we would use the path http://localhost:8080/store/home.html. To the user it looks at though this is a simple HTML file, but in fact a servlet is being executed and the resulting HTML is displayed to the user.
<servlet> <servlet-name>HomeServlet</servlet-name> <servlet-class>store.MainServlet</servlet-class> </servlet> <servlet> <servlet-name>CheckOutServlet</servlet-name> <servlet-class>store.CheckOutServlet</servlet-class> </servlet> <servlet> <servlet-name>CartServlet</servlet-name> <servlet-class>store.CartServlet</servlet-class> </servlet> <servlet-mapping> <servlet-name>HomeServlet</servlet-name> <url-pattern>/home.html</url-pattern> </servlet-mapping> <servlet-mapping> <servlet-name>CheckOutServlet</servlet-name> <url-pattern>/CheckOutServlet</url-pattern> </servlet-mapping> <servlet-mapping> <servlet-name>CartServlet</servlet-name> <url-pattern>/Cart</url-pattern> </servlet-mapping>
As you can see, all of the other servlets are mapped to a URI with the same name as the name of the servlet itself.
Once we have declared and mapped each of our servlets, we assign a welcome page (index.html) for the application:
<welcome-file-list> <welcome-file>index.html</welcome-file> </welcome-file-list>
Next we define an error page for the application too. The section of the deployment descriptor that does this is shown below:
<error-page> <exception-type> store.ItemAlreadyAddedException </exception-type> <location> /duplicateItem.html </location> </error-page>
This definition says that whenever the exception store.ItemAlreadyAddedException is thrown, the page duplicateItem.html will be displayed. If you recall, we have said that only one item of a specific type can be added to the users shopping cart. If this constraint is violated, then the exception above is thrown, and the user is presented with a page telling them that they cannot add duplicate items to their cart.
The final part of the deployment descriptor defines the security policy for our application. Earlier we said that the checkout page required the user to login to the store. The following section of the deployment descriptor enforces this. If you look back over the checkout code, you will notice that we didn't need to do anything special to make logging in required. This is the power of leaving security and other system functions until deployment time. This breed of security is known as declarative security. The alternate, adding code to the application to perform the authentication; is known as programmatic security.
<security-constraint> <web-resource-collection> <web-resource-name>CheckOutResource</web-resource-name> <url-pattern>/CheckOutServlet/*</url-pattern> <http-method>GET</http-method> <http-method>POST</http-method> </web-resource-collection> <auth-constraint> <role-name>storeuser</role-name> </auth-constraint> </security-constraint> <login-config> <auth-method>FORM</auth-method> <realm-name>Wrox Store Checkout</realm-name> <form-login-config> <form-login-page> /login.html </form-login-page> <form-error-page> /error.html </form-error-page> </form-login-config> </login-config> </web-app>
You will notice that this is set up in exactly the same way as the file-based security that we described earlier on in the chapter. The resources that we wish to secure are defined in the <web-resource-collection> tag (in this case the CheckOutServlet) and the role required for access is defined in the <auth-constraint> section (in this case storeuser).
The contents of <login-config> have changed from our previous discussion of security. This time, we are not simply using the browser's ability to pop up a login box to get the username and password. This time we are defining a custom login page for our application. This means any request by the application for a username and password is directed to the login page. This page is very simple, and allows us to customize the user logon experience. This form-based login is configured via the <form-login-config> section. All that we have to do is to define a page to handle logins, and a page to redirect to on failed logins.
The form that handles logins for our application is defined by the code below:
<form method="post" action="j_security_check"> <table> <tr> <td> User Name: </td> <td> <input type="text" name="j_username"> </td> </tr> <tr> <td> Password: </td> <td> <input type="password" name="j_password"> </td> </tr> <tr> <td colspan=2> <input type="submit" value=" Login "> </td> </tr> </table> </form>
Notice that the form submits to a resource called j_security_check. This is the resource that all forms that handle logins must submit to. There must be a field called j_username and j_password present in order for this logon page to be processed.
Now that we have seen all of the code, as well as the deployment descriptor for our application, we need to compile the classes using javac.
Adding Users
The next step is to set up your store's users. This can be done my making entries in the %CATALINA_HOME%\conf\tomcat-users.xml file. Each user has an entry like the following:
<user name="sam" password="password" roles="storeuser" /> Our final steps are to package up the application and then deploy it.
Packaging the Application
Earlier in the chapter we discussed the concept of the Web Application Archive (WAR) file. Let's create a WAR file containing our sample application.
The first step is to make sure that the directory structure of the web application is correct, and that the files comprising the application are in the correct subdirectories, as discussed earlier in the chapter. Then move to the top level of the store web app's directory structure, and issue the following command at the prompt:
jar -cv0f store.war .
This should create your store.war file. Now we need to deploy it.
Deploying the Application
We will now demonstrate how to deploy our completed and archived application to Tomcat. For very basic deployments, to do this, just copy your WAR file into the webapps directory of your Tomcat installation.
However, you may wish to keep your web application somewhere other than the top level of the webapps directory. In this case, in order to tell Tomcat where to look for the web app, we need to add a <Context> element to the %CATALINA_HOME\conf\server.xml file:
<Context path="/store" docBase="/store.war" reloadable="true"/> This line declares a context to exist with its base URL path being /store. In other words, the application will be found at http://localhost:8080/store/. The docBase parameter tells Tomcat where to find the web app; in this case the relative path /store.war indicates that the application is located in the top level of the webapps directory. The URI you supply here could also be an absolute file path, so you could keep your web apps anywhere on your machine that you wish, although from an organizational point of view it is often best to keep web apps in the webapps folder.
If the reloadable parameter is set to true then Tomcat monitors classes in /WEB-INF/classes/ and /WEB-INF/lib for changes, and automatically reloads the web application if a change is detected. This feature is very useful during application development, but it requires significant runtime overhead and is not recommended for use on deployed production applications.
There are many other parameters that can be passed. Most of these beyond the scope of this chapter, but are very useful if you wish to have more control over how your application is deployed. Details of these parameters can be found at http://jakarta.apache.org/tomcat/tomcat-4.0-doc/config/context.html.
Now restart Tomcat, and your application will be deployed. It can now be accessed at http://localhost:8080/store/. You should see the welcome page:
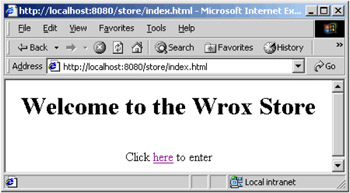
Click on here and you will see the home page for the store:
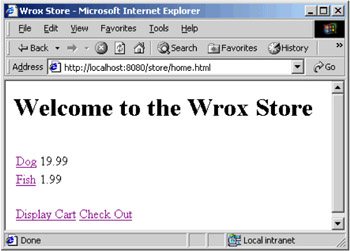
Try adding some products to your cart, and then click on Check Out. You will encounter a login page. When you have successfully logged in, you will be asked to confirm that you wish to checkout. If you click on the Confirm button you will get a confirmation message:
If you make changes to the application, simply copy the new WAR file over the old one, and Tomcat will reload the application automatically.
|
| < Free Open Study > |
|
EAN: 2147483647
Pages: 130