Using Dialog Box Controls
Using Dialog Box Controls
Visual Studio contains eight standard dialog box controls on the Dialogs and Printing tabs of the Toolbox. These dialog boxes are ready-made, so you don't need to create your own custom dialog boxes for the most common tasks in Windows applications, such as opening, saving, and printing files. In many cases, you'll still need to write the event procedure code that connects these dialog boxes to your program, but the user interfaces are built for you and conform to the standards for common use among Windows applications.
The eight standard dialog box controls available to you are listed in the following table. With a few important exceptions, they're similar to the objects provided by the CommonDialog control in Visual Basic 6. The PrintPreviewControl control isn't listed here, but you'll find it useful if you use the PrintPreviewDialog control.
Control Name | Purpose |
OpenFileDialog | Gets the drive, folder name, and file name for an existing file |
SaveFileDialog | Gets the drive, folder name, and file name for a new file |
FontDialog | Lets the user choose a new font type and style |
ColorDialog | Lets the user select a color from a palette |
FolderBrowserDialog | Lets the user navigate through a computer's folder structure |
PrintDialog | Lets the user set printing options |
PrintPreviewDialog | Displays a print preview dialog box like the Microsoft Word program does |
PageSetupDialog | Lets the user control page setup options, such as margins, paper size, and layout |
In the following exercises, you'll practice using the OpenFileDialog and ColorDialog controls. The OpenFileDialog control lets your program open bitmap files, and the ColorDialog control enables your program to change the color of the clock output. You'll connect these dialog boxes to the toolbar that you just created, although you could just as easily connect them to menu commands.
Add OpenFileDialog and ColorDialog controls
Click the OpenFileDialog control on the Dialogs tab of the Toolbox, and then click the form.
An open file dialog object appears in the component tray.
Click the ColorDialog control on the Dialogs tab of the Toolbox, and then click the form again.
The component tray now looks like this:
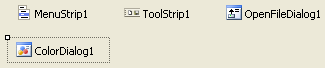
Just like the menu strip and tool strip objects, the open file dialog and color dialog objects appear in the component tray, and they can be customized with property settings.
Now you'll create a picture box object by using the PictureBox control. As you've seen, the picture box object displays artwork on a form. This time, you'll display artwork in the picture box by using the open file dialog object.
Add a picture box object
Click the PictureBox control in the Toolbox.
Draw a picture box object on the form, below the label.
Use the shortcut arrow in the picture box object to set the SizeMode property of the picture box to StretchImage.
Now you'll create event procedures for the Color and Open buttons on the toolbar.
EAN: N/A
Pages: 168