Processing Menu Choices
Processing Menu Choices
After menus and commands are configured by using the menu strip object, they also become new objects in your program. To make the menu objects do meaningful work, you need to write event procedures for them. Menu event procedures typically contain program statements that display or process information on the user interface form and modify one or more menu properties. If more information is needed from the user to process the selected command, you can write your event procedure so that it displays a dialog box or one of the input controls you used in Chapter 3.
In the following exercise, you'll add a label object to your form to display the output of the Time and Date commands on the Clock menu.
Add a label object to the form
Click the Label control in the Toolbox.
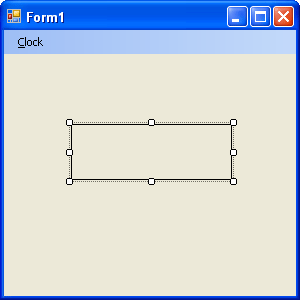
Create a label in the middle of the form.
The label object appears on the form and bears the name Label1 in the program code. If you find later that this label is too small later to fit the text, you can resize it as you would any object on a form. See the following graphic for the size I've used.
Set the following properties for the label:
Object
Property
Setting
Label1
AutoSize
BorderStyle
Font
Text
TextAlign
False
FixedSingle
Microsoft Sans Serif, Bold, 14-point
(empty)
MiddleCenter
Your form looks similar to this:
Now you'll add program statements to the Time and Date event procedures to process the menu commands.
NOTE
In the following exercises, you'll enter program code to process menu choices. It's OK if you're still a bit hazy on what program code does and how you use it—you'll learn much more about program statements in Chapters 5 through 7.
Edit the menu event procedures
Click the Clock menu on the form to display its commands.
Double-click the Time command in the menu to open an event procedure for the command in the Code Editor.
The TimeToolStripMenuItem_Click event procedure appears in the Code Editor. The name TimeToolStripMenuItem_Click includes the name Time that you gave this menu command. The words ToolStripMenuItem indicate that in its underlying technology, the MenuStrip control is related to the ToolStrip control. (We'll see further examples of that later in this chapter.) The _Click syntax means that this is the event procedure that runs when a user clicks the menu item.
We'll keep this menu name for now, but if you wanted to create your own internal names for menu objects, you could select the object, open the Properties window, and change the Name property. Although I won't bother with that extra step in this chapter, later in the book you'll practice renaming objects in your program to conform more readily to professional programming practices.
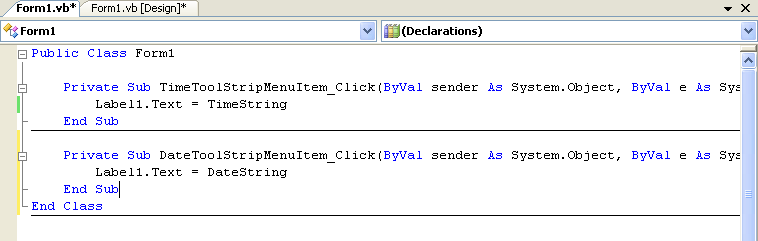
Type the following program statement:
Label1.Text = TimeString
This program statement displays the current time (from the system clock) in the Text property of the Label1 object, replacing the previous Label1 text (if any). TimeString is a property that contains the current time formatted for display or printing. You can use TimeString at any time in your programs to display the time accurately down to the second. (TimeString is essentially a replacement for the older Visual Basic TIME$ statement.)
NOTE
The Visual Basic TimeString property returns the current system time. You can set the system time by using the Date/Time icon in Windows Control Panel; you can change the system time format by using the Regional Options (or Regional and Language Options) icon in Control Panel.Press the Down Arrow key.
Visual Basic interprets the line and adjusts capitalization and spacing, if necessary. (Visual Basic checks each line for syntax errors as you enter it.)
TIP
You can enter a line by pressing Enter, Up Arrow, or Down Arrow.Click the View Designer button in Solution Explorer, and then double-click the Date command on the Clock menu.
The DateToolStripMenuItem_Click event procedure appears in the Code Editor. This event procedure is executed when the user clicks the Date command on the Clock menu.
Type the following program statement:
Label1.Text = DateString
This program statement displays the current date (from the system clock) in the Text property of the Label1 object, replacing the previous Label1 text. The DateString property is also available for general use in your programs. Assign DateString to the Text property of an object whenever you want to display the current date on a form.
NOTE
The Visual Basic DateString property returns the current system date. You can set the system date by using the Date And Time icon in Control Panel; you can change the system date format by using the Regional Options (or Regional And Language Options) icon in Control Panel.Press the Down Arrow key to enter the line.
Your screen looks similar to this:
You've finished entering the menu demonstration program. Now you'll save your changes to the project and prepare to run it.
Click the Save All button on the Standard toolbar, and then specify the c:\vb05sbs\chap04 folder as the location.
Run the Menu program
TIP
The complete Menu program is located in the c:\vb05sbs\chap04\menu folder.
Click the Start Debugging button on the Standard toolbar.
The Menu program runs in the IDE.
Click the Clock menu on the menu bar.
The Clock menu appears.
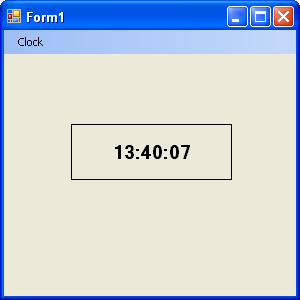
Click the Time command.
The current system time appears in the label box, as shown here:
Now you'll try displaying the current date by using the access keys on the menu.
Press and release the Alt key.
The Clock menu opens and the first item on it is highlighted.
Press D to display the current date.
The current date appears in the label box.
Click the Close button on the program's title bar to stop the program.
Congratulations! You've created a working program that makes use of menus and access keys. In the next exercise, you'll learn how to use toolbars.
System Clock Properties and Functions
You can use various properties and functions to retrieve chronological values from the system clock. You can use these values to create custom calendars, clocks, and alarms in your programs. The following table lists the most useful system clock functions. For more information, check the Visual Studio online Help.
Property or Function | Description |
TimeString | This property sets or returns the current time from the system clock. |
DateString | This property sets or returns the current date from the system clock. |
Now | This property returns an encoded value representing the current date and time. This property is most useful as an argument for other system clock functions. |
Hour (date) | This function extracts the hour portion of the specified date/time value (0 through 23). |
Minute (date) | This function extracts the minute portion of the specified date/time value (0 through 59). |
Second (date) | This function extracts the second portion of the specified date/time value (0 through 59). |
Month (date) | This function extracts a whole number representing the month (1 through 12). |
Year (date) | This function extracts the year portion of the specified date/time value. |
Weekday (date) | This function extracts a whole number representing the day of the week (1 is Sunday, 2 is Monday, and so on). |
EAN: N/A
Pages: 168