Creating the User Interface
Creating the User Interface
In this exercise, you'll start building Lucky Seven by first creating a new project and then using controls in the Toolbox to construct the user interface.
Create a new project
Start Visual Studio 2005.
On the Visual Studio File menu, click New Project.
TIP
You can also start a new programming project by clicking the blue Project link to the right of Create at the bottom of the Recent Projects pane on the Start Page.The New Project dialog box appears.
In the Project Types area of the dialog box, click a few + signs to more fully display the programming options available to you. Your screen looks something like this:
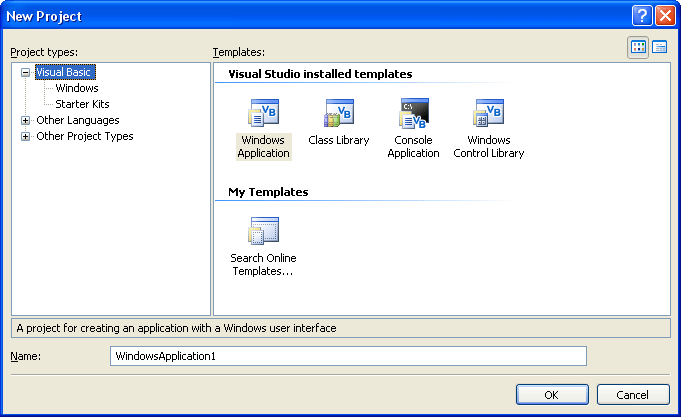
The New Project dialog box provides access to the major project types available for writing Windows applications. If you indicated during setup that you are a Visual Basic programmer, Visual Basic is your primary development option (as shown here), but the other languages in Visual Studio (Visual C#, Visual J++, and C++) are always available through this dialog box. Although you will select a basic Windows application project in this exercise, this dialog box is also the gateway to other types of development projects, such as a console application, smart device (.NET compact Framework) application, starter kit, or Visual Studio deployment project. Web development options are not available through this dialog box. To create a Web application (something you'll try later in the book), you would click the New Web Site command on the File menu.
Click the Windows Application icon in the Templates area of the dialog box, if it is not already selected.
Visual Studio prepares the development environment for Visual Basic Windows application programming.
In the Name text box, type MyLucky7.
Visual Studio assigns the name MyLucky7 to your project. (You'll specify a folder location for the project later.)
TIP
If your New Project dialog box contains Location and Solution Name text boxes, you need to specify a folder location and solution name for your new programming project now. The presence of these text boxes is controlled by a check box in the Tools/Options dialog box, but this is no longer the default setting for Visual Basic 2005. Throughout this book, you will be instructed to save your projects (or discard them) after you have completed the programming exercise. For more information about this “delayed saving” feature and about restoring Visual Studio to its default settings, see “Customizing IDE Settings to Match Step-by-Step Exercises” in Chapter 1.Click OK to create the new project in Visual Studio.
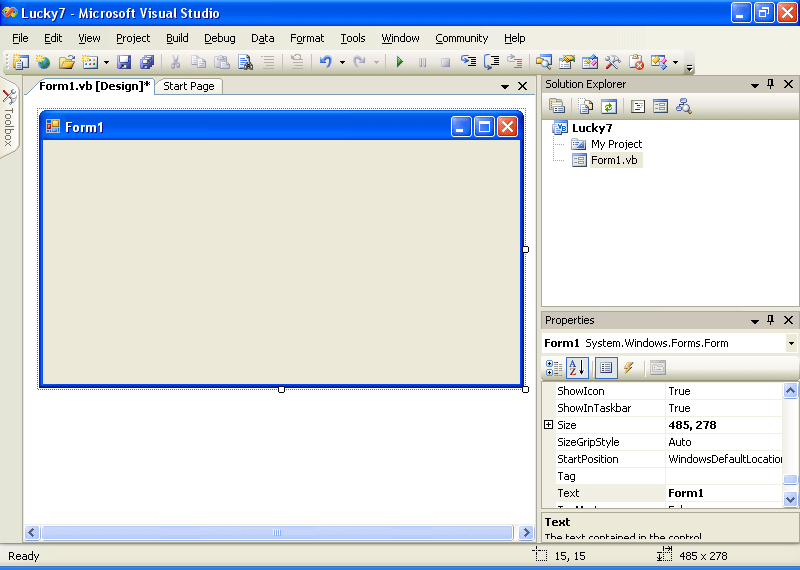
Visual Studio cleans the slate for a new programming project and displays the blank Windows form that you will use to build your user interface.
Now you'll enlarge the form and create the two buttons in the interface.
Create the user interface
Position the mouse pointer over the lower-right corner of the form until its shape changes to a resizing pointer, and then drag to increase the size of the form to make room for the objects in your program.
As you resize the form, scroll bars might appear in the Designer to give you access to the entire form you're creating. Depending on your screen resolution and the Visual Studio tools you have open, you might not be able to see the entire form at once. Don't worry about this—your form can be small or it can fill the entire screen because the scroll bars give you access to the entire form.
Size your form so that it is about the size of the form shown here. If you want to match my example exactly, you can use the width and height dimensions (485 pixels x 278 pixels) shown in the lower-right corner of the screen.
To see the entire form without obstruction, you can resize or close the other programming tools, as you learned in Chapter 1. (Return to Chapter 1 if you have questions about resizing windows or tools.)
Now you'll practice adding a button object on the form.
Click the Toolbox tab to display the Toolbox window in the IDE.
The Toolbox contains all of the controls that you'll use to build Visual Basic programs in this book. The controls suitable for creating a Windows application are visible now because you selected the Windows Application project type earlier. Controls are organized by type, and by default the Common Controls category is visible. (If the Toolbox is not visible now, click Toolbox on the View menu to display it.)
Double-click the Button control in the Toolbox, and then move the mouse pointer away from the Toolbox.
Visual Studio creates a default-sized button object on the form and hides the Toolbox, as shown here:
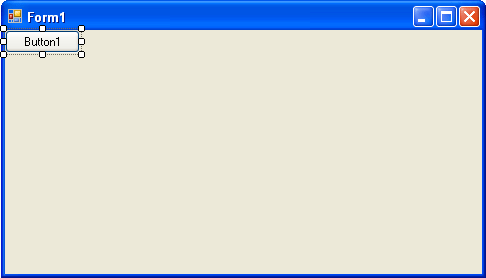
The button is named Button1 because it is the first button in the program. (You should make a mental note of this button name—you'll see it again when you write your program code.) The new button object is selected and enclosed by resize handles. When Visual Basic is in design mode (that is, whenever the Visual Studio IDE is active), you can move objects on the form by dragging them with the mouse, and you can resize them by using the resize handles. While a program is running, however, the user can't move interface elements unless you've changed a property in the program to allow this. You'll practice moving and resizing the button now.
Move and resize a button
Position the mouse pointer over the button so that it changes to a four-headed arrow, and then drag the button down and to the right.
The button moves across the surface of the form. If you move the object near the edge of the form or another object (if other objects are present), it automatically aligns itself to a hidden grid when it is an inch or so away. A little blue “snapline” also appears to help you gauge the distance of this object from the edge of the form or the other object. Unlike previous versions of Visual Studio, a grid is not displayed on the form by default, but you can use the snapline to judge distances with almost the same effect.
TIP
If you want to display the design mode grid as in Microsoft Visual Studio .NET 2003 and Visual Basic 6, click the Options command on the Tools menu, click Windows Form Designer, and then click General. Set ShowGrid to True, and set LayOutMode to SnapToGrid. You will need to close and reopen the project for the change to take effect.Position the mouse pointer on the lower-right corner of the button.
When the mouse pointer rests on a resize handle of a selected object, it becomes a resizing pointer. You can use the resizing pointer to change the size of an object.
Enlarge the button by dragging the pointer down and to the right.
When you release the mouse button, the button changes size and snaps to the grid.
Use the resizing pointer to return the button to its original size, and then move the button back to its original location on the form.
Now you'll add a second button to the form, below the first button.
Add a second button
Click the Toolbox tab to display the Toolbox.
Click the Button control in the Toolbox (single-click this time), and then move the mouse pointer over the form.
The mouse pointer changes to crosshairs and a button icon. The crosshairs are designed to help you draw the rectangular shape of the button on the form, and you can use this method as an alternative to double-clicking to create a control of the default size.
Drag the pointer down and to the right. Release the mouse button to complete the button, and watch it snap to the form.
Resize the button object so that it is the same size as the first button, and then move it below the first button on the form. (Use the snapline feature to help you.)
TIP
At any time, you can delete an object and start over again by selecting the object on the form and then pressing Delete. Feel free to create and delete objects to practice creating your user interface.
Now you'll add the labels used to display the numbers in the program. A label is a special user interface element designed to display text, numbers, or symbols when a program runs. When the user clicks the Lucky Seven program's Spin button, three random numbers appear in the label boxes. If one of the numbers is a 7, the user wins.
Add the number labels
Double-click the Label control in the Toolbox.
Visual Studio creates a label object on the form. If you're familiar with earlier versions of Visual Studio or Visual Basic, you'll notice that the label object is smaller than in previous versions by default. It is just large enough to hold the text contained in the object, but it can also be resized.
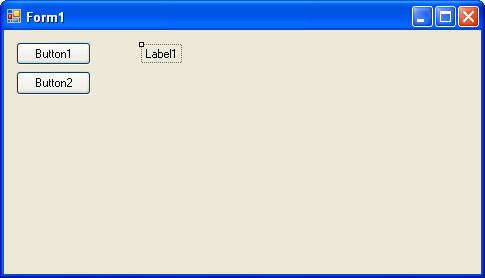
Drag the Label1 object to the right of the two button objects.
Your form looks something like this:
Double-click the Label control in the Toolbox to create a second label object.
This label object will be named Label2 in the program.
Double-click the Label control again to create a third label object.
Move the second and third label objects to the right of the first one on the form.
Allow plenty of space between the three labels because you will use them to display large numbers when the program runs.
Now you'll use the Label control to add a descriptive label to your form. This will be the fourth and final label in the program.
Double-click the Label control in the Toolbox.
Drag the Label4 object below the two command buttons.
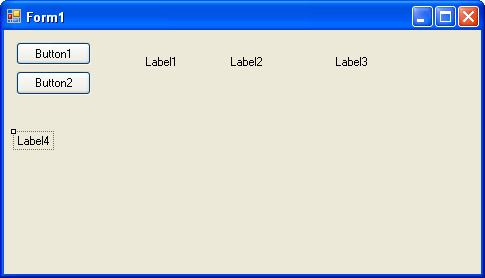
When you've finished, your four labels should look like those in the following illustration. (You can move your label objects if they don't look quite right.)
Now you'll add a picture box to the form to graphically display the payout you'll receive when you draw a 7 and hit the jackpot. A picture box is designed to display bitmaps, icons, digital photos, and other artwork in a program. One of the best uses for a picture box is to display a JPEG image file.
Add a picture
Click the PictureBox control in the Toolbox.
Using the control's drawing pointer, create a large rectangular box below the second and third labels on the form.
Leave a little space below the labels for their size to grow as I mentioned earlier. When you've finished, your picture box object looks similar to this:
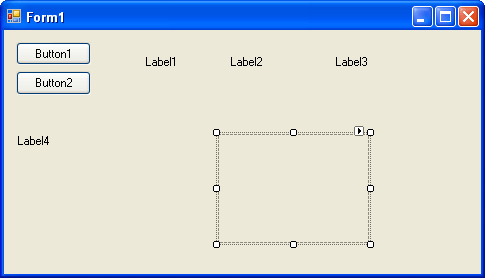
This object will be named PictureBox1 in your program; you'll use this name later in the program code.
Now you're ready to customize your interface by setting a few properties.
EAN: N/A
Pages: 168