Exploring the Keynote Workspace
| < Day Day Up > |
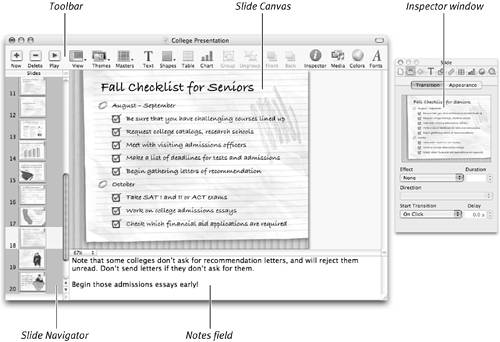
| The Keynote workspace is made up of one main window and a variety of tool windows that you can show or hide ( Figure 1.6 ). Let's look at the pieces one by one. Figure 1.6. The Keynote workspace has one main document window, and several floating windows. Not shown in this picture are the floating Colors, Media, and Fonts windows. The Slide CanvasThis is the main Keynote document window; it's where you will edit your slides and place graphics, tables, and charts . You can zoom into (or out of) the action with the Zoom pop-up menu at the lower-left corner of the Slide Canvas window ( Figure 1.7 ). Figure 1.7. Select the magnification of the slide with the Zoom pop-up menu in the Slide Canvas.
The Slide NavigatorThe Slide Navigator is the pane at the left edge of the document window. It actually does triple duty, showing three different aspects of your presentation. In Navigator View , it shows thumbnails of your slides. You can organize and group slides in this view by dragging slide thumbnails to the right so they are indented in the list, as shown in Figure 1.8 . The parent slide of a group of indented slides has a disclosure triangle; clicking the triangle allows you to hide or show the indented slides. This makes it easier to organize the presentation, especially with longer shows. You can also drag the parent slide to another place in the presentation, and the indented slides move along with it. Figure 1.8. You can group and organize slides in the Slide Navigator. Another thing you can do in Navigator View is skip slides; skipped slides won't appear when you give the presentation, and will "collapse" in Navigator View, appearing as a line. The second function of the Slide Navigator is Outline View ; in this view the content of your slides appears ( Figure 1.9 ). You can create, write, edit, and rearrange your slides and their content in this view. In fact, that's one of the best ways to create a presentation; more on that in Chapter 2. Figure 1.9. Use the Outline View to get an overview of the content of your presentation. The Slide Navigator can also show you the master slides associated with the presentation's theme; in this view, the Slide Navigator is split into two panes, with the top pane showing the master slides and the bottom pane your presentation's slides ( Figure 1.10 ). You'll find more information about master slides in Chapter 3. Figure 1.10. When you view master slides, the Slide Navigator splits into two panes, showing both the master slides and your presentation slides. The Notes fieldThe Notes field ( Figure 1.11 ) is where you can enter speaker notes that help you give the presentation; these won't appear on the presentation screen, but they can be viewed on a second display. For example, if you are presenting using a PowerBook and a projector, the notes can appear on the PowerBook's screen while the presentation runs on the projector. Figure 1.11. You enter your speaker notes in the Notes field. If you prefer, you can print speaker notes. See Chapter 12 for more information about printing your presentation, including speaker notes. The ToolbarLike most programs, Keynote has a toolbar that provides the tools you need to create, edit, and play presentations ( Figure 1.12 ). You can change the buttons in the toolbar to suit the way you work; see "Customizing the Toolbar," later in this chapter. Figure 1.12. With the Keynote Toolbar you get access to most of the tools that you need to create, edit, and play presentations. The InspectorThe Inspector window ( Figure 1.13 ) is actually ten windows in one; it has a toolbar that lets you change between its ten panes:
Figure 1.13. The Inspector window gives you ten different sets of controls to modify your presentation.
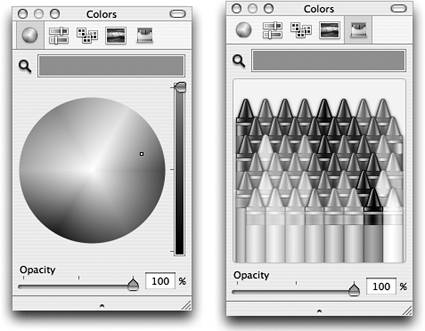
The Colors windowLike the Inspector window, the Colors window ( Figure 1.14 ) has several modes; it gives you five different ways to choose colors: Color Wheel, Color Sliders, Color Palettes, Image Palettes, and Crayons. Figure 1.14. Keynote gives you five different ways to choose colors. Here are the Color Wheel and Crayons choices. The Fonts windowThe Fonts window allows you to choose the font family, the typeface, and the size for any selected type ( Figure 1.15 ). Figure 1.15. The Fonts window can show you a preview of your font selection.
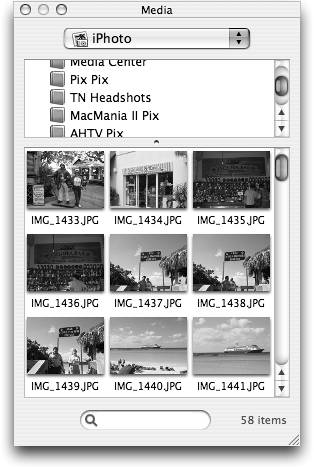
The Media windowThe Media window, new in Keynote 2, allows you to easily integrate pictures from your iPhoto library; music and sounds from your iTunes library; and QuickTime movies from your Movies folder ( Figure 1.16 ). See Chapter 6 for more about using the Media window. Figure 1.16. The Media window makes it easy to add pictures, sounds and music, or movies to your presentation. |
 Tip
Tip 


| < Day Day Up > |
EAN: N/A
Pages: 179
- Chapter IV How Consumers Think About Interactive Aspects of Web Advertising
- Chapter VII Objective and Perceived Complexity and Their Impacts on Internet Communication
- Chapter IX Extrinsic Plus Intrinsic Human Factors Influencing the Web Usage
- Chapter X Converting Browsers to Buyers: Key Considerations in Designing Business-to-Consumer Web Sites
- Chapter XVII Internet Markets and E-Loyalty