Overview of the Companyweb Implementation for SBS
| SBS 2003 includes a preconfigured WSS intranet site at http://companyweb, shown in Figure 14.1. The Companyweb implementation of WSS provides a default set of objects ready to be used or customized. These objects include five separate document libraries, a picture library, lists for announcements, links, vacation schedules, help desk items, and general discussions. Although these objects are preconfigured for you in the default Companyweb implementation, almost all these can be reproduced on any WSS site. The exception to that statement is the Incoming Faxes library. The Companyweb implementation of WSS includes Fax Library objects in addition to Document Library and Forms Library objects. The Fax Library object is unique to SBS and allows faxes received via SBS Shared Fax to be automatically routed and stored in a SharePoint library. Figure 14.1. The default Companyweb home page.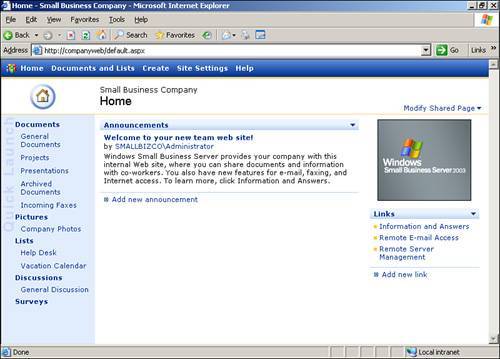 Default File Locations for CompanywebFrom an installation standpoint, the Companyweb has two main file groups. First, there are the support files that are available for all SharePoint sites to use. These files include items such as icons, graphics, and site templates. By default, these are installed in the C:\Program Files\Common Files\Microsoft Shared\Web Server Extensions\60\ directory. The other half of the Companyweb installation is the SharePoint databases. WSS uses one database to store configuration information for the WSS server, as well as a separate content database for each WSS site that stores all site content. Therefore, the number of WSS databases on a given WSS server will always be equal to the number of WSS sites on the server plus one. By default, WSS uses the Microsoft SQL Data Engine (MSDE) as its database engine. MSDE supports separate instances, where each instance appears and behaves as a separate MSDE installation. SBS creates a separate MSDE instance for Companyweb, which by default is installed to C:\Program Files\Microsoft SQL Server\MSSQL$SHAREPOINT\, with the actual database files in the data subdirectory.
Moving Companyweb DatabasesThe best method to move SharePoint databases is to not have to move them to begin with. When running the SBS integrated setup, you have the option to specify where you want to install the Companyweb databases, which allows you to redirect the installation target location to a data partition. If you have already completed your SBS installation and the Companyweb databases are in the default location on the C: drive, you can successfully move the Companyweb databases to another partition. By default, the Companyweb installation has two databases: STS_Config and STS_<servername>_1. Each of these databases needs to be moved using the following steps:
Default Permissions for CompanywebWSS uses its own role-based permissions structure for controlling permissions to each of the various elements within the Companyweb site. By default, the Companyweb defines four different permission roles (also known as site groups within WSS) as shown in Table 14.1.
These roles (or site groups) within WSS are similar in function to security groups within Active Directory. Because users can belong to any number of site groups, you can grant permissions to individual elements (lists) within the Companyweb site to site groups instead of individual users. By adding users to site groups, each user inherits the same permissions as the site groups the user belongs to. One feature currently not present within the WSS security model is the capability to nest site groups, or have one site group be a member of another site group. Although this capability would prove beneficial in a larger, rather complex WSS deployment, it is most often not needed in a typical SBS Companyweb deployment. As you know, when creating user accounts within SBS by using the provided Add User Wizard, you may select from one of four predefined templates: User, Mobile User, Power User, and Administrator. From a Companyweb standpoint, both the User and Mobile User templates grant the user Web Designer permissions to the Companyweb, whereas the Power User and Administrator templates grant the user Administrator permissions to the Comanyweb. If you do not want all your users to have a minimum of Web Designer rights within the Companyweb, you have several options to customize permissions within the Companyweb. Customizing Permissions for Companyweb SiteWSS allows you to define your own security roles for site access, so you are not bound to the four default roles mentioned previously. For example, suppose that you have several users who you want to be able to add and edit list items, but you do not want them to be able to delete list items. However, the default Reader role allows users only to view items, not to add new items or edit existing items. Likewise, the default Contributor role allows users to add new items, edit existing items, and delete items. As a result, you need to create a new role to meet your needs, selecting from the available list rights as shown in Figure 14.2. Figure 14.2. The list rights available when creating a new site group.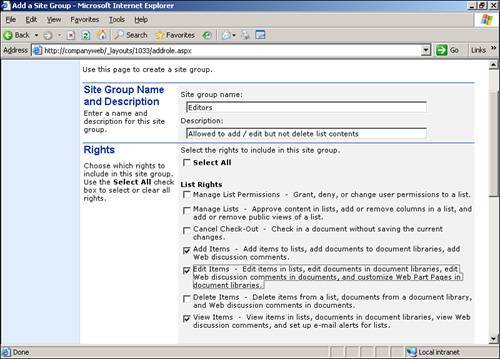 Virtually all configuration tasks for Companyweb take place within the Companyweb site, under Site Settings. To maintain site groups, from the Site Settings page, follow the link to Go To Site Administration; then follow the link for Manage Site Groups. On this page, you can create a new site group to meet your needs. Figure 14.2 shows a new site group called Editors being created that grants View, Add, and Edit permissions to list contents but does not include Delete permissions. Now that we have created the Editors site group, we need to add users to this group. Again, access Manage Users via the Companyweb site by opening Site Settings. In the Manage Users page as shown in Figure 14.3, select the users you want to assign to the Editors group and click to Edit Site Groups of Selected Users. Here you can choose the site groups you want the selected users to belong to and update their membership. Figure 14.3. The Companyweb Manage Users page.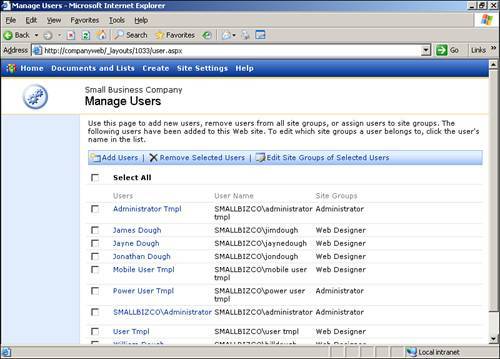 You'll notice that the Companyweb Manage Users page includes four users that you may not recognize: Administrator Tmpl, Mobile User Tmpl, Power User Tmpl, and User Tmpl. These are the disabled user accounts that SBS uses for templates when creating new user accounts. As a result, you can edit the Companyweb permissions granted to new users created with user templates by editing the site group membership of the template accounts themselves. For example, if you wanted any user created with the User template to have only Contributor level access within Companyweb, you could simply open the User Tmpl and change its site group from Web Designer to Contributor. As a result, all future user accounts created with the User template will have Contributor level access to the Companyweb instead of the default Web Designer access. As mentioned previously, virtually all the configuration tasks for Companyweb are executed within the Companyweb Site Settings. However, there is one key exception to this rule when it pertains to Companyweb permissions. Within Active Directory Users and Computers, there exists a Security Group under the My Business, Security Groups Organizational Unit called SharePoint Administrators. Members of this Security Group automatically have Administrator level access to the Companyweb site, regardless of the permission levels explicitly granted within Companyweb itself. By default, SBS adds the Domain Power Users security group as a member of the SharePoint Administrators security group. As a result, any user who is a member of the Domain Power Users security group will have Administrator level access to Companyweb. Therefore, if you want to restrict the permissions of any users who are members of the Domain Power Users security group, you need to either remove the user from the Domain Power Users security group, or remove the Domain Power Users security group from the SharePoint Administrators security group. Customizing Permissions for Companyweb ListsBy default, site groups within Companyweb apply to all elements in the Companyweb site. So a user who belongs to the Contributor site group has permission to view, add, edit, and delete items in each individual document library and list. On occasion, you will have a need for custom permissions for a given object, as shown in Figure 14.4. For example, suppose that all your users have Contributor level access to the entire Companyweb site. However, you want to restrict a certain document library so that only a few specific users have access. Figure 14.4. The Change Permissions page for the default General Documents document library.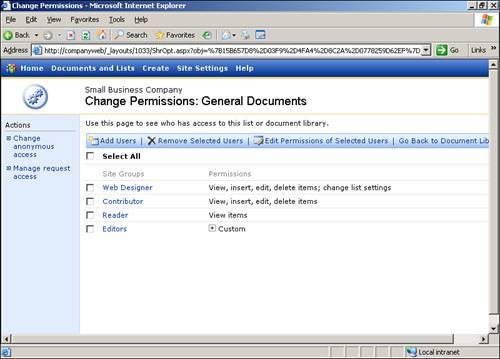 When you access any object (document library, list, and so on) within Companyweb, you will notice a group of Action links in the left pane. So, to customize access permissions for the General Documents library, simply open the library and then follow the Modify Settings and Columns link. In the General Settings section, select the link to Change Permissions for This Document Library, which opens the page as shown in Figure 14.4. From here, you can add the specific users you want to have access and what permissions you want each user to have within this document library. Additionally, you will want to remove the site groups that you do not want to have access to the document library. In this scenario where you are configuring specific permissions for a given object in the Companyweb site, you are somewhat limited by what permissions you can grant to individual users. For example, the object permissions do not provide an option to have a user be able to add and edit items but not delete items. If you need this level of advanced permissions, you can create a new site group as mentioned previously. With the new site group you can specify View, Add, and Edit permissions, and then add the users you want to have these permissions for the document library. Finally, add the new site group to the document library permissions list instead of the individual users to obtain the desired result.
|
EAN: 2147483647
Pages: 253