3.3. Configuring a Virtual Machine Follow these steps to configure your virtual machine: To begin building a virtual machine, log on to the MUI through your Web browser. You will be prompted for your username and password, as shown in Figure 3.1 Figure 3-1. Logging on to the Management User Interface through a Web Browser 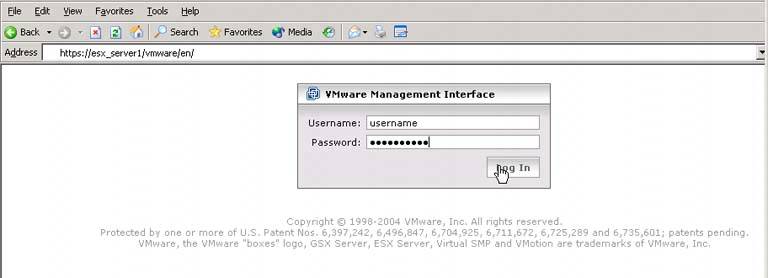 In the lower right-hand corner, you should see the Add Virtual Machine button. Click it (see Figure 3.2). -
Figure 3-2. Adding the Virtual Machine Button 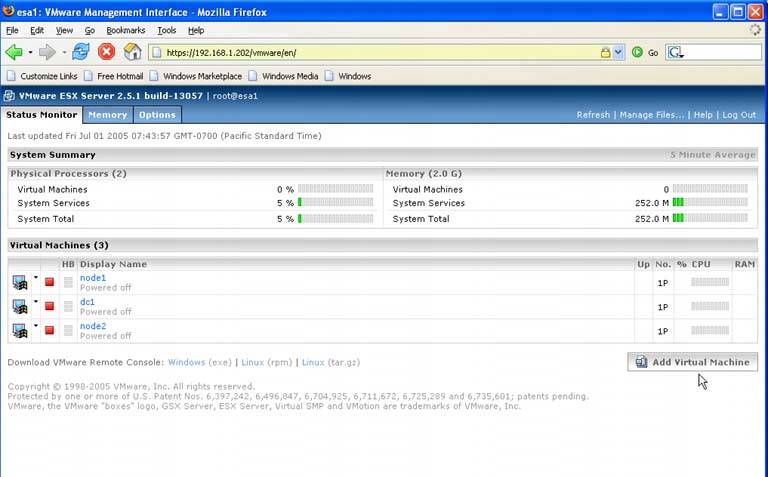 As shown in Figure 3.3, the Add Virtual Machine window should appear. Here you can choose which operating system you want for the virtual machine, its display name and, most importantly, where the configuration file is located. Every virtual machine needs its own directory. It's good practice to give the directory a name similar to the virtual machine itself. To change the location or name of the default directory, simply click in the Location text box and edit the default path. In the following example, a top-level VMware directory is created, as well as the w2ks-std-gold subdirectory where the configuration file and many of the virtual machines' associated files are generated. You can change the name of the configuration file itself, although this is unnecessary. If you change the name of the configuration file, make sure you leave the extension as .vmx. Click Next. Figure 3-3. The Add Virtual Machine Window 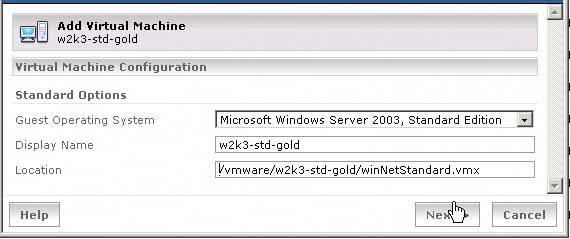 Figure 3.4 shows the window in which you can add additional processors if you have purchased Virtual SMP. If you haven't purchased it, this option will not be available. You can also set the memory in this window from the default value. You may adjust the memory later if you want to modify your current setting. The virtual machine will need to be powered off first, but it is a simple task. If you plan on running Citrix on this virtual machine, check the Cirtrix Terminal Services check box. This will improve performance on your Citrix server by ensuring enough memory is reserved for the virtual Citrix Server. Once you've made your selections, click Next. Figure 3-4. The Virtual Machine Configuration 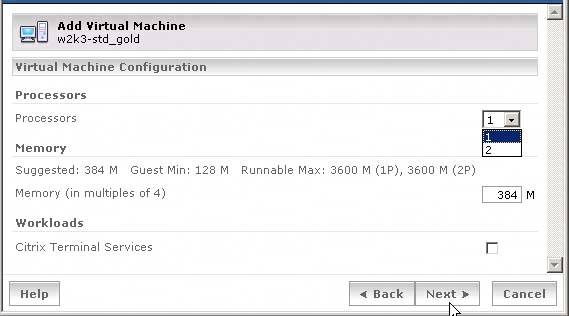 Since this is your first virtual machine, when the Virtual Disk window appears, select Blank to create a new virtual disk (see Figure 3.5). The virtual disk is a file, a very large file with an extension of .vmdk in ESX Server 2.5. In earlier versions, the extension was .dsk. Other selections for virtual disks include Existing, which allows you to use an existing virtual disk. As you build a library of gold images, you will use this option more often. System LUN/Disk gives you direct access or raw access to a LUN or disk. Figure 3-5. The Virtual Disk Window 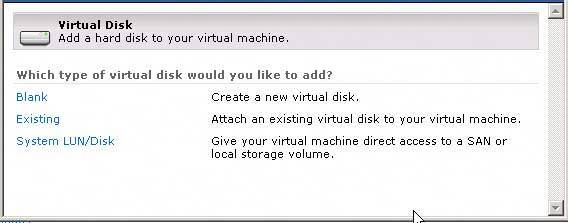 Next, you'll need to select the location for the virtual disk by choosing the VMFS volume, which was created by default during the installation process. Configuring & Implementing…
VMFS | All running virtual machines need to be on a VMFS volume. The VMFS is a specialized file system used especially for virtual machines. VMware describes the access modes for a VMFS volume like this: There are two access modes for VMFS volumes: public and shared. Public mode is the default mode for ESX Server. If you are running a public VMFS version 1 (VMFS-1) volume, multiple ESX Server computers have the capability to access the VMware ESX Server file system, as long as the VMFS volume is on a shared storage system (for example, a VMFS on a storage area network). However, only one ESX Server can access the VMFS volume at a time. With public VMFS version 2 (VMFS-2) volumes, multiple ESX Server computers can access the VMware ESX Server file system concurrently. VMware ESX Server file systems with a public mode have automatic locking to ensure file system consistency. Shared mode is used for a VMFS volume that is used for failover-based clustering among virtual machines on the same or different ESX Servers. |
The VMFS volume in this example is vmstore2.You will need to name your virtual disk files, and since these must be stored in a VMFS, it's recommended you name them so they are easily identifiable by you. Your naming standard should be defined and documented. The capacity of your virtual disk will have a default value that you can increase or decrease. Remember, when sizing your virtual drive that, though in the physical world you had 18GB-, 36GB-, 72GB-sized drives, and so on (which many times went unused), here you can size your drives much more efficiently. So, allow for growth, paging files, and defrag room on your drives. Select which Virtual SCSI Node you want. Since this is your first drive, you can leave the default; however, if you will be creating additional drives, such as for data and/or clustering, for this virtual machine, you will need to select different SCSI node options for your additional virtual disks. Next, choose the Disk Mode for your virtual disk. Disk Mode allows for four options. By default, Persistent is selected. Click Next once you have completed configuring your disk. Configuring & Implementing…
Disk Mode Options | Disk mode options are definitely one of the more flexible and powerful elements of a virtual machine. Options include: Persistent Acts like a typical physical disk where all writes are recorded immediately as soon as the operating system writes them to disk. Nonpersistent Means that all changes to the virtual disk are discarded once the virtual machine is powered off. Undoable Allows you to keep or discard changes to your virtual disk at your discretion. All changes are kept in a redo log file, and when you power down the virtual machine, you will be prompted to keep or discard the changes. Append Keeps changes in a redo-log file as well, but when you power off the virtual machine, you aren't prompted to keep or discard the changes. All changes are kept in the redo-log until you use the vmkfstools command (see Chapter 10) with a commit(-m) switch which will apply the redo-log to the virtual disk.
|
Figure 3.6 shows a window with virtual disk options. Figure 3-6. Virtual Disk Options 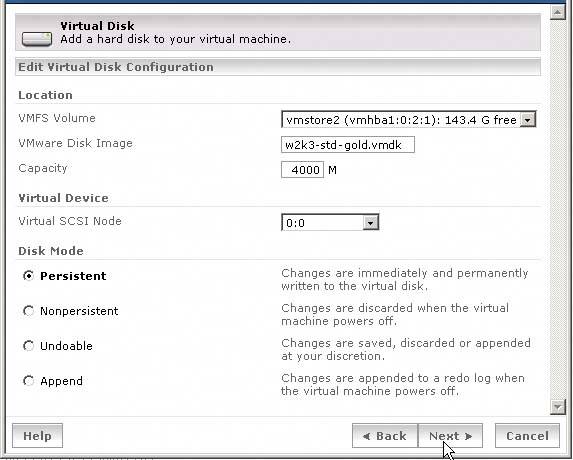 Once you've completed step 6, your virtual machine is basically configured. The window that's displayed is the Properties page of your virtual machine (see Figure 3.7). By default, the Hardware tab is selected, and you can see all the hardware that composes your virtual machine. Let's look at the details page of each piece of virtual hardware on your virtual machine. Figure 3-7. The Properties Page of Your Virtual Machine 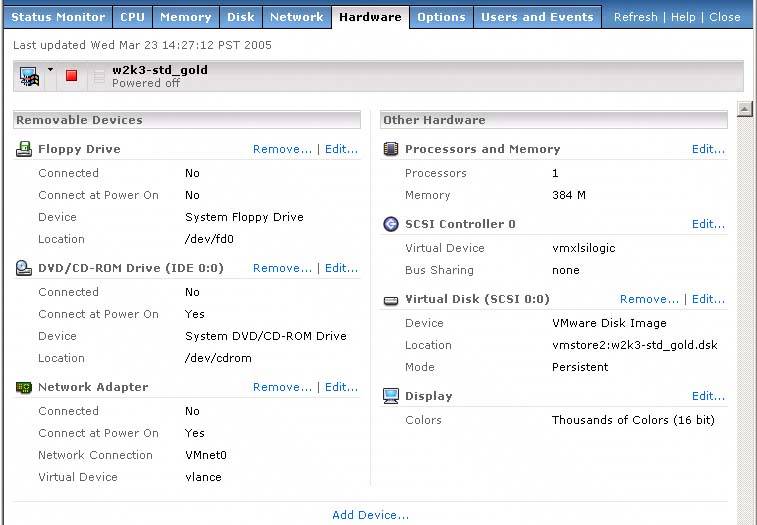 Starting Removable Devices, click Edit to see the detail of the floppy drive (see Figure 3.8). By default, the location is the actual floppy drive of your host, if it has one. However, you can path out to a .flp file and that too can be your floppy drive. If you do this, change the drop-down menu so it reads Floppy Image. Click OK or Cancel. Figure 3-8. Virtual Floppy Drive Detail 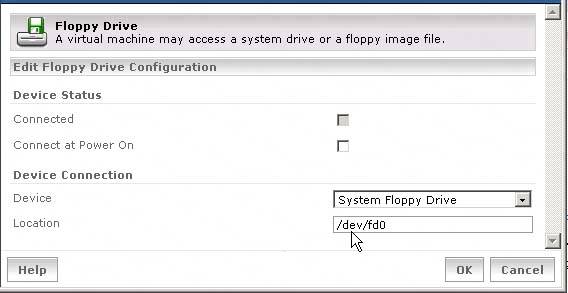 Click Edit to view the detail of your virtual DVD/CD-ROM drive (see Figure 3.9). The DVD/CD-ROM is set to power on by default, which at first might sound all right. But if you have, say, 20 virtual machines all connecting when they power on and all the virtual machines have auto-play enabled, well, you can imagine the troublesuddenly you have 20 virtual machines all running the CD-ROM you put into the drive. Therefore, we recommend you uncheck this box. Figure 3-9. Virtual DVD/CD-ROM Detail 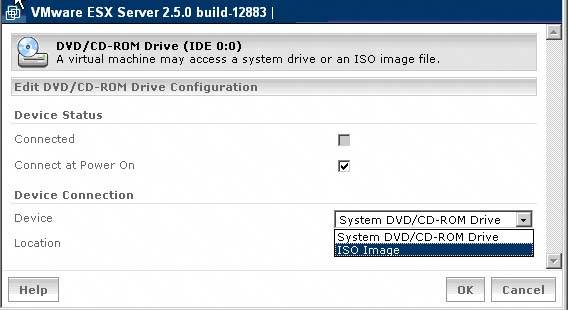 Similar to the floppy, your default drive will be to the host's DVD/CD-ROM drive. If you change the drop-down menu under Device, you'll see the option for ISO Image. ISO image has become a very important and much-used method for loading software, executables, binaries, and other data that your virtual machine may need. You'll find that the use of ISO images in your virtual infrastructure will prove indispensable. For now, leave the default and click OK or Cancel. Next, you'll configure your virtual network interface card. By default, the vlance driver (see Chapter 5) is loaded (see Figure 3.10) since it's supported by the operating systems that ESX supports for its guest virtual machines. However, this is not the optimal driver. If you check the drop-down menu for the Virtual Device, you will see the vmxnet driver, which VMware recommends you use. To use this network driver, however, you'll first need to load the VMware Tools, which is discussed later in this chapter. Click OK. Figure 3-10. Network Adapter Detail 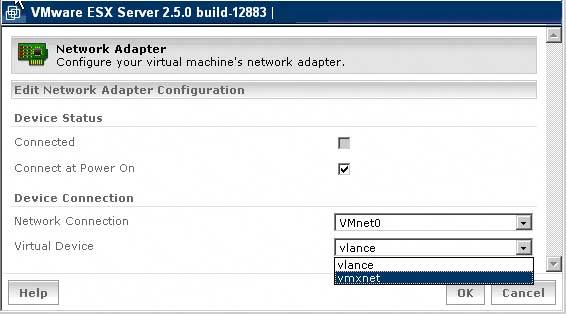 Select Edit under Processors and Memory (see Figure 3.11). Since we have not loaded an operating system yet, you can still change the number of processors your virtual machine can have. We gave it one, but if you want to give it a second, left-click the Click Here link under the Edit Processor Configuration. If you are not changing your processor or memory configuration, skip to step 13. Figure 3-11. Processors and Memory Detail 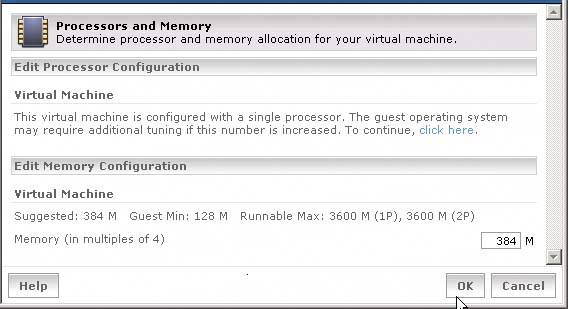 From the Processors drop-down menu, you can select the number of processors you are licensed for (see Figure 3.12). Virtual SMP is an add-on license you need to purchase separately from VMware. You can also adjust the amount of memory with a maximum amount being 3,600MB. Ensure you not only allot the amount needed for the operating system but also enough for any applications you'll be running. Click OK. Figure 3-12. Change the Number of Virtual Processors 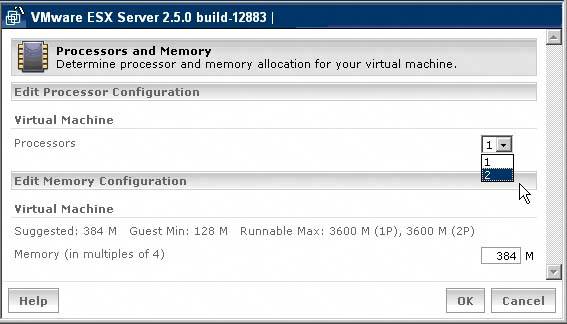 Your SCSI Controller configuration is, by default, set with no bus sharing (see Figure 3.13). We will discuss bus sharing more in Chapter 4, and you'll discover some very powerful ways to configure your SCSI Controller for advanced configurations of your virtual machines. For now, click OK. Figure 3-13. SCSI Controller Detail 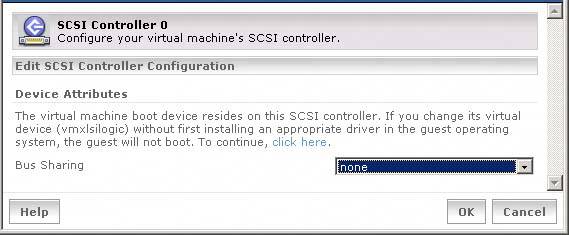 When editing your virtual disk, you can select the VMFS volume, the virtual disk image file name, and the disk mode options that were discussed earlier in this chapter (see Figure 3.14).Through the use of vmkfstools, you can even expand the virtual disk after the operating system is on it. Of course, you will need disk partitioning tools to allow the operating system to recognize the added space and extend the partition (or just create another partition), but it is all doable. This is another example of VMware's flexibility. Click OK. Figure 3-14. Virtual Disk Detail 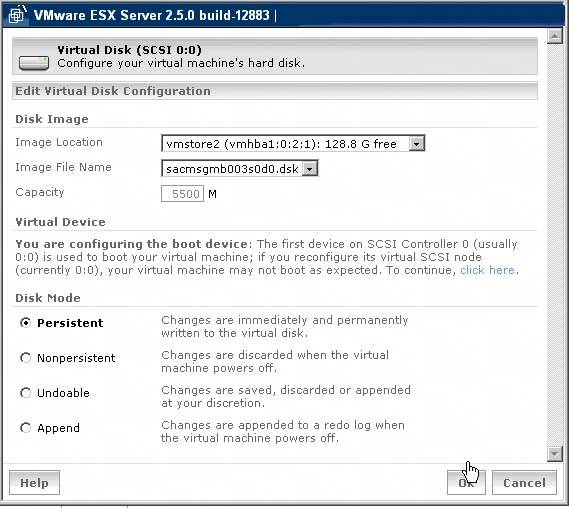 The Display Depth can be easily tweaked here (see Figure 3.15). Since this is a server, incredible video quality is generally not needed. It takes up more resources and is a waste. VMware recommends configuring this setting low, and so do we. Once you click OK, your virtual machine is builtat least from a virtual hardware perspective. Figure 3-15. Display Detail  Close the Properties window for your virtual machine. Now it's time to load the operating system.
3.3.1. Loading the Operating System The following steps explain how to load your OS: Prior to turning on your virtual machine and loading the operating system, you will want to load the Remote Console on the computer on which you are managing your ESX Server and your virtual machines (see Figure 3.16). Open the MUI, and near the bottom of the window choose the operating system that is running on your computer: Figure 3-16. Remote Console Install 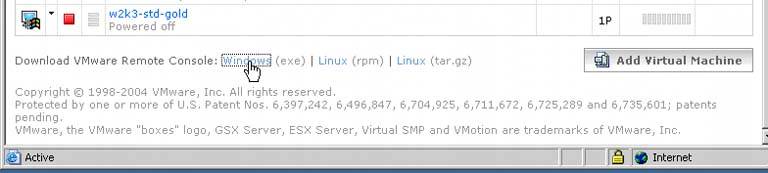 Follow the instructions to load the Remote Console (see Figure 3.17). If you have run either VMware Workstation or GSX on the system onto which you are loading the Remote Console, you may need to perform an uninstall before you can load the Remote Console. To load the operating system, place the CD-ROM or install media in its appropriate drive on the host and turn on the virtual machine by going back into the MUI and clicking the Remote Console icon button. Figure 3-17. Remote Console Access 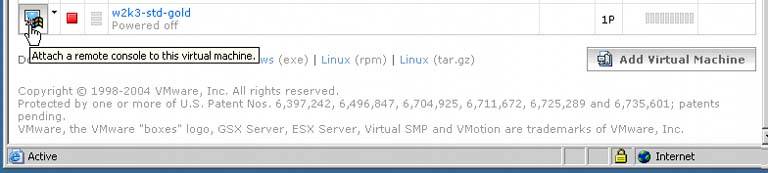 You will now need to authenticate yourself. Once you're in the Remote Console of your virtual machine, click the Power On button (see Figure 3.18). Figure 3-18. Power On Virtual Machine 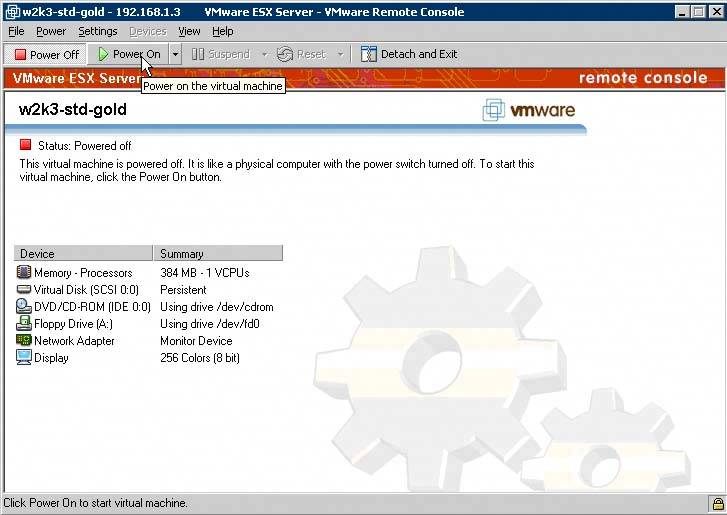 Load your operating system as you would normally. Configuring & Implementing…
BIOS Change | It is surprising to some people that virtual machines have a BIOS and that it can be modified. The BIOS is a PheonixBIOS 4.0 in ESX 2.5. If you're loading your operating system with a CD-ROM, you'll need to change the BIOS's bootup sequence to have the CD-ROM boot before the virtual disk. When you start your virtual machine, press F2 to enter setup in the window shown in Figure 3.19 Next, using your scroll keys, move to the Boot menu. Move the CD-ROM drive to the top by pressing the plus key (see Figure 3.20). Press F10 and select Yes to save this configuration. Your virtual machine will reboot, and your operating system CD should start. You may want to investigate your BIOS options or at least familiarize yourself with what you can configure. |
Figure 3-19. The BIOS Change 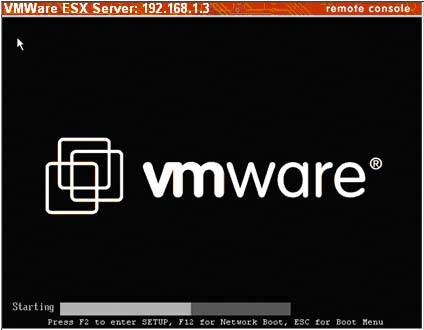 Figure 3-20. Moving to the Boot Menu 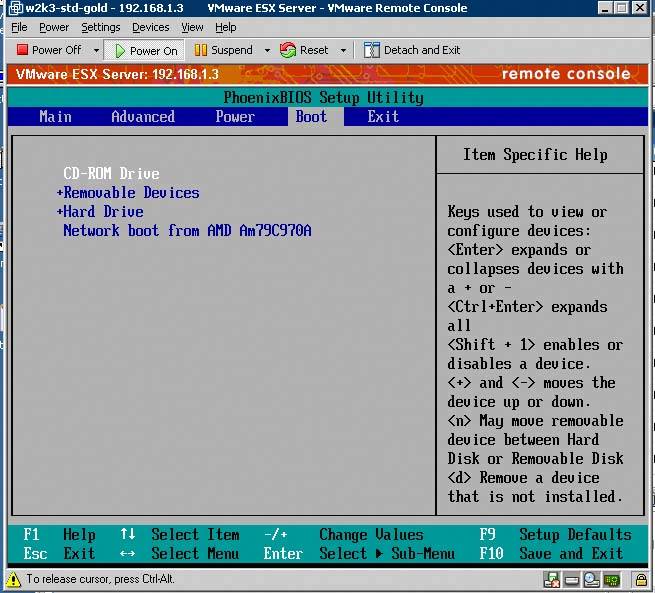 Once you've loaded your operating system and documented all the settings you selected, such as computer name and network information, log in to your virtual machine. You will need to have administrative access to perform the next step. Once you're logged in, from the Settings menu in the Remote console, click VMware Tools Install. (See Figure 3.21) It's important that you load the VMware Tools. Figure 3-21. Loading VMware Tools 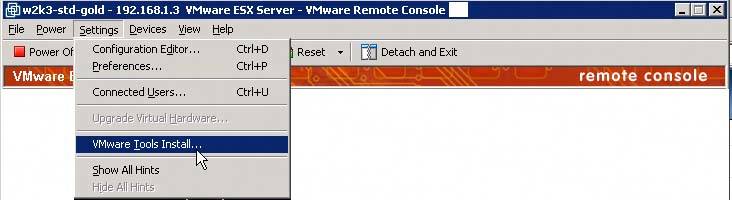
Note: Installing VMware Tools is a critical step and should not be missed. Your guest operating system determines the method you'll use to load the VMware Tools. At the following you can find the VMware Tools install process for all guest operating systems that ESX Server 2.5 supports: http://www.vmware.com/support/esx25/doc/esx25admin_tools_vms.html #999573.
You have now completed the build process for a virtual machine. Consider this virtual machine your Gold Master. Once you completed the build, turn the virtual machine off. Next, you will clone your Gold master.
|