2.3. Performing the Installation This section includes step-by-step descriptions of the installation process of VMware ESX Server along with associated screenshots. The graphical installer method will be discussed, but two other methods, the text-mode installer and scripted installer, can also be used. Though these two methods will not be covered in this book, more information on them can be found at the VMware Web site. 2.3.1. Installation of ESX Server 2.5 Now it's time to discuss the graphical installer method for setting up ESX Server 2.5. As mentioned earlier, you may also use the text-mode or scripted installation methods. The last two methods will not be covered here, but more information can be found on the VMware Web site. 2.3.1.1. Graphical Installer This is VMware's recommended installation method. It is by far the easiest of the three installation methods, especially for those with limited time at the command line. The graphical installer looks familiar to all of us point and clickers with a proper graphical user interface (GUI) within which you can use your mouse. There are two locations where you can install ESX Server 2.5to the local disk or on the SAN. The installation method described in this book will be to the local disk. For information on installing ESX Server 2.5 on a SAN, please review the documentation at the following Web addresses: www.vmware.com/pdf/esx25_san_cfg.pdf www.vmware.com/pdf/esx/esx25_install.pdf www.vmware.com/pdf/esx/esx25_admin.pdf
The reason we're not going into great detail about this method is that the method itself and some of its ramifications and caveats are worth several chapters, if not a small book. 2.3.1.2. Installation Process As we step through the graphical installer installation process, it's a good idea to write down the configuration options you choose on a piece of paper. This way you can incorporate the options you select into your server build document and have a record of how you built your ESX server. So, whatever you select, write it down. As you can see in Figure 2.1, when you insert the ESX Server CD into the CD-ROM and power on your server, you're presented with a number of installation choices. The default is the graphical installer, or standard installation method. (If you do not see this screen, you may need to change the BIOS of your server to allow it to boot from a CD. See your server manufacturer's documentation for details, but commonly you can do this by pressing the F2 key or Delete key.) It's a good idea to fully understand each of these choices since they may be applicable to your environment. Press Enter. Figure 2-1. The ESX Server 2.5 Installer Screen 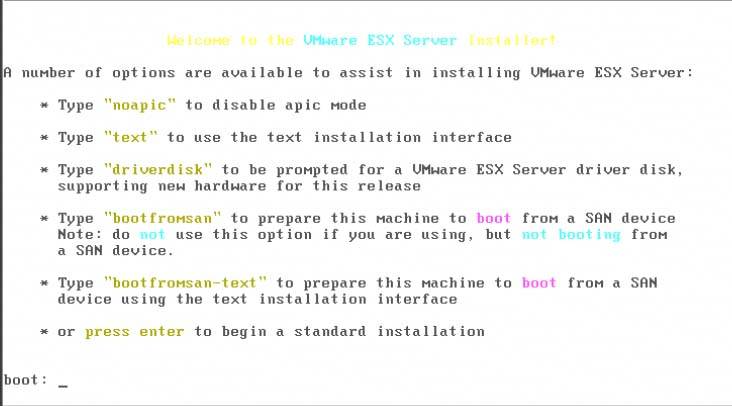 The window in Figure 2.2 is a branding splash. Click Next. (If you click Show Help, some helpful tips appear.) Figure 2-2. Branding Splash  If you choose Default, as shown in Figure 2.3, click Next to go on to step 7. If you choose Custom, as shown in Figure 2.4, you'll be allowed to select keyboard and mouse options and complete a full installation. Click Next and go to step 3a. (The Default install deletes any existing file system structure, so if you're upgrading to a new version of ESX Server, jump to the Upgrading ESX Server later in the chapter). Figure 2-3. The Default Installation 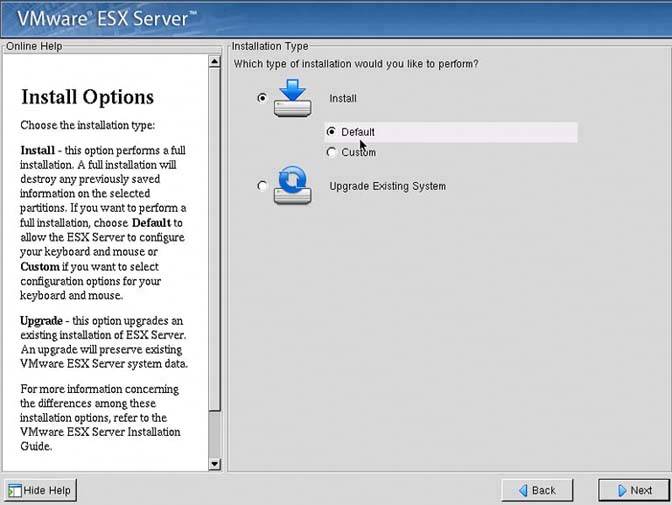 If you've chosen a Custom installation, as depicted in Figure 2.4 Click Next. Figure 2-4. The Custom Installation 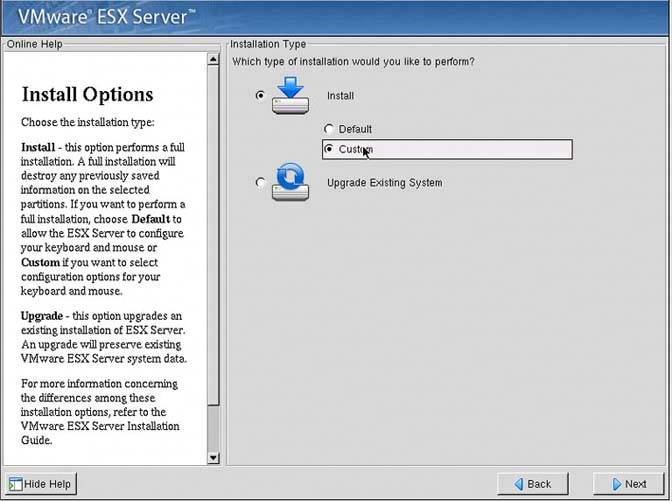 In the window shown in Figure 2.5, you can select your choice of keyboard layout. After selecting your keyboard configuration, click Next. Figure 2-5. Keyboard ConfigurationCustom Installation 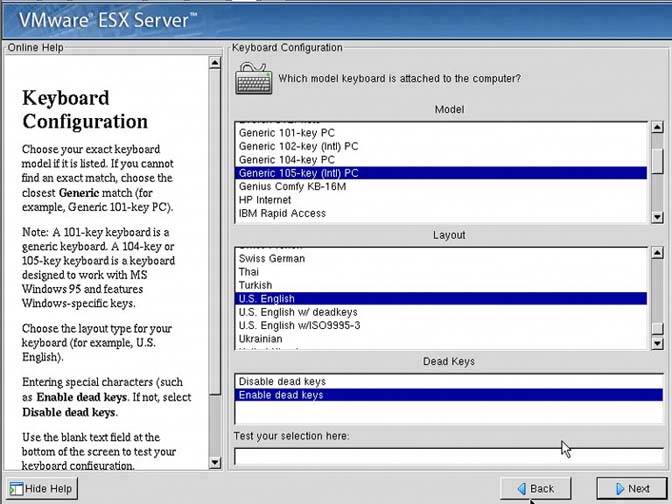 Now you'll configure your mouse. The defaults are selected in Figure 2.6 Click Next when you've finished configuring your mouse. Figure 2-6. Mouse ConfigurationCustom Installation 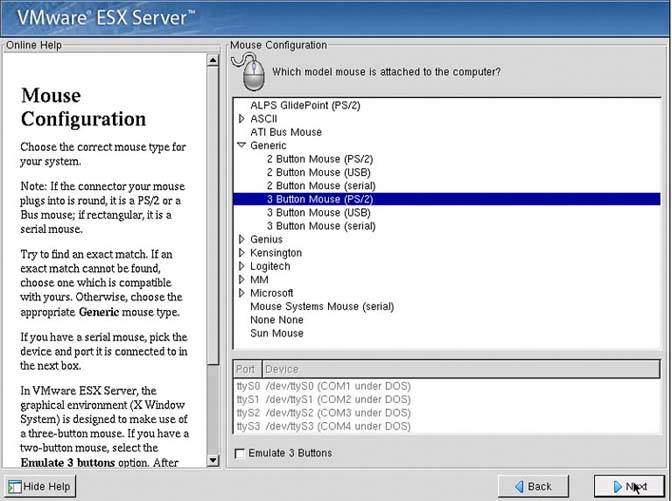 In Figure 2.7, notice that the check box is checked to accept the licensing agreement. Once you've checked this box, click Next. Figure 2-7. The Licensing Agreement 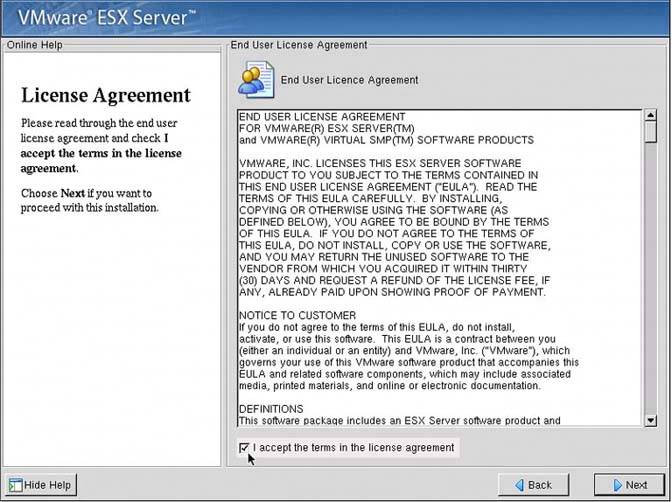 Type in both your ESX Server and Virtual SMP serial numbers (see Figure 2.8). If you haven't purchased Virtual SMP, then leave that section blank and click Next. Figure 2-8. Serial Numbers 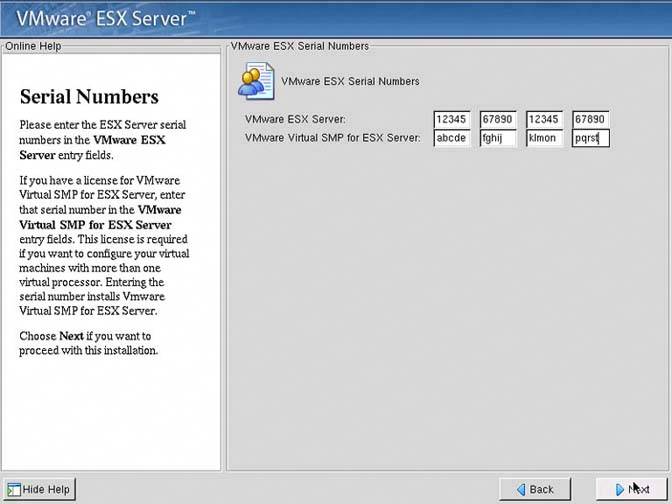 In the Device Allocation window, as depicted in Figure 2.9, you should see the default setting Reserved Memory for the Service Console, as well as at least two network adapters (since that's the required minimum). The number of virtual machines you plan for this ESX Server will dictate the amount of Reserved Memory you allocate to the Service Console. The maximum Reserved Memory you can allocate to the Service Console is 800MB. Notice that the first adapter that ESX Server found is the adapter given to the Service Console (we'll discuss this in greater detail in Chapter 5). After you set the Service Console memory and make any adjustments to the network adapters, click Next. Figure 2-9. Device Allocation 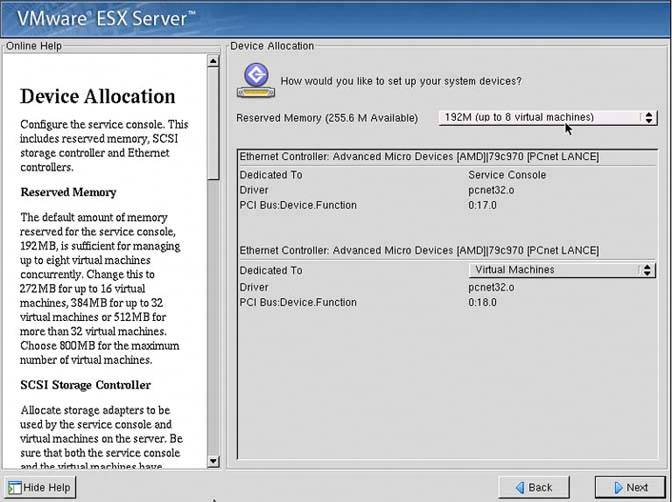
Note: In Figure 2.10, you see the selection for Reserved Memory for the Service Console. Although VMware recommends these levels, we've found it much easier to allocate the maximum amount of memory to the Service Console to avoid having to troubleshoot Service Console performance issues that might be memory-based. The difference between the minimum and maximum is just over half a gigabyte of memory, a small amount and easily budgeted for.
Figure 2-10. Setting the Reserved Service Console Memory to Maximum 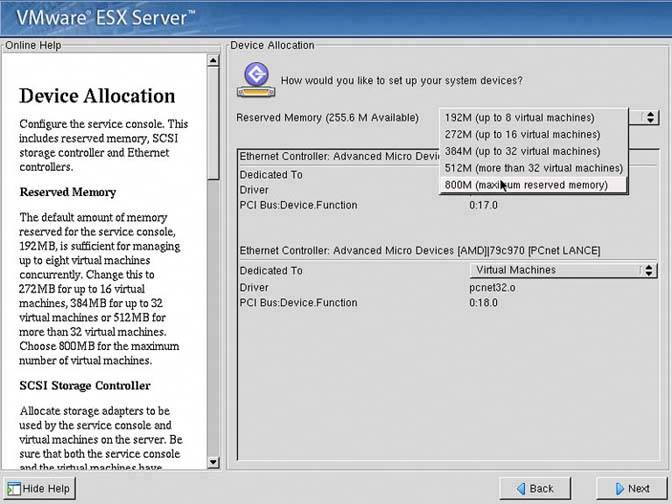
Note: One could argue that setting this to the maximum amount is wasteful, or at least not as efficient as possible. However, slow MUI performance is a frustrating experience. If you are running a large number of virtual machines, any custom backup scripts will have many users accessing the MUI (not a good practice), or running management software such as IBM Director. Because of this, increasing the Service Console memory may be required. We preempt that change by recommending you set the Service Console memory to its maximum setting. This way the design point will never need to be increased because it can't be. Changes to the Service Console Memory require a reboot of the host, therefore all your virtuals will either need to be powered down or moved to another host using Vmotion technology.
The following window should appear. Click Yes to proceed (see Figure 2.11). Figure 2-11. Initialize the Drive 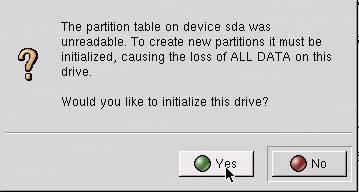 If you're new to ESX or just interested in seeing what partitions ESX creates, select Automatic Partitioning and click Next. For those Linux gurus out there, select Manual Partitioning.
Note: In Figure 2.12, select Automatic Partitioning and the Remove All Partitions Except vmfs radio button if you are reinstalling ESX Server and do NOT want to erase your vmfs partition (and thus all your virtual machines).
Figure 2-12. Disk Partition Setup 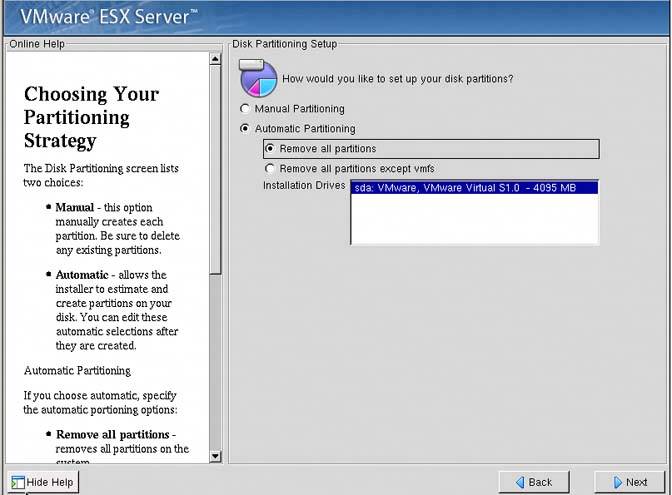 The warning window in Figure 2.13 now appears stating you have selected to delete all partitions and data and asks if you are sure you want to do this. Click Yes. Figure 2-13. The Warning Window 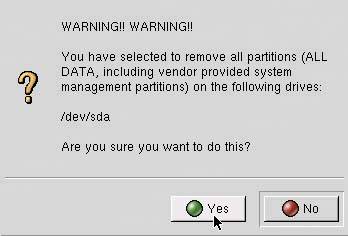 The Disk Setup window shows how ESX has partitioned your disk. Disk geometry, disk model, and partition details are viewable. You may manually adjust the size of each partition by highlighting it and clicking the Edit button. You may also delete or reset the partition table by clicking either the Delete or Reset buttons. You should become familiar with these options. For example, if you click the Reset button, all your partitions will be removed and you can manually build them or simply click the Back button once, which takes you back to the window in Figure 2.12 From there, select Automatic Partitioning to have ESX rebuild the partitioning table for you. Another recommendation is that you create an /iso directory for the .iso images that you will be creating later. See the /iso directory section in this chapter. After you have the partition table set up the way you want, click Next (see Figure 2.14). Figure 2-14. The Disk Partition Table 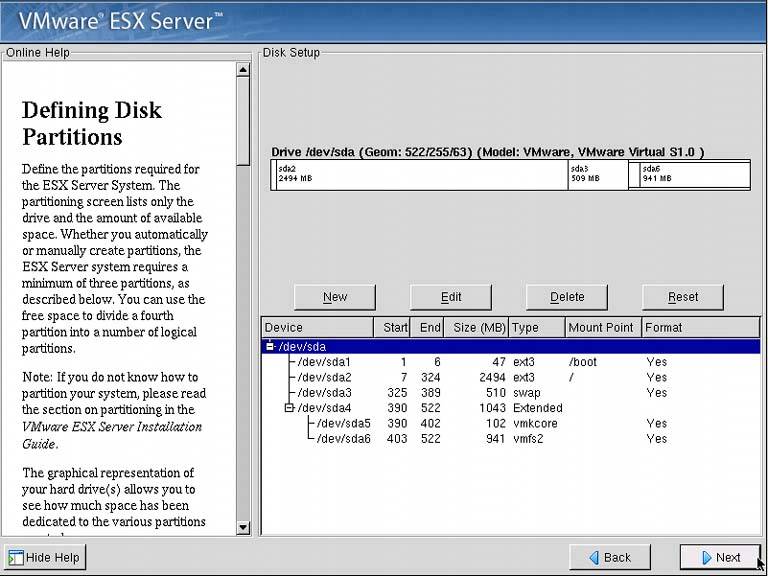 Next, you'll need the network configuration information for your ESX Server (see Figure 2.15). Once you've input this information, click Next. Figure 2-15. Network Configuration Information 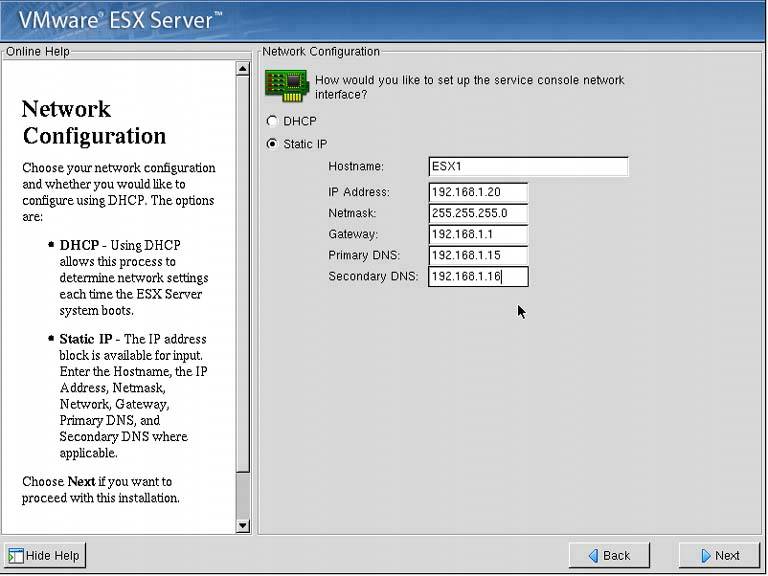 The Time Zone Selection window will appear (see Figure 2.16). Selecting your time zone and setting the time can be a critical configuration or design point. See the accompanying sidebar for more details. After selecting your time zone, click Next. Figure 2-16. Time Zone Information 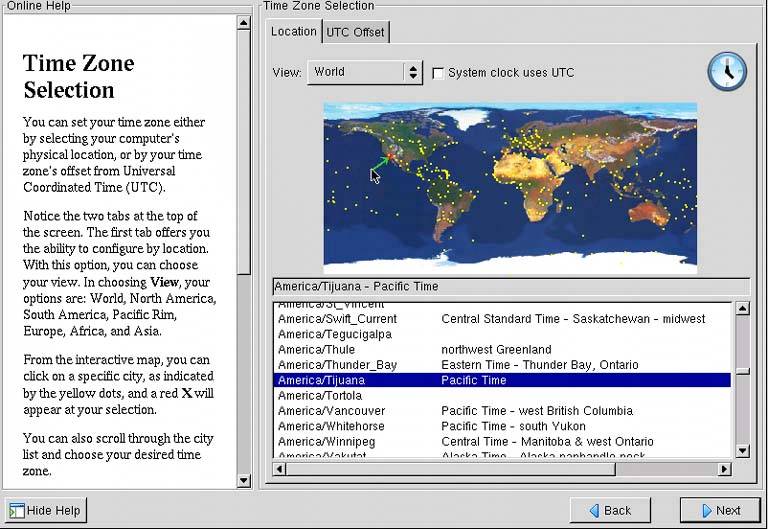 Designing & Planning…
Time Zone and Time | How to update time and keep time consistent across your environment may be a critical design point. In ESX Server, you have the ability to have all your virtual machines' time be updated by the ESX host itself. This is set in the VMware tools, which we will describe in greater detail in Chapter 3. However, whether you have an internal time server or rely on an external source for time synchronization, do not rely on the ESX Server BIOS clock to keep accurate time. Slips between ESX Servers will occur without a synchronization method. See the "Post-installation Tasks" section later in this chapter. The command to set the time on your ESX Server, as well as sync it with an external time source, is described in the following paragraphs. First, see what the BIOS clock is set to. To do this, power on your ESX Server and go into the BIOS. Navigate in the BIOS until you find the Time/Date settings. Ensure they're set correctly. If ESX Server is already installed, shell into your ESX Server and type hwclock and press Enter. Once ESX is installed, check the system time. If it's correct, type date and press Enter. This is the system clock. If these times and dates match, you're fine; if not, to correct the system clock, you'll need to use the data command once again. If the current date and time are March 08, 2005 and 11:30.20, the command would be date 033081130202005. Be aware that the time is in 24-hour notation, so if it was 11:30 P.M., then it becomes 23:30. |
You will now be asked for your root password (see Figure 2.17). It's recommended you make this password somewhat complex since root is similar in authority to a Windows local administrator. Essentially, root has god rights on your ESX server, so the root password should be kept very confidential. You may also add other accounts by clicking the Add button. In fact, it's recommended you do so. Once you've entered the root password and added your additional accounts, click Next.
Note: Synchronizing your ESX Server with an NTP server is really quite easy. NTP is loaded when you install ESX Server 2.0.1 and later.
Figure 2-17. Root Password 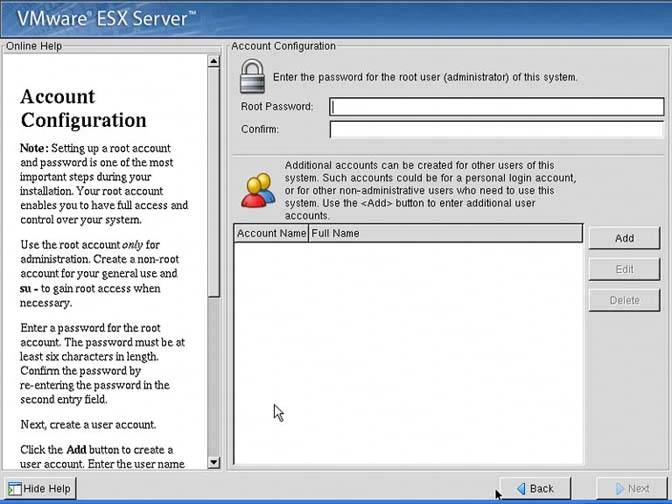 The next window that appears is the About to Install window (see Figure 2.18). Here you can go over the options you've selected for your ESX Server configuration. Refer to the sheet of paper you're using to record your configuration options. You have been writing them down, haven't you? Once you're sure of your selections, click Next. Figure 2-18. The About to Install Window 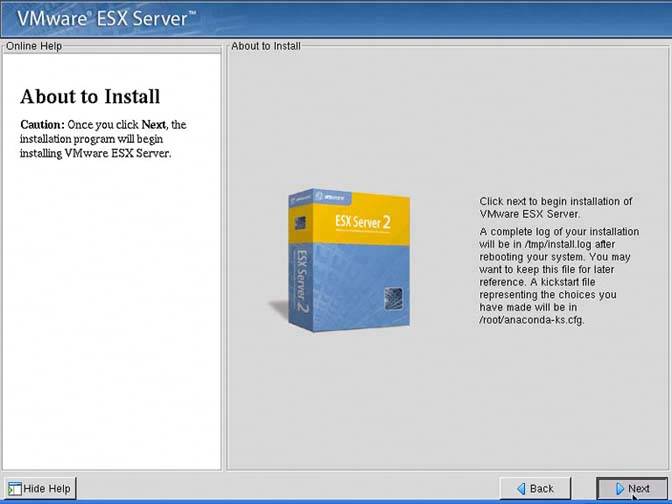 The installation of ESX Server begins (see Figure 2.19). Figure 2-19. Installing ESX Server 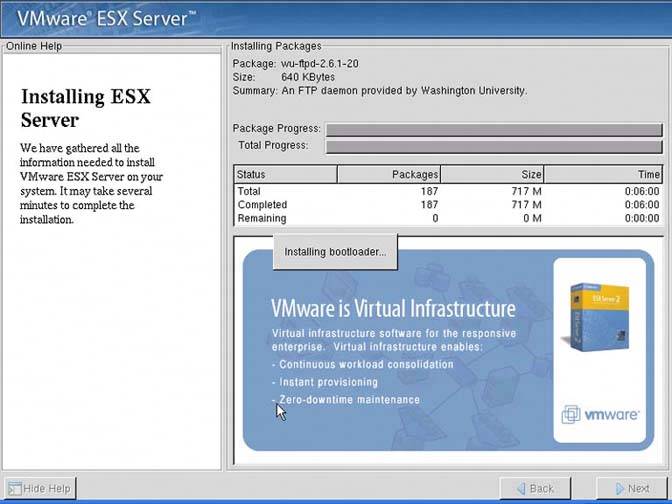 Once the installation is complete, the Congratulations window appears (see Figure 2.20). Figure 2-20. Congratulations 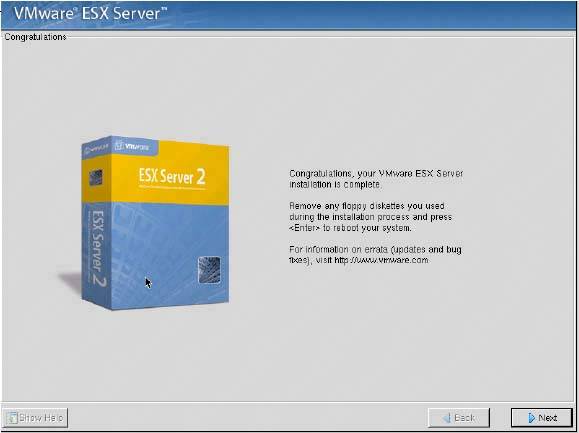 Click Next and your server will reboot. Make sure you've taken the CD out of the drive. If you want to change your BIOS boot order back to the way it was, you can do it when your server begins the reboot process.
You have completed the base build of your ESX Server. You're now one step closer to a virtual environment. Make sure you update all your documentation, including your server build document. 2.3.1.3. Post-installation Tasks Now we'll discuss post-installation tasks. 2.3.1.3.1. Time As already mentioned in this chapter, time can be a critical design component. The following procedure explains how to set the time on your ESX Server, as well as sync it with an external time source. First, see what the BIOS clock is set to. To do this, power on your ESX Server and go into the BIOS. Navigate in the BIOS until you find the Time/Date settings. Ensure this is set correctly. If the ESX Server is already installed, shell into your ESX Server, type hwclock, and press Enter. Once ESX is installed, check the system time. If it's correct, type date, and press Enter. This is the system clock. If these times and dates match, you are fine; if not, to correct the system clock, use the data command once again. If the current date and time are March 08, 2005 and it's 11:30.20, the command would be date 033081130202005. Be aware that the time is in 24-hour notation, so if it was 11:30 P.M., then it becomes 23:30. Synchronizing your ESX Server with an NTP server is really quite easy. NTP is loaded when you install ESX Server 2.0.1 and later. The following is taken from www.vmware.com/support/kb/enduser/std_adp.php?p_faqid=1339. Perform these steps to set the NTP settings: Log on to the console as the root user. Edit the file /etc/ntp.conf. (The comments in ntp.conf explain the purpose of each section.) Find the section titled # --- OUR TIMESERVERS ----- Copy the existing restrict and server example lines: # restrict mytrustedtimeserverip mask 255.255.255.255 nomodify notrap noquery # server mytrustedtimeserverip Remove the # character from the two newly copied lines so they are no longer treated as comments. Update both the new lines with the IP address of the NTP server. Repeat this section to add more time servers, if needed. Note: There must be both a restrict and a server line in this section for each NTP server.
Save the file. Edit the file /etc/ntp/step-tickers. In this file, list the host name of the NTP servers entered previously. Add each NTP server to /etc/hosts to minimize the impact of DNS lookup failures during NTP synchronization. To see the offset (in seconds) between the local and source clocks, run ntpdate -q time_server_name_or_ip_address
Note: If the correction resulting from synchronizing the local clock with the time server is large enough, it could affect the operating systems or applications running in virtual machines when they synchronize their clocks with the ESX Server they are running on. To enable the NTP daemon to autostart when the server is rebooted, run chkconfiglevel 345 ntpd on
To (re)start it now without rebooting, run service ntpd restart
To set the local hardware clock to the NTP synchronized local system time, run hwclocksystohc
To watch the status of the ntpd process, run watch ntpqp
Press Ctrl+C to hide the process. Note the information in the following columns: The character in the first column indicates the quality of the source. * indicates the source is the current reference. remote lists the IP address or host name of the source. when indicates how many seconds have passed since the source was polled. poll indicates the polling interval. This value increases depending on the accuracy of the local clock. reach is an octal number that indicates the reachability of the source. A value of 377 indicates the source has answered the last eight consecutive polls. offset is the time difference between the source and the local clock in milliseconds.
Services such as Active Directory, which relies on Kerberos security, are very time-sensitive. Design how time will be set in your environment and test it well in your lab prior to any deployment in production. 2.3.2. Reporting a Problem If you encounter a problem with your installation, you may need to request support from VMware. Invariably, you will be asked to run the /usr/bin/vm-support script from the Service Console. This script produces a file with the following format: Esx-<data>-<unique number>.tgz.
This script collects essential information that helps a VMware engineer start diagnosing your issue. You may as well run it prior to asking for assistance since they will ask you to run the script anyway. |