The JOptionPane
|
|
Option panes are basically small dialog windows that are easy and quick to implement. They have many uses, ranging from simply displaying a message to the user to taking a complete set of data from the user. Let's look at an example application that demonstrates how to implement option panes into your applications.
Code Listing 19: Using the JOptionPane
import java.awt.*; import java.awt.event.*; import javax.swing.*; public class OptionPanesExample extends JFrame implements ActionListener { public static void main(String[] argv) { OptionPanesExample mainApp = new OptionPanesExample(); } public OptionPanesExample() { super("Option Panes Example"); setBounds(0, 0, 350, 200); getContentPane().setLayout(null); setDefaultCloseOperation(EXIT_ON_CLOSE); // Create the buttons... messageDialogButton = new JButton("Message Dialog"); messageDialogButton.setBounds(10, 20, 150, 25); warningDialogButton = new JButton("Warning Dialog"); warningDialogButton.setBounds(10, 50, 150, 25); errorDialogButton = new JButton("Error Dialog"); errorDialogButton.setBounds(10, 80, 150, 25); inputDialogButton = new JButton("Input Dialog"); inputDialogButton.setBounds(175, 20, 150, 25); confirmationDialogButton = new JButton("Confirmation Dialog"); confirmationDialogButton.setBounds(175, 50, 150, 25); componentDialogButton = new JButton("Component Dialog"); componentDialogButton.setBounds(175, 80, 150, 25); // Add the action listeners messageDialogButton.addActionListener(this); warningDialogButton.addActionListener(this); errorDialogButton.addActionListener(this); inputDialogButton.addActionListener(this); confirmationDialogButton.addActionListener(this); componentDialogButton.addActionListener(this); // Add the objects to the content pane... getContentPane().add(messageDialogButton); getContentPane().add(warningDialogButton); getContentPane().add(errorDialogButton); getContentPane().add(inputDialogButton); getContentPane().add(confirmationDialogButton); getContentPane().add(componentDialogButton); setVisible(true); } public void actionPerformed(ActionEvent e) { if(e.getSource() == messageDialogButton) { JOptionPane.showMessageDialog(this, "This is a message!", "A Message", JOptionPane.INFORMATION_MESSAGE); } else if(e.getSource() == warningDialogButton) { JOptionPane.showMessageDialog(this, "Warning! Warning! This is a warning message!", "Warning", JOptionPane.WARNING_MESSAGE); } else if(e.getSource() == errorDialogButton) { JOptionPane.showMessageDialog(this, "A very serious error has occured! Well not really but you get the idea!", "Nasty Evil Error", JOptionPane.ERROR_MESSAGE); } else if(e.getSource() == inputDialogButton) { String feedback = JOptionPane.showInputDialog(this, "Enter some text"); JOptionPane.showMessageDialog(this, feedback, "The text you entered...", JOptionPane.INFORMATION_MESSAGE); } else if(e.getSource() == confirmationDialogButton) { int result = JOptionPane.showConfirmDialog(this, "Are you sure?"); if(result == JOptionPane.YES_OPTION) { JOptionPane.showMessageDialog(this, "You were sure!", "Result", JOptionPane.INFORMATION_MESSAGE); } else if(result == JOptionPane.NO_OPTION) { JOptionPane.showMessageDialog(this, "You were not sure!", "Result", JOptionPane.INFORMATION_MESSAGE); } else if(result == JOptionPane.CANCEL_OPTION) { JOptionPane.showMessageDialog(this, "You pressed cancel!", "Result", JOptionPane.INFORMATION_MESSAGE); } } else if(e.getSource() == componentDialogButton) { // The component dialog is a little more complex... Object[] theMessages = new Object[2]; String label = "Please tick the check box"; // Assign the first message (a simple label) theMessages[0] = label; JCheckBox checkbox = new JCheckBox("The Checkbox"); theMessages[1] = checkbox; String[] options = {"Yes", "No", "Not sure", "Huh?"}; int result = JOptionPane.showOptionDialog(this, theMessages, "The Title", JOptionPane.DEFAULT_OPTION, JOptionPane.INFORMATION_MESSAGE, null, options, options[0]); JOptionPane.showMessageDialog(this, String.valueOf(result), "And the result was...", JOptionPane.INFORMATION_MESSAGE); } } JButton messageDialogButton; JButton warningDialogButton; JButton errorDialogButton; JButton inputDialogButton; JButton confirmationDialogButton; JButton componentDialogButton; } When we execute the application, we will see a window with six buttons available in it. Each button allows us to sample each of the different types of option panes available to us. This can be seen in the following screen shot:
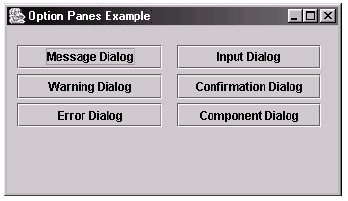
Figure 24: The Option Panes Example application
Let's now look at each of the different option panes (dialogs) individually.
-
The message dialog
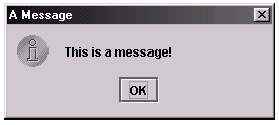
Figure 25: The message dialogThis simple message dialog is created with the following line of code:
JOptionPane.showMessageDialog(this, "This is a message!", "A Message", JOptionPane.INFORMATION_MESSAGE);
Note that the showMessageDialog method is a static method of the JOptionPane class. As you can see from the code, the first parameter specifies the parent component, which in our example is just the main window (specified by the this variable). The second parameter specifies the message that we wish to appear in the body of the dialog. The third states the title that should appear in the title bar. Finally, the last parameter specifies the small icon that should appear to the left of the body text.
-
The warning dialog
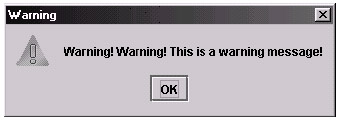
Figure 26: The warning dialogThis dialog is created in exactly the same way as the message dialog with the small exception that we change the final parameter to read WARNING_MESSAGE instead of INFORMATION_MESSAGE. This can be seen in the following line of code:
JOptionPane.showMessageDialog(this, "Warning! Warning! This is a warning message!", "Warning", JOptionPane.WARNING_MESSAGE);
-
The error dialog
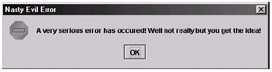
Figure 27: The error dialogAgain, the error dialog works in the same way as the message and warning dialogs. Instead of specifying the INFORMATION_MESSAGE constant or the WARNING_MESSAGE constant, we use the ERROR_ MESSAGE constant. Here is the line of code that we used to create this dialog:
JOptionPane.showMessageDialog(this, "A very serious error has occured! Well not really but you get the idea!", "Nasty Evil Error", JOptionPane.ERROR_MESSAGE);
-
The input dialog
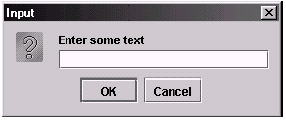
Figure 28: The input dialogThe input dialog provides an easy and quick way to get a string of input from the user. To create this dialog, we use the static method showInputDialog. The first parameter of this method takes in the parent component, which in our case is our main class (i.e., this). The second parameter takes in a string of text that will appear above the text field on the dialog. Here is the line of code that we use to create the input dialog:
String feedback = JOptionPane.showInputDialog(this, "Enter some text");
When the user clicks the OK button, the string is returned from the dialog, and in our example we store it in a reference called feedback. We can then use this as we would any other String object. In our example we display the string that was input by the user in a message dialog. This is achieved by using the following line of code:
JOptionPane.showMessageDialog(this, feedback, "The text you entered...", JOptionPane.INFORMATION_MESSAGE);
-
The confirmation dialog
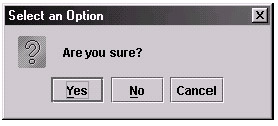
Figure 29: The confirmation dialogThis is yet another useful dialog. The confirmation dialog allows us to easily get confirmation from a user. We first create the dialog using the following line of code:
int result = JOptionPane.showConfirmDialog(this, "Are you sure?");
As with the input dialog, the first parameter specifies the parent component, and the second displays the text to be displayed within the dialog. Note that the dialog returns an integer value, which, in our example, we store in the integer variable result.
Once we have the result back from the dialog, we can simply use a set of if statements to react to the result accordingly. Note that there are constants defined in the JOptionPane class to represent the buttons on the confirmation dialog (i.e., the Yes button is defined as JOptionPane.YES_OPTION). Here is the code segment that we have implemented to react to each of the three buttons that the user can click on the dialog:
if(result == JOptionPane.YES_OPTION) { JOptionPane.showMessageDialog(this, "You were sure!", "Result", JOptionPane.INFORMATION_MESSAGE); } else if(result == JOptionPane.NO_OPTION) { JOptionPane.showMessageDialog(this, "You were not sure!", "Result", JOptionPane.INFORMATION_MESSAGE); } else if(result == JOptionPane.CANCEL_OPTION) { JOptionPane.showMessageDialog(this, "You pressed cancel!", "Result", JOptionPane.INFORMATION_MESSAGE); } -
The component dialog
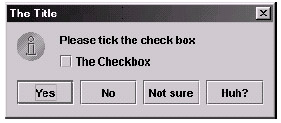
Figure 30: The component dialogBy far the most powerful dialog, the component dialog allows us to add extra content and options. We can add any number of components that we require to the dialog, as well as any number of options to the bottom. As we can see from the above screen shot, in this example we have added a check box component to the main body area. We have also added two extra options called Not Sure and Huh?.
Let's look at the code. First we create an array of two generic Object classes called theMessages. This array is going to be used to represent the body of our dialog and is created as follows:
Object[] theMessages = new Object[2];
After we have created the array, we then create a string of text that we wish to appear on the dialog and assign it as the first element of our theMessages object array. This can be seen in the following two lines of code:
String label = "Please tick the check box"; // Assign the first message (a simple label) theMessages[0] = label;
Next we create a JCheckBox object and assign it to the second element of the array; this can also be seen in the next line of code:
JCheckBox checkbox = new JCheckBox("The Checkbox"); theMessages[1] = checkbox;Now that we have the content of our dialog ready, we need to create an array of strings to represent the options that need to be displayed along the bottom of our dialog. We create this array as follows in our example:
String[] options = {"Yes", "No", "Not sure", "Huh?"};Now that we have everything ready, we can create our component dialog using the showOptionDialog static method as follows:
int result = JOptionPane.showOptionDialog(this, theMessages, "The Title", JOptionPane.DEFAULT_OPTION, JOptionPane.INFORMATION_MESSAGE, null, options, options[0]);
The first parameter specifies the parent component, as with the other dialogs. The second parameter is used to pass in our array of body objects that we created (i.e., the theMessages array). Next is the title that we want to be displayed on the title bar of the dialog, followed by any preset buttons that we wish to appear and the icon (if any) that we wish to appear at the left-hand side (in this case we have displayed the information icon). The next field takes an icon if we require it (if not, we set this to null, as we have done in this example). Then we specify our array of strings that we would like to appear as buttons (note that the dialog will automatically generate buttons from our strings). Finally, we specify the default button on the dialog. In our case, we have made the Yes button the default by passing its reference in directly from the array (i.e., options[0]).
Heavy going, eh? Notice that the showOptionDialog method returns an integer, which we store in a variable called result. This will contain the index of the button array options, which represents the button the user has clicked on (i.e., if the user clicks on Yes, the result will be 0; if the user clicks on No, the result will be 1, etc.).
|
|
EAN: 2147483647
Pages: 237