Rendering
|
|
The technique of rendering graphics in Java has gone through some very important changes in J2SE 1.4, with the ability to use full-screen exclusive mode and hardware acceleration. By rendering graphics, we refer to continuously updating the display of your game within the game loop. In this section, we will begin with a basic rendering loop and progress through various techniques for making your rendering as efficient as possible, ending up in full-screen exclusive mode. Of course, we will also cover applet rendering as well.
First of all, we should take a look at two classes that we are going to use throughout this section to illustrate different rendering techniques: the HotSpot and Animator classes.
The HotSpot class is used to create and store a colored circle image and also provides a render function for the circle image to be drawn onto the Graphics object passed to it. Here is the code for HotSpot.java.
import java.awt.*; import java.awt.geom.*; import java.awt.image.*; public class HotSpot { public HotSpot(Point pos, int diameter, Color col) { bounds = new Rectangle(pos.x, pos.y, diameter, diameter); image = new BufferedImage(diameter, diameter, BufferedImage.TYPE_INT_ARGB); Graphics2D g2D = (Graphics2D)image.getGraphics(); Ellipse2D.Double circle = new Ellipse2D.Double(0, 0, diameter, diameter); g2D.setColor(col); g2D.fill(circle); g2D.dispose(); } public void render(Graphics g) { g.drawImage(image, bounds.x, bounds.y, null); } public Rectangle bounds; private BufferedImage image; } The Animator class is used to control the movement of a HotSpot object around a given rectangular area and also provides a render function for drawing this information. Here is the code for Animator.java.
import java.awt.*; import java.util.*; public class Animator { public Animator(Rectangle bounds) { this.bounds = bounds; createHotSpot(); } public void createHotSpot() { Random rand = new Random(); int diameter = 100+rand.nextInt(200); Color col = new Color(rand.nextInt(Integer.MAX_VALUE)); hotSpot = new HotSpot(new Point(0, (bounds.height-diameter)/2), diameter, col); moveDir.setLocation(3, 3); } public void animate() { if(hotSpot != null) { if(moveDir.x>0) { hotSpot.bounds.x+=moveDir.x; if(hotSpot.bounds.x+hotSpot.bounds.width >= bounds.width) { hotSpot.bounds.x = (2*bounds.width)- hotSpot.bounds.x-(2*hotSpot.bounds.width); moveDir.x = -moveDir.x; } } else if(moveDir.x<0) { hotSpot.bounds.x+=moveDir.x; if(hotSpot.bounds.x <= 0) { hotSpot.bounds.x = Math.abs(hotSpot.bounds.x); moveDir.x = -moveDir.x; } } if(moveDir.y>0) { hotSpot.bounds.y+=moveDir.y; if(hotSpot.bounds.y+hotSpot.bounds.height >= bounds.height) { hotSpot.bounds.y = (2*bounds.height)- hotSpot.bounds.y-(2*hotSpot.bounds.height); moveDir.y = -moveDir.y; } } else if(moveDir.y<0) { hotSpot.bounds.y+=moveDir.y; if(hotSpot.bounds.y <= 0) { hotSpot.bounds.y = Math.abs(hotSpot.bounds.y); moveDir.y = -moveDir.y; } } } } public void render(Graphics g) { g.translate(bounds.x, bounds.y); g.setColor(Color.blue); g.fillRect(0, 0, bounds.width, bounds.height); if(hotSpot!=null) hotSpot.render(g); g.translate(-bounds.x, -bounds.y); } public HotSpot hotSpot; public Point moveDir = new Point(); public Rectangle bounds; } It is important to note the significance of the two main functions in the Animator class: animate and render. The animate method represents the logical side of the code, whereas the render method represents the drawing side of the code. Calling these in a main loop over and over again will give us a continuously updating display of a circle moving around the screen and bouncing off the walls.
The Main Game Loop
In order for your game to run repeatedly on its own, there must be a main game loop. There are various ways that a main game loop can be implemented, but the most general of main game loops will behave in the following way:
while(gameRunning) { Handle input Do game logic Update display } Handling input could be anything from a mouse press to a network message to a fellow online player (likely via the game server). The game logic will typically handle character movements, collision detection, AI, or anything that needs to run independently in the game. Updating the display is self-explanatory. Java uses separate threads for many aspects of what was just explained, such as mouse input from the (separate to your main loop thread) Event Dispatch Thread or when using passive rendering, which is also handled by the Event Dispatch Thread, or creating your own listener thread for listening to incoming network messages, as we shall see in the network chapters toward the end of this book. This can become a problem when you have a main loop running and handling game logic that is out of synch with events coming in from other threads. In this chapter and many other chapters, we will show appropriate ways to get all of these events handled completely in synch with the main loop, starting with passive rendering.
Passive Rendering
If you recall back to the beginning of this chapter when we discussed the Event Dispatch Thread and regurgitate your knowledge gained from reading Chapter 7, "Threads," we talked about how the paint method was invoked by the Event Dispatch Thread when an update was requested. It is recommended at this stage that you return to the "Introducing the Event Dispatch Thread" section of this chapter if you do not recall this thoroughly.
The default way to repaint a component is through a call to the method repaint on the component you wish to be redrawn (e.g., your main frame). However, this will not automatically repaint your component (though it should occur not long after) but will send a request to the Event Dispatch Thread to repaint your component. This technique is known as passive rendering, where you basically render the display passively as opposed to rendering actively then and there. The problem with passive rendering is that repaint requests are unreliable, and unwanted ones can come in from the Event Dispatch Thread; we want to render when we want, synchronized in the main loop. Also, there is the problem that in some cases we would want to time the actual drawing to measure performance. That is very difficult if not impossible with the passive rendering. The end goal of this section of the chapter is to turn the passive rendering repaint command into what is effectively an active rendering main loop. First of all, we should just concentrate on creating a rendering main loop using the previously mentioned Animator and HotSpot classes that can be instantly plugged into almost all of the following rendering examples in this section.
The main class for the following application example is called PassiveRendering and must be compiled along with the Animator and HotSpot classes shown earlier. We will first take a look at the PassiveRendering class and then discuss how it works; there is a lot to note about this example alone.
Code Listing 9-13: PassiveRendering.java
import java.awt.*; import java.awt.image.*; import javax.swing.*; import java.awt.event.*; class PassiveRendering extends JFrame implements Runnable { public PassiveRendering() { setTitle("Very Passively Rendering Example"); getContentPane().setLayout(null); setResizable(false); addWindowListener(new WindowAdapter() { public void windowClosing(WindowEvent e) { exitProgram(); } }); animator = new Animator(new Rectangle(0, 0, DISPLAY_WIDTH, DISPLAY_HEIGHT)); backBuffer = new BufferedImage(DISPLAY_WIDTH, DISPLAY_HEIGHT, BufferedImage.TYPE_INT_RGB); bbGraphics = (Graphics2D)backBuffer.getGraphics(); setVisible(true); Insets insets = getInsets(); DISPLAY_X = insets.left; DISPLAY_Y = insets.top; resizeToInternalSize(DISPLAY_WIDTH, DISPLAY_HEIGHT); } public void resizeToInternalSize(int internalWidth, int internalHeight) { Insets insets = getInsets(); final int newWidth = internalWidth + insets.left + insets.right; final int newHeight = internalHeight + insets.top + insets.bottom; Runnable resize = new Runnable() { public void run() { setSize(newWidth, newHeight); } }; if(!SwingUtilities.isEventDispatchThread()) { try { SwingUtilities.invokeAndWait(resize); } catch(Exception e) {} } else resize.run(); validate(); } public void run() { long startTime, waitTime, elapsedTime; // 1000/25 Frames Per Second = 40 millisecond delay int delayTime = 1000/25; Thread thisThread = Thread.currentThread(); while(loop==thisThread) { startTime = System.currentTimeMillis(); // move circle animator.animate(); // request repaint repaint(); // handle frame rate elapsedTime = System.currentTimeMillis() - startTime; waitTime = Math.max(delayTime - elapsedTime, 5); try { Thread.sleep(waitTime); } catch(InterruptedException e) {} mainLoopCounter++; } System.out.println("Program Exited"); dispose(); System.exit(0); } public void renderCounterInfo(Graphics g) { g.setColor(Color.yellow); g.drawString("Main Loop cycles: "+mainLoopCounter, 20, 20); g.drawString("Repaint count: "+repaintCounter, 20, 40); g.drawString("Difference: "+(mainLoopCounter-repaintCounter), 20, 60); } public void paint(Graphics g) { Graphics2D g2D = (Graphics2D)g; g2D.translate(DISPLAY_X, DISPLAY_Y); if(isDoubleBuffered) { animator.render(bbGraphics); renderCounterInfo(bbGraphics); g2D.drawImage(backBuffer, 0, 0, null); } else { animator.render(g2D); renderCounterInfo(g2D); } repaintCounter++; } public void update(Graphics g) { paint(g); } public void exitProgram() { loop = null; } public static void main(String args[]) { PassiveRendering app = new PassiveRendering(); app.loop = new Thread(app); app.loop.start(); } private int mainLoopCounter = 0; private int repaintCounter = 0; private Animator animator; private Thread loop; private BufferedImage backBuffer; private Graphics2D bbGraphics; private final int DISPLAY_X; // value assigned in constructor private final int DISPLAY_Y; // value assigned in constructor private static final int DISPLAY_WIDTH = 400; private static final int DISPLAY_HEIGHT = 400; private boolean isDoubleBuffered = true; } When you run this example, along with the Animator and HotSpot classes shown at the start of the "Rendering" section, you should get output of a circle bouncing around the screen, similar to the following figure.

Figure 9-14:
Introducing the Main Loop
To begin with, we create a new thread to handle the main loop. We do this by declaring that the main class implements the Runnable interface. This means that our main class, which extends JFrame, may also be treated as a thread in the respect that it defines a run method. Our code begins in main as follows:
public static void main(String args[]) { PassiveRendering app = new PassiveRendering(); app.loop = new Thread(app); app.loop.start(); } Here we create the main frame app and display it. We then create our main loop thread and start it. The call to start commences the thread's execution, invoking the run method supplied by the object that we passed to the thread's constructor, app, which is of type Runnable so it defines a run method to call.
| Note | It would be perfectly fine to actually program your main loop from the main method (e.g., call a main loop method from there and run your main loop code from the main thread, as it is a running thread just like the one we created anyway). The reason we create a new thread is because we need to for applets in this way anyway, so it keeps things consistent when we switch between applets and applications. Just to note, going straight into a main loop from (or in) main would be fine also (of course, the main loop termination condition would be different, where we would just use a Boolean flag instead). |
The PassiveRendering constructor, as well as setting up the frame, also creates an Animator object and creates a back buffer. (We will discuss the back buffer in a moment.) Now let's run through the main loop one bit at a time and look at how it works.
public void run() { long startTime, waitTime, elapsedTime; // 1000/25 Frames Per Second = 40 millisecond delay int delayTime = 1000/25; Here we declare the variables startTime, waitTime, and elapsedTime. We will discuss these as we work our way through this run method. delayTime defines the delay in the main loop per frame/cycle in milliseconds. This is taken by dividing the number of frames that you want to display per second by 1000 milliseconds (1 second). We will look at some important facts about handling the frame rate in Java a little later in Chapter 12, "Game Programming
Techniques."
Thread thisThread = Thread.currentThread(); while(loop==thisThread) { Here we define the termination condition for our main loop thread. This technique for stopping a thread was discussed in detail in Chapter 7 along with other useful techniques.
startTime = System.currentTimeMillis();
Here we get the current time from the method System.currentTimeMillis. We are not actually interested in the time but a numeric counter to compare with a later time in order to synchronize our frame rate. Handling the frame rate efficiently is discussed in Chapter 12. However, we will show a simple method later in this example.
// move circle animator.animate();
A call to the animate method of our Animator object will handle moving the position of the circle object by its given pixel speed. This call represents where game logic would be handled in the main loop.
// request repaint repaint();
Calling the method repaint will send out a request to update the display of our frame, resulting in the paint method being invoked. We will discuss this properly in a moment also.
// handle frame rate elapsedTime = System.currentTimeMillis() - startTime; waitTime = Math.max(delayTime - elapsedTime, 5); try { Thread.sleep(waitTime); } catch(InterruptedException e) {} Handling the frame rate is important to ensure that your loop runs as smoothly as possible at the required speed. Again, later we will learn that in Java this isn't entirely the case. In this code we first calculate the elapsed time in milliseconds by subtracting the time at which the frame started (which we recorded then in the variable startTime) from the current time. The elapsed time is also generally known as the delta time. We then find out how long we should wait by subtracting the elapsed time (the time it has taken the frame to execute) from the required delay time of 40 milliseconds (1000/40 = 25 frames per second). We then call the sleep method, which will cause this thread to sleep for the calculated duration.
However, we also need to give other threads a chance to execute. This is important in a multithreaded language like Java. Starving other threads such as the Event Dispatch Thread, Garbage Collection, etc., can have disastrous results on your game. For this, we detect if the time to sleep is less than 5 milliseconds and sleep for this time instead. We will discuss handling your game when the frame rate goes slower than expected a little later in the book.
mainLoopCounter++; }
Here is the end of our main loop where we increment the variable mainLoopCounter, which is storing the number of iterations that the loop has performed. This is recorded to illustrate problems with passive rendering, which we shall discuss in a moment.
System.out.println("Program Exited"); dispose(); System.exit(0); } The main loop is terminated by setting loop to null in the exitProgram method. This method is invoked when the user closes the window, causing the windowClosing method to be invoked by the Event Dispatch Thread. We will look at event listeners in the next chapter, so do not worry too much about them for now. The method System.exit(0) will terminate the program completely. A non-zero parameter indicates the program terminated because of a problem, so here we pass 0 as we exit safely.
Reducing Flickering
Overriding the Update Method
When a repaint is requested on an AWT Frame or a Swing JFrame, or an Applet or JApplet for that matter, it is invoked through a call to the update method, which in turn calls paint directly. (Note that in some instances, paint will be called directly, without a call to update). By default, update will first clear the background region itself in the background color of the component in question, which in this instance is our JFrame. The background color of a component can be set using the method setBackground(Color). However, we do not want to draw the background in this way, as in most circumstances we will be drawing our own background, perhaps as an image. So what we want to do is simply override the update method and make a call to paint ourselves, without painting a component-sized rectangle first. This is the first step in reducing screen flicker with passive rendering.
Double Buffering
Double buffering is the standard way to prevent flicker and achieve smooth animations. A buffer in this context is simply an area of memory to and from which data is written. Double buffering simply entails using two buffers. When using double buffering for drawing, we are able to draw to one buffer while the other is being drawn to the screen. When using just one buffer, there is the problem that you could be drawing to the buffer that is also being drawn to the screen concurrently or has already had a portion of its data drawn to the screen. The result is that you will see a partial drawing of the original buffer image and then whatever your drawing code has just written to the buffer at the same time. This will cause flicker, made obvious by the change in display, as with our circle object moving its position every frame, or any game updating its screen display. In this example, you can set the Boolean variable isDoubleBuffered to false to see what the rendering looks like without double buffering. In Java, the standard means of double buffering is to create an off-screen image the size of the displayable area. We do this in our example in the constructor of the PassiveRendering frame with the following lines of code:
backBuffer = new BufferedImage(DISPLAY_WIDTH, DISPLAY_HEIGHT, BufferedImage.TYPE_INT_RGB); bbGraphics = (Graphics2D)backBuffer.getGraphics();
We discussed creating images earlier in this chapter. The backBuffer variable is declared as a member of the main class of type BufferedImage. Here we can also create and store the Graphics object of this buffer for rendering to later using the method getGraphics of the image. Now we can take a look at the paint method where this drawing takes place:
public void paint(Graphics g) { Graphics2D g2D = (Graphics2D)g; g2D.translate(DISPLAY_X, DISPLAY_Y); if(isDoubleBuffered) { animator.render(bbGraphics); renderCounterInfo(bbGraphics); g2D.drawImage(backBuffer, 0, 0, null); If the variable isDoubleBuffered is true, we draw first to the off-screen image backBuffer and then draw this image to the displayable component drawn to the screen.
} else { animator.render(g2D); renderCounterInfo(g2D); However, if the variable isDoubleBuffered is set to false, we simply draw our graphics straight to the displayable component without double buffering it first.
} repaintCounter++; }
When the painting is done, we increment the variable repaintCounter. We will discuss this in a moment.
Synchronized Drawing with the Main Loop
The main problem with passive rendering is that you have two threads running at the same time, the main loop thread and the Event Dispatch Thread calling your paint method. The problem with having these two threads running at the same time (in principle, anyway) is the same problem you have with any threads running alongside one another: synchronization. In terms of the paint method being called while the main loop is running, you have no real control over the time at which the paint method is called in conjunction with the main loop. The fact that the paint method should be called very soon after the repaint request should not be taken for granted. Besides this fact, further repaint requests can also be posted that are unnecessary when you are updating the display with your own calls to repaint many times per second. In the previous example, PassiveRendering, we recorded the number of times the main loop executed in the variable mainLoopCounter and the number of times the paint method was invoked in the variable repaintCounter, drawing these values to the window area every time paint was invoked. As you can see in Figure 9-14, the number of paint iterations (431) exceeds the number of main loop iterations (368) by 63. This was mainly due to the fact that another window was dragged over our window repetitively to emphasize the point.
The real problem with two threads like these lies in handling objects in general. Suppose you hold a reference to an object, like a HotSpot from the HotSpot class we defined earlier. Part of the way through the main loop you decide that you want to remove this object; you remove it, setting your reference to null, but your paint method then interrupts and tries to draw the object with your reference now referring to null. You may add a check in the paint code to see if the reference is not equal to null before drawing, which would decrease the likelihood of such an error occurring but would still not remove the possibility completely. In the next chapter, we will look at this in much more detail when handling mouse and keyboard events, which are received similarly to the Event Dispatch Thread, so do not worry overly about this problem for now if you do not fully understand it.
The easiest method of synchronizing the main loop with the paint code is simply to do your drawing in the main loop. We can achieve this by calling the method getGraphics on our main component, the JFrame itself, and draw to it within the main loop. The following example, ActiveRendering, is an example of this technique for rendering and again uses the classes Animator and HotSpot, defined at the beginning of the "Rendering" section. You will need to use them in order to compile and run this code.
Code Listing 9-14: ActiveRendering.java
import java.awt.*; import java.awt.image.*; import javax.swing.*; import java.awt.event.*; public class ActiveRendering extends JFrame implements Runnable { public ActiveRendering() { setTitle("Active Rendering Application"); getContentPane().setLayout(null); setResizable(false); setIgnoreRepaint(true); addWindowListener(new WindowAdapter() { public void windowClosing(WindowEvent e) { exitProgram(); } }); animator = new Animator(new Rectangle(0, 0, DISPLAY_WIDTH, DISPLAY_HEIGHT)); backBuffer = new BufferedImage(DISPLAY_WIDTH, DISPLAY_HEIGHT, BufferedImage.TYPE_INT_RGB); bbGraphics = (Graphics2D) backBuffer.getGraphics(); setVisible(true); Insets insets = getInsets(); DISPLAY_X = insets.left; DISPLAY_Y = insets.top; resizeToInternalSize(DISPLAY_WIDTH, DISPLAY_HEIGHT); } public void resizeToInternalSize(int internalWidth, int internalHeight) { Insets insets = getInsets(); final int newWidth = internalWidth + insets.left + insets.right; final int newHeight = internalHeight + insets.top + insets.bottom; Runnable resize = new Runnable() { public void run() { setSize(newWidth, newHeight); } }; if(!SwingUtilities.isEventDispatchThread()) { try { SwingUtilities.invokeAndWait(resize); } catch(Exception e) {} } else resize.run(); validate(); } public void run() { long startTime, waitTime, elapsedTime; // 1000/25 Frames Per Second = 40 millisecond delay int delayTime = 1000/25; Thread thisThread = Thread.currentThread(); while(loop==thisThread) { startTime = System.currentTimeMillis(); animator.animate(); // render to back buffer now render(bbGraphics); // render back buffer image to screen Graphics g = getGraphics(); g.drawImage(backBuffer, DISPLAY_X, DISPLAY_Y, null); g.dispose(); // handle frame rate elapsedTime = System.currentTimeMillis() - startTime; waitTime = Math.max(delayTime - elapsedTime, 5); try { Thread.sleep(waitTime); } catch(InterruptedException e) {} mainLoopCounter++; } System.out.println("Program Exited"); dispose(); System.exit(0); } public void renderCounterInfo(Graphics g) { g.setColor(Color.yellow); g.drawString("Main Loop cycles: "+mainLoopCounter, 20, 20); g.drawString("Repaint count: "+repaintCounter, 20, 40); g.drawString("Difference: "+(mainLoopCounter-repaintCounter), 20, 60); } public void render(Graphics g) { animator.render(g); renderCounterInfo(g); repaintCounter++; } public void exitProgram() { loop = null; } public static void main(String args[]) { ActiveRendering app = new ActiveRendering(); app.loop = new Thread(app); app.loop.start(); } private int mainLoopCounter = 0; private int repaintCounter = 0; private Animator animator; private Thread loop; private BufferedImage backBuffer; private Graphics2D bbGraphics; private final int DISPLAY_X; // value assigned in constructor private final int DISPLAY_Y; // value assigned in constructor private static final int DISPLAY_WIDTH = 400; private static final int DISPLAY_HEIGHT = 400; } When you compile and run this code, you should get output similar to Figure 9-14, but this time the main loop counter and the paint counter values should be equal.
The first, quite irrelevant difference between this example and the PassiveRendering example is that we have taken out the Boolean isDoubleBuffered option for double buffering just to neaten up the code a little. The first thing to note about this example is that we have moved the painting code from the paint method to our own method called render, which is not an inherited method but simply our own method for rendering. Furthermore, we have removed the methods paint and update and included the call setIgnoreRepaint(true) in the constructor of our application, which will prevent them from being invoked from the Event Dispatch Thread. So Event Dispatch Thread paint messages will be ignored and will not interfere with our rendering process. All that is left is for us to render actively in the main loop. We do this by passing the back buffer's Graphics object to the render method. We then draw the back buffer image to the screen at the specified top-left coordinates, which is neater than translating to the coordinates first. The painting is now performed in the main loop under our control.
Let's See That in an Applet
The conversion of the code for ActiveRendering into an applet is relatively straightforward, and the technique remains the same. Here is the code for the example ActiveRenderingApplet.java, which requires the Animator and HotSpot classes, too.
Code Listing 9-15: ActiveRenderingApplet.java
import java.awt.*; import java.awt.image.*; import javax.swing.*; import java.awt.event.*; public class ActiveRenderingApplet extends JApplet implements Runnable { public void init() { getContentPane().setLayout(null); setSize(DISPLAY_WIDTH, DISPLAY_HEIGHT); setIgnoreRepaint(true); animator = new Animator(new Rectangle(0, 0, DISPLAY_WIDTH, DISPLAY_HEIGHT)); backBuffer = new BufferedImage(DISPLAY_WIDTH, DISPLAY_HEIGHT, BufferedImage.TYPE_INT_RGB); bbGraphics = (Graphics2D) backBuffer.getGraphics(); } public void start() { loop = new Thread(this); loop.start(); } public void stop() { loop = null; } public void run() { long startTime, waitTime, elapsedTime; // 1000/25 Frames Per Second = 40 millisecond delay int delayTime = 1000/25; Thread thisThread = Thread.currentThread(); while(loop==thisThread) { startTime = System.currentTimeMillis(); animator.animate(); // render to back buffer now render(bbGraphics); // render back buffer image to screen Graphics g = getGraphics(); g.drawImage(backBuffer, 0, 0, null); g.dispose(); // handle frame rate elapsedTime = System.currentTimeMillis() - startTime; waitTime = Math.max(delayTime - elapsedTime, 5); try { Thread.sleep(waitTime); } catch(InterruptedException e) {} mainLoopCounter++; } } public void renderCounterInfo(Graphics g) { g.setColor(Color.yellow); g.drawString("Main Loop cycles: "+mainLoopCounter, 20, 20); g.drawString("Repaint count: "+repaintCounter, 20, 40); g.drawString("Difference: "+(mainLoopCounter-repaintCounter), 20, 60); } public void render(Graphics g) { animator.render(bbGraphics); renderCounterInfo(bbGraphics); repaintCounter++; } private int mainLoopCounter = 0; private int repaintCounter = 0; private Animator animator; private Thread loop; private BufferedImage backBuffer; private Graphics2D bbGraphics; private static final int DISPLAY_WIDTH = 400; private static final int DISPLAY_HEIGHT = 400; } Much of the code in this example should be relatively familiar to you, as we discussed applets in the early stages of this chapter and the new rendering code is almost the same as the rendering code for the application made earlier. You should note that there is no main method in the applet. Instead, the JApplet object is created through the JVM and the browser, whereby the init method is first invoked. Initialization code, such as image loading, should be provided here. Then the start method of the applet is invoked where we create and start the main loop thread.
Synchronized Painting Using Threads
The aim of this example is to illustrate how thread manipulation can be used to synchronize repaint calls with the main loop. Although this technique is not essential to us because we have already discussed a suitable means of synchronizing the main loop with painting earlier, this example should act as a good lesson in understanding threads, which are a major part of the Java language.
In order to synchronize paint method calls with the main loop by calling the repaint method, we can use the wait and notify methods of a given object. This will allow us to request a repaint (using the repaint method of our component) and then pause the main loop thread immediately after the request until the paint method has not only been invoked but has performed its painting routine. We also take action to prevent extra, unwanted paint requests from being performed in the paint method in the following example, ActivelyPassiveRenderingRepaints. This example again uses the classes Animator and HotSpot, defined at the beginning of the "Rendering" section, so you will need to use them to compile and run this code.
Code Listing 9-16: ActivelyPassiveRenderingRepaints.java
import java.awt.*; import java.awt.image.*; import javax.swing.*; import java.awt.event.*; class ActivelyPassiveRenderingRepaints extends JFrame implements Runnable { public ActivelyPassiveRenderingRepaints() { setTitle("Actively Passive Rendering Application"); getContentPane().setLayout(null); setResizable(false); addWindowListener(new WindowAdapter() { public void windowClosing(WindowEvent e) { exitProgram(); } }); animator = new Animator(new Rectangle(0, 0, DISPLAY_WIDTH, DISPLAY_HEIGHT)); backBuffer = new BufferedImage(DISPLAY_WIDTH, DISPLAY_HEIGHT, BufferedImage.TYPE_INT_RGB); bbGraphics = (Graphics2D) backBuffer.getGraphics(); setVisible(true); Insets insets = getInsets(); DISPLAY_X = insets.left; DISPLAY_Y = insets.top; resizeToInternalSize(DISPLAY_WIDTH, DISPLAY_HEIGHT); } public void resizeToInternalSize(int internalWidth, int internalHeight) { Insets insets = getInsets(); final int newWidth = internalWidth + insets.left + insets.right; final int newHeight = internalHeight + insets.top + insets.bottom; Runnable resize = new Runnable() { public void run() { setSize(newWidth, newHeight); } }; if(!SwingUtilities.isEventDispatchThread()) { try { SwingUtilities.invokeAndWait(resize); } catch(Exception e) {} } else resize.run(); validate(); } public void run() { long startTime, waitTime, elapsedTime; // 1000/25 Frames Per Second = 40 millisecond delay int delayTime = 1000/25; Thread thisThread = Thread.currentThread(); while(loop==thisThread) { startTime = System.currentTimeMillis(); animator.animate(); rendered = false; repaint(); waitForPaint(); // handle frame rate elapsedTime = System.currentTimeMillis() - startTime; waitTime = Math.max(delayTime - elapsedTime, 5); try { Thread.sleep(waitTime); } catch(InterruptedException e) {} mainLoopCounter++; } System.out.println("Program Exited"); dispose(); System.exit(0); } public void renderCounterInfo(Graphics g) { g.setColor(Color.yellow); g.drawString("Main Loop cycles: "+mainLoopCounter, 20, 20); g.drawString("Repaint count: "+repaintCounter, 20, 40); g.drawString("Difference: "+(mainLoopCounter-repaintCounter), 20, 60); } public void paint(Graphics g) { if(!rendered) { // render to the back buffer animator.render(bbGraphics); renderCounterInfo(bbGraphics); // render back buffer to screen g.drawImage(backBuffer, DISPLAY_X, DISPLAY_Y, null); synchronized(this) { rendered = true; notify(); } repaintCounter++; } } public void update(Graphics g) { paint(g); } public void waitForPaint() { synchronized(this) { while(!rendered) { try { wait(); } catch(InterruptedException e) {} } } } public void exitProgram() { loop = null; } public static void main(String args[]) { ActivelyPassiveRenderingRepaints app = new ActivelyPassiveRenderingRepaints(); app.loop = new Thread(app); app.loop.start(); } private int mainLoopCounter = 0; private int repaintCounter = 0; private boolean rendered = true; private Animator animator; private Thread loop; private BufferedImage backBuffer; private Graphics2D bbGraphics; private final int DISPLAY_X; // value assigned in constructor private final int DISPLAY_Y; // value assigned in constructor private static final int DISPLAY_WIDTH = 400; private static final int DISPLAY_HEIGHT = 400; } When you compile and run this code, the main loop counter and the paint counter values should again be equal, whereby this time a call is made to repaint in the main loop, which then waits for the paint method to be invoked successfully before continuing.
So how does it work? To begin with, let's look at the new paint request code in the main loop thread:
rendered = false; repaint(); waitForPaint();
The boolean variable rendered is set to false to indicate to both the paint method and the waitForPaint method that the paint job still needs to be performed. This is also used to prevent unwanted paints from being performed, as we shall see in a moment in the new paint method. The basic concept of this paint request code is to, as the method suggests, wait for painting to be performed before continuing. Let's now take a closer look at the paint method and the waitForPaint method and discuss the possible paths that each could take and understand how all will lead to a successful wait routine. First, here is the paint method:
public void paint(Graphics g) { if(!rendered) { We will only perform our paint routine if the rendered variable is set to false, so this will prevent unwanted paint requests from continuing into the painting code, namely unwanted invocations from the Event Dispatch Thread.
// render to the back buffer animator.render(bbGraphics); renderCounterInfo(bbGraphics); // render back buffer to screen g.drawImage(backBuffer, DISPLAY_X, DISPLAY_Y, null); synchronized(this) { rendered = true; notify(); } Here we synchronize on the frame object (this) and then set the variable rendered to true and notify our main loop thread. The main loop thread is waiting on this object's monitor so that it can awake and continue out of the waitForPaint method and continue on with the main loop from which it was called. We'll look at the waitForPaint method and then go into more detail on this in a moment.
repaintCounter++; } } public void waitForPaint() { synchronized(this) { while(!rendered) { try { wait(); } catch(InterruptedException e) {} } } } The method waitForPaint is called from the main loop thread immediately after the call to repaint. As we do not know if waitForPaint will be called from the main loop thread before the paint method is called from the Event Dispatch Thread, we have two possible code paths to account for in order to successfully wait for the paint job to be performed:
-
Path 1—We set rendered to false and called repaint. The paint method is invoked before the waitForPaint method and reaches the synchronized(this) code block inside the paint method before waitForPaint synchronizes the object with its own synchronized(this) code block. This means that while paint is in its synchronized(this) code block, waitForPaint will not enter its own synchronized(this) code block. Then in the paint method we set rendered to true, call notify and exit the synch-block, allowing waitForPaint to now enter its own synch-block. When the method waitForPaint enters its synch-block, it finds that rendered is true and never performs the while(!rendered) routine. It swiftly exits from the method, returning to the main loop having successfully waited until the paint method was complete. This is the easy path.
-
Path 2—The more complicated scenario is where the synch-block in waitForPaint is entered before the synch-block in the paint method is reached (i.e., the paint routine is incomplete). Now the synch-block in waitForPaint will be entered. You will find that rendered is still equal to false because it cannot yet be set to true, as the synch-block in the paint method cannot currently be entered. We then call the wait method in waitForPaint. The wait method will stop until another thread calls the notify or notifyAll method on the current object. Remember when we looked at the Object class in Chapter 4? These methods belong to it and are therefore inherited by all objects, hence any object can be used for synchronization in this way. The wait method also causes the current thread (the main loop thread in this case) to release any ownership on synchronizing this object, allowing the synchronized(this) block in the paint method to now be entered, as the main loop thread currently waits to be re-awoken. When this happens the variable rendered is then set to true and the notify method is invoked. The call to notify awakens a thread that is currently waiting on the object in question, notably our call to wait in the waitForPaint method. The wait method is then passed and the while loop exits as the variable rendered is now equal to true. Once again, we are synchronized and the main loop can continue knowing the paint job has completed successfully.
Hopefully this has not been too draining to understand; you should also understand threads a little better too.
Using a VolatileImage Back Buffer
The VolatileImage class provides a means of storing your image directly in the hardware memory of the graphics card (as opposed to system memory like BufferedImage), whereby the image will become hardware accelerated. The non-accelerated images, such as BufferedImage, need to be copied over to the screen from system memory for drawing together with any color depth and scaling operations required per frame. With hardware acceleration, the image is stored in VRAM, accelerated video memory, whereby the graphics card can take on specialized graphics operations, performing routines faster and rendering more efficiently to the screen. Note that if the system that you are running on does not support accelerated video memory, your image will be stored in system memory just like BufferedImage.
The problem with VolatileImage is that it is volatile, whereby its contents can be lost by being overwritten in video memory by another application. This can occur by such an action as changing the display mode in your operating system or a window taking over full-screen exclusive mode. For this irregularity, the VolatileImage class allows us to test the image to see if the contents have been lost, giving us the chance to restore the image soon after. The following example, VolatileImageRendering, is an example of rendering to a VolatileImage back buffer in an applet. So go and get the Animator and HotSpot classes and take a look at the following code.
Code Listing 9-17: VolatileImageRendering.java
import java.awt.*; import java.awt.image.*; import javax.swing.*; import java.awt.event.*; public class VolatileImageRendering extends JApplet implements Runnable { public void init() { getContentPane().setLayout(null); setSize(DISPLAY_WIDTH, DISPLAY_HEIGHT); setIgnoreRepaint(true); animator = new Animator(new Rectangle(0, 0, DISPLAY_WIDTH, DISPLAY_HEIGHT)); createVolatileImageBackBuffer(); } public void createVolatileImageBackBuffer() { volatileImageBackBuffer = getGraphicsConfiguration().create CompatibleVolatileImage(DISPLAY_WIDTH, DISPLAY_HEIGHT); vibbGraphics = (Graphics2D) volatileImageBackBuffer.getGraphics(); } public void start() { loop = new Thread(this); loop.start(); } public void stop() { loop = null; } public void run() { long startTime, waitTime, elapsedTime; // 1000/25 Frames Per Second = 40 millisecond delay int delayTime = 1000/25; Thread thisThread = Thread.currentThread(); while(loop==thisThread) { startTime = System.currentTimeMillis(); animator.animate(); // render to back buffer render(vibbGraphics); // render back buffer to screen Graphics g = getGraphics(); g.drawImage(volatileImageBackBuffer, 0, 0, null); g.dispose(); // handle frame rate elapsedTime = System.currentTimeMillis() - startTime; waitTime = Math.max(delayTime - elapsedTime, 5); try { Thread.sleep(waitTime); } catch(InterruptedException e) {} } } public void render(Graphics g) { do { int state = volatileImageBackBuffer.validate (getGraphicsConfiguration()); if(state==VolatileImage.IMAGE_INCOMPATIBLE) createVolatileImageBackBuffer(); // create a new image // render to volatileImage back buffer animator.render(g); } while(volatileImageBackBuffer.contentsLost()); } private Animator animator; private Thread loop; private VolatileImage volatileImageBackBuffer; private Graphics2D vibbGraphics; // volatile image bbGraphics private static final int DISPLAY_WIDTH = 400; private static final int DISPLAY_HEIGHT = 400; } We create the VolatileImage in the method createVolatileImageBackBuffer, obtained from the graphics configuration of the screen. This is important because we may be running on a dual monitor display, where each monitor could likely have its own graphics card. The method createVolatileImageBackBuffer may also be re-called in the main rendering loop from the render method if the contents of VolatileImage are found to have been overwritten by our out-of-control operating system.
VolatileImage in its Current State
For the vast majority of 2D games, the sprites used in these games will not always be rectangular and fully opaque but will have transparent pixels. For example, Mario's character does not fill up an entire rectangular area but uses the pixels it takes to shape his body. At the moment, VolatileImage does not support transparency, which makes it unusable for non-rectangular filling sprite data. This important feature of VolatileImage will hopefully be supported soon though.
Active Rendering and Full-Screen Exclusive Mode
Probably the most important new feature of Java 1.4 for games development is full-screen exclusive mode. This feature enables us to take direct control over the screen, suspending the underlying windowing environment. This means that we can render to the full bounds of the monitor display and not have to worry about any of the window problems that we have encountered so far. Furthermore, when going into full-screen exclusive mode, we may also change the screen resolution and bit depth to any supported by the destination system, instead of being forced to use the current windowed mode configuration. The screen resolution is simply the number of pixels that fill the monitor display in width and height (e.g., 800x600, 1024x768) and the bit depth is the number of bits used for storing the color value for each pixel (e.g., 8-bit—256 colors, 32-bit—roughly 16.8 million colors).
There is much to discuss on this subject, as we shall see in the coming sections, but you can be sure of one thing: in Java it's very easy to venture into full-screen exclusive mode. In a moment, we will create a template full-screen rendering application, which also gives you the option of running in debug/windowed mode instead. But first we will take a look at the all-important BufferStrategy class, also a new feature in Java 1.4.
Introducing the BufferStrategy Class
The class java.awt.image.BufferStrategy was designed to provide an all-purpose means of actively rendering to a window or canvas.
The buffer strategy will attempt to use the most efficient method for rendering for your given display component. However, this implementation is dependent on the capabilities of the hardware and software on which you are running. If possible, the buffer strategy of choice for rendering is page flipping. If page flipping is not available, it will perform double buffering similar to when we created the off-screen buffers in previous examples. In this case the buffer strategy will take advantage of volatile image capabilities if supported; otherwise it will perform double buffering without accelerated images.
The two main methods of the BufferStrategy class that we will use in our main rendering loop are getDrawGraphics and show. The method getDrawGraphics will simply return the Graphics object to which we can perform our drawing routines, and the show method is called when you are finished and are ready to draw to the screen. Another important point is that rendering, using BufferStrategy, can be performed in windowed mode and full-screen exclusive mode, meaning that you may use the same main rendering loop code to be performed in both. We will perform this in the upcoming example, FullScreenDemo, in a moment, allowing you to choose whether or not you wish to go into full-screen exclusive mode or stay in windowed mode, using the same rendering loop whatever the choice.
Page Flipping
When using double buffering techniques, we are required to first of all render our scene to an off-screen back buffer, as we did in previous examples in this section, and then copy the back buffer to the destination component's Graphics object for drawing to the screen. Using page flipping, the buffers are created in video memory, where we can draw directly to them. They may then be swapped using a video pointer. The video pointer is merely the address in video memory pointing (in this case, to either one of our buffers, making that buffer the primary surface). When we wish to swap the buffers, instead of copying the contents of our back buffer to the primary buffer, we can simply swap the video pointer so that it now points to the new primary surface (previously the back buffer that we have just drawn the latest scene to), leaving us with the old primary surface, which becomes our new back buffer ready to be overwritten with a newer scene, and so on with the swapping. In Java, you can also easily specify the number of buffers that you wish to use for your buffer strategy. This means you can perform chain flipping where two or more back buffers can be used with a primary surface, increasing the smoothness of your rendering at the cost of using more memory.
The FullScreenDemo Example
In this example we will look at all of the basics of moving into full-screen exclusive mode and using the BufferStrategy to control our rendering. We will take a look at this example step by step, as it is quite large. Be aware that the complete source code for this example is here, but it has explanations interspersed among the code.
Note also that you will need to grab the Animator and HotSpot classes to be compiled along with this example.
Code Listing 9-18: FullScreenDemo.java
import java.awt.*; import java.awt.image.*; import java.awt.event.*; import javax.swing.*; class FullScreenDemo extends JFrame implements Runnable, KeyListener { One small thing to note at this stage is that we implement the KeyListener interface in this example class. We implement this interface in order to read keyboard input events into our program (namely the Escape key being pressed) so that we can exit from full-screen mode as the close button on the window will not be available in this instance. We will go into depth about keyboard and mouse events in the next chapter, so do not concern yourself with this too much for the time being.
public FullScreenDemo(GraphicsDevice graphicsDevice) { super(graphicsDevice.getDefaultConfiguration()); this.graphicsDevice = graphicsDevice; getContentPane().setLayout(null); setIgnoreRepaint(true); setResizable(false); animator = new Animator(new Rectangle(0, 0, DISPLAY_WIDTH, DISPLAY_HEIGHT)); addWindowListener(new WindowAdapter() { public void windowClosing(WindowEvent e) { exitProgram(); } }); addKeyListener(this); } In the call to the constructor in the method main, we pass a GraphicsDevice object of the local graphics environment. We can then pass this to the super class (JFrame) constructor also and store our own reference to it to be used later for actually moving into full-screen mode. We also make a call to setIgnoreRepaint here, which will tell the Event Dispatch Thread to ignore any painting requests coming in from the operating system so we can actively render on our own, as we did in previous active rendering examples. We also add a window listener for when a window-closing event comes in from the user action. Note that even though in full-screen mode we will not have a close button on the window (the x button), the user can still use shortcut keys, such as Alt+F4 in Windows, to close the window. So even in full-screen mode, this will dispatch a window-closing window event.
The following method, setMode, is used to eventually display our JFrame in a given display mode. The parameter passed is 0 for full-screen or 1 for windowed mode.
public void setMode(int mode) { if(mode==FULLSCREEN_MODE) if(!graphicsDevice.isFullScreenSupported()) { mode = WINDOWED_MODE; System.out.println("Sorry, fullscreen mode not supported, continuing in windowed mode"); } Here we can make a check to the method isFullScreenSupported of the GraphicsDevice object. If full-screen mode is not supported, we will carry on in windowed mode.
this.mode = mode; try { if(mode==FULLSCREEN_MODE) { setUndecorated(true); The call to the method setUndecorated allows us to remove the windowed decorations from around our JFrame object when going into full-screen mode. An earlier hack of pretending to be in full-screen mode before it became available in Java was to create a screen size window and turn off the decorations; now we can do it properly.
graphicsDevice.setFullScreenWindow(this);
To go into full-screen, all we need to do is simply make a call to the method setFullScreenWindow of the GraphicsDevice object passing a reference to our JFrame object (this), and there we go.
Once in full-screen mode, we can change the display mode (that is, the resolution, bit depth, and monitor refresh rate of the screen) using the class java.awt.DisplayMode. We can first check to see if we are able to change the display mode and then attempt our change.
if(graphicsDevice.isDisplayChangeSupported()) { DisplayMode dm = new DisplayMode(DISPLAY_WIDTH, DISPLAY_HEIGHT, 16, DisplayMode.REFRESH_RATE_UNKNOWN); if(isDisplayModeAvailable(dm)) graphicsDevice.setDisplayMode(dm); The method isDisplayModeAvailable checks through a list of available modes to see if any of them match up to the one that we desire. This method is implemented further in this example.
else { System.out.println("Display mode not available: "+ dm.getWidth()+":"+ dm.getHeight()+":"+ dm.getBitDepth()); System.exit(0); } } else { System.out.println("Display change not supported"); System.exit(0); } } else // WINDOWED_MODE { If we are moving into normal windowed mode, we can reproduce the window setup code that we have used in earlier windowed examples in this section.
setTitle("Windowed Mode"); setVisible(true); Insets insets = getInsets(); DISPLAY_X = insets.left; DISPLAY_Y = insets.top; resizeToInternalSize(DISPLAY_WIDTH, DISPLAY_HEIGHT); } At this point, we have set up and displayed our JFrame, be it in full-screen mode or windowed mode. All that remains is for us to create the BufferStrategy for rendering to our displayable area. We can perform this by calling the method createBufferStrategy of the JFrame component, simply passing to it the number of buffers that we are going to use. We then get the buffer strategy and store a reference to it in the variable strategy to be used for rendering later on.
createBufferStrategy(3); strategy = getBufferStrategy(); } catch(Exception e) { graphicsDevice.setFullScreenWindow(null); e.printStackTrace(); } We can also make a test to see if page flipping is being used, as follows:
if(!strategy.getCapabilities().isPageFlipping()) System.out.println("Page flipping is not available in this mode"); While writing this book using the initial release of J2SE 1.4, we experienced a problem with using full-screen mode and rendering BufferStrategy, where it appeared that the BufferStrategy created was not immediately ready for rendering, possibly due to a slight delay in the changing of the display mode. For this purpose, we have included the method waitForReadyStrategy, implemented later on in this example, which is designed to continue to catch exceptions until the BufferStrategy is ready for drawing. It is a bit of a hack, but it does work. Alternatively, we were forced to continually restart our application until it worked, which was annoying.
waitForReadyStrategy(); }
Here is simply the window resizing method that we have been using throughout this chapter for running in windowed mode:
public void resizeToInternalSize(int internalWidth, int internalHeight) { Insets insets = getInsets(); final int newWidth = internalWidth + insets.left + insets.right; final int newHeight = internalHeight + insets.top + insets.bottom; Runnable resize = new Runnable() { public void run() { setSize(newWidth, newHeight); } }; if(!SwingUtilities.isEventDispatchThread()) { try { SwingUtilities.invokeAndWait(resize); } catch(Exception e) {} } else resize.run(); validate(); } Next is a simple method used in the initialization stage of going into full-screen mode.
public boolean isDisplayModeAvailable(DisplayMode dm) { DisplayMode[] availableModes = graphicsDevice.getDisplayModes(); for(int i=0; i<availableModes.length; i++) { if(dm.getWidth()==availableModes[i].getWidth() && dm.getHeight()==availableModes[i].getHeight() && dm.getBitDepth()==availableModes[i].getBitDepth()) return true; } return false; } This simple method obtains a list of available display modes using the method graphicsDevice.getAvailableDisplayModes and then searches through the available modes, returning true if the argument parameter mode is one of those available and false otherwise.
public void waitForReadyStrategy() { int iterations = 0; while(true) { try { Thread.sleep(20); } catch(InterruptedException e) {} try { strategy.getDrawGraphics(); break; } catch(IllegalStateException e) { System.out.println("BufferStrategy not ready yet"); } iterations++; if(iterations == 100) { // (Unlikely event) No use after 2 seconds // (100*20ms = 2secs) give up trying System.out.println("Exiting Program, unable to use BufferStrategy"); System.exit(0); } } } As you can see, this method is quite straightforward. In it, we simply attempt to retrieve the Graphics object from our buffer strategy, catching an exception if thrown. We give this test a life of two seconds before giving up and exiting out of the program. Note that we have never experienced such an exception with one single sleep of 20 milliseconds alone (though we have without a sleep), so exiting unsuccessfully should be very unlikely with this method.
public void start() { loop = new Thread(this); loop.start(); } The start method is called after the display has been set up to begin the main loop rendering process. Once the thread "loop" is created and started, the run method is called.
public void run() { long startTime, waitTime, elapsedTime; // 1000/25 Frames Per Second = 40 millisecond delay int delayTime = 1000/25; Thread thisThread = Thread.currentThread(); while(loop==thisThread) { startTime = System.currentTimeMillis(); We call the method animator.animate, as we have in many of the previous examples, to perform the movement of the HotSpot around the screen.
animator.animate();
We are now ready to draw our scene by retrieving the Graphics object to draw to from strategy.getDrawGraphics. We can then draw to this and finally make a call to strategy.show when finished.
Graphics g = strategy.getDrawGraphics(); if(!strategy.contentsLost()) { g.translate(DISPLAY_X, DISPLAY_Y); animator.render(g); g.dispose(); strategy.show(); } // handle frame rate elapsedTime = System.currentTimeMillis() - startTime; waitTime = Math.max(delayTime - elapsedTime, 5); try { Thread.sleep(waitTime); } catch(InterruptedException e) {} } System.out.println("Program Exited"); dispose(); System.exit(0); } public void exitProgram() { loop = null; } The main method performs all of the calls required to get this example up and running. In this method we also create our option pane for choosing whether to go into full-screen or windowed mode, but do not worry too much about this aspect of the code for now; we will look at graphical user interface objects (GUI) in Chapter 13.
public static void main(String args[]) { GraphicsEnvironment ge = GraphicsEnvironment.getLocalGraphicsEnvironment(); FullScreenDemo testFrame = new FullScreenDemo(ge.getDefaultScreenDevice()); Object[] options = {"FullScreen Mode", "Windowed Mode"}; int choice = JOptionPane.showOptionDialog(null, "Select Display Mode:", "FullScreenDemo Option Pane", JOptionPane.DEFAULT_OPTION, JOptionPane.QUESTION_MESSAGE, null, options, options[0]); if(choice!=JOptionPane.CLOSED_OPTION) { // choice will be either 0 or 1 corresponding to our mode // flags FULLSCREEN_MODE = 0, WINDOWED_MODE = 1 testFrame.setMode(choice); testFrame.start(); } else System.exit(0); } When running in full-screen mode, we no longer have a close button to click, so for this purpose we have added a key listener so that when the user presses the Escape key, the program will exit successfully. We will look at key events in the next chapter.
public void keyPressed(KeyEvent e) { if(e.getKeyCode() == KeyEvent.VK_ESCAPE) exitProgram(); } public void keyReleased(KeyEvent e) {} public void keyTyped(KeyEvent e) {} private Thread loop; private GraphicsDevice graphicsDevice; private Animator animator; // not final - may need to adjust these coordinates to adapt to // windowed border private int DISPLAY_X = 0; private int DISPLAY_Y = 0; private final int DISPLAY_WIDTH = 800; private final int DISPLAY_HEIGHT = 600; private BufferStrategy strategy; private static final int FULLSCREEN_MODE = 0; private static final int WINDOWED_MODE = 1; private int mode; } When you compile and run this example, you should first of all be queried by an option dialog asking whether you wish to go into full-screen or windowed mode.

Figure 9-15:
Hopefully, the example should venture into the desired display mode. Here is a screen shot of this example moving into windowed mode, rendering the circle about the screen using the buffer strategy:
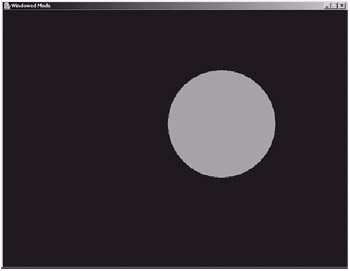
Figure 9-16:
This example should provide you with a good template to work from when developing games of your own. The windowed mode is especially useful for debugging purposes, logging run-time stats in the console window.
|
|
EAN: 2147483647
Pages: 237
- Article 314 Outlet, Device, Pull, and Junction Boxes; Conduit Bodies; Fittings; and Handhole Enclosures
- Article 326 Integrated Gas Spacer Cable Type IGS
- Article 353 High Density Polyethylene Conduit Type HDPE Conduit
- Article 411: Lighting Systems Operating at 30 Volts or Less
- Example No. D2(a) Optional Calculation for One-Family Dwelling Heating Larger than Air Conditioning [See Section 220.82]