Create an Artistic Montage
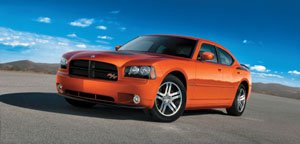
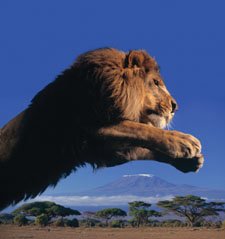
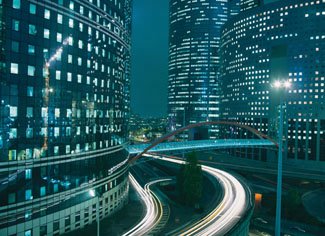
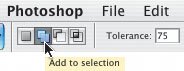
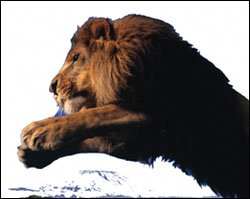
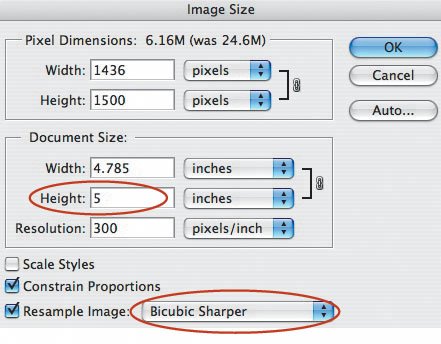
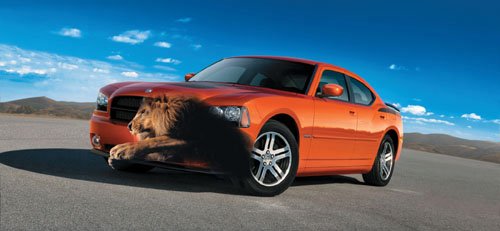
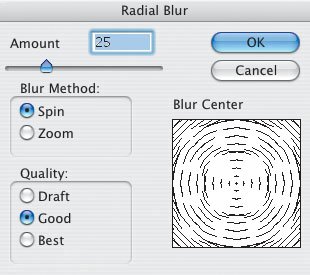
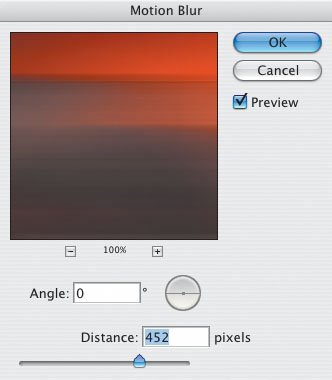
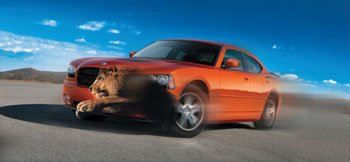
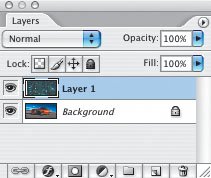
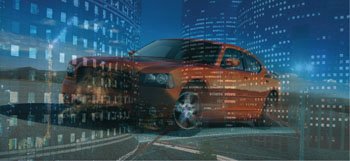
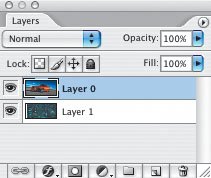
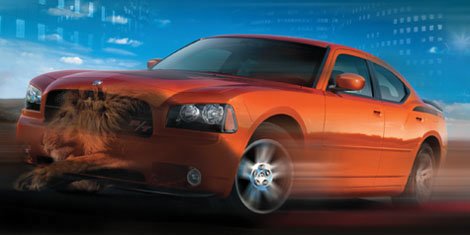
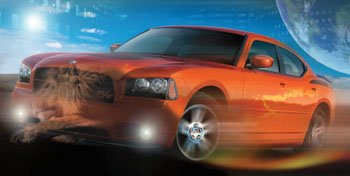
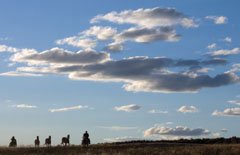
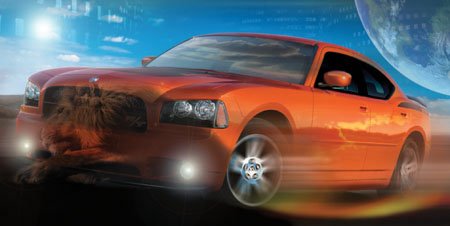
| I always like a challenge, especially when it comes to working and playing in Photoshop. If you like challenges, I think you'll like this lesson. Better yet, take the challenge yourself and try to create your own montage. (These work images, along with all the other work images in this book, are available at www.ricksammon.com.) Here was the challenge (from Popular Photography): I had to come up with a creative montage using a picture of a car, a picture of a lion, and a picture of a city at nighttime (Figures 4.110, 4.111, and 4.112). (By the way, I didn't take these photographs.) Note that these pictures weren't the highest-resolution images on the planet; however, they were fine for the challenge and this lesson. The car and lion photographs were the same resolution and height in pixels. The main idea was to combine the images to convey the power of the car. I put on my Photoshop thinking cap and got to work. Figure 4.110. Figure 4.111. Figure 4.112. Adding motion was my main goal, but that had to wait. First, I had to create the basic montagethe fine-tuning would come later. My progress is documented in this section. (Please keep in mind that there are tons of ways to create a montage in Photoshop; this is just one representation.) To convey the power of the engine, I decided to show the lion leaping out of the car's grill. I first flipped the image left to right (Image > Rotate Canvas > Flip Canvas Horizontal), because in the original image, the lion was jumping in the wrong direction. Then, I used the Magic Wand tool, and after clicking the Add to Selection icon in the Menu tab to select most of the background (Figure 4.113), I cut out that area of the picture by choosing Edit > Cut (Figure 4.114). Figure 4.113. Figure 4.114. Because I wanted the lion to appear smaller in the car image, I reduced the size of the lion file by half by going to Image > Image Size and changing the height to 5 inches. I also selected Bicubic Sharper, because famed Photoshop expert Scott Kelby told me that when reducing the size of an image, that's the best technique to use to maximize image quality (Figure 4.115). Figure 4.115. With the lion and car files both open, I selected the Move tool, clicked in the lion image, and then dragged that image into the car image (Figure 4.116). Figure 4.116.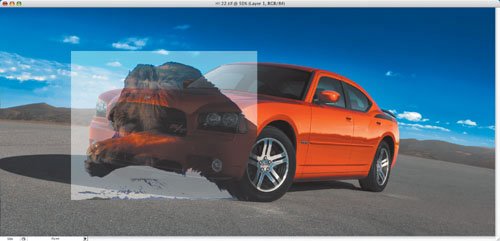 My lion cutout wasn't perfect, but that was no problem. I next used the Eraser tool with the Opacity set to 50% in the Options Bar so as not to erase too much too fast; I moved the Eraser around the outline of the lion's body until there was a smooth, unnoticeable transition between the car layer and the lion layer. Then, I used the Blur tool around the edges of the lion's body to soften the border between the lion and the car even more. You probably noticed that you can see through the lion in this image. That's because I reduced the Opacity of the lion layer (top layer) so I could accurately position the lion. The lion wasn't in exactly the right position. Plus, I wanted to stretch the lion to give it a greater sense of speed. To do so, with the top layer (the lion image) active, I went to Edit > Transform > Scale. Next, I clicked the lower-left handle (it doesn't matter which handle you choose) and, by moving the handle inward and upward, resized the lion. After clicking inside the Transform box, I positioned the king of beasts over the grill of the car (Figure 4.117). I clicked Return to apply the transformation. Figure 4.117.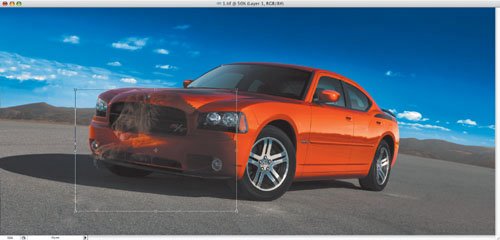 At this point, I could clearly see the lion, and I reset the Opacity of the top layer to 100%. Here's the result of my efforts so far (Figure 4.118). Later, I would reduce the Opacity of the lion layer for a more subtle view of the animal. I'd also reposition it, again by the using the Transform tool and by clicking inside the Transform box. Figure 4.118. The car was parked when the picture was taken, but the power of Photoshop let me easily create the impression that it was moving. Using the Elliptical Marquee tool, I selected the front chrome wheel hub. Then I used the Radial Blur filter and set the wheel spinning (Figure 4.119). Then I did the same thing to the back wheel. (I made a mistake here that I'll address at the end of this lesson. I could fix it now, but I want you to guess what it is.) Figure 4.119. Check this out (Figure 4.120). The car is almost on the move. But I need to do more work to set it in motion. Figure 4.120. To add motion to the entire car, I decided to use the Motion Blur filter. Using this filter to add a sense of motion and speed to a stationary object requires a two-step process. First, I made a duplicate layer. Then, I applied the degree of blur I wanted in the Motion Blur control panel (Figure 4.121). Figure 4.121. Now I was getting there (Figure 4.122). But something is wrong with this picture. As you keen-eyed photographers and Photoshop users no doubt noticed, there is no driver behind the wheel of the "moving" car! I'll solve that problem in a few moments. Figure 4.122. It was time to add the city scene to my picture. In hindsight, I should have started with the city as the background layer; but I didn't have that idea until this point in the process. To add the city, I opened both documents on my screen and then dragged the city picture over the car picture. The city picture appears here as the top layer (Figure 4.123). (As you can see, I already flattened the car and lion layers.) Figure 4.123. Guess what? I could still make it the background layer where it belonged. In the Layers palette, after renaming the locked Background layer (by double-clicking on it and then clicking OK in the pop-up dialog box), I clicked the top layer (the city, at this point) and moved it under the car layer. Now the city layer was in the background (Figures 4.124 and 4.125). Using the earlier technique of reducing the opacity of the car layer, it was easy to erase the part of the city scene that covered the car. Figure 4.124. Figure 4.125. Here's what I thought was my final montage (Figure 4.126). But as I mentioned earlier, the driver was missing. Plus, I felt that I could do more to the image. Figure 4.126. For a more dramatic image, I used the Lens Flare filter (Filter > Render > Lens Flare) to add a sunburst to the sky. You can position the flare point anywhere in the scene. The planet in the upper-right corner of the scene came from Flaming Pear's LunaCell Photoshop-compatible plug-in (www.flamingpear.com). I moved the planet into the scene using the same technique I used to add the lion layer. I also painted blurred red and yellow flames on the car by using a brush after selecting red and yellow as my foreground colors in the Foreground/Background Colors at the bottom of the Tool Bar (Figure 4.127). Figure 4.127. Now it was time to turn on two of the car's front road lights. That was easy: I used the Lens Flare filter again (Figure 4.128). Figure 4.128. Here's the "no driver" fix. From one of my landscape pictures, I copied part of the sky (Figure 4.129). I pasted it into my image and used the Transform feature to move it into position. To fit the sky neatly into the windshield area, I used the Eraser tool to erase parts of the sky that were over the body of the car. The replacement sky hid the fact that there was no driver at the wheel (Figure 4.130)! Look closely and you'll see the clouds of a sunset "reflected" on the side of the car. Those come from one of my stock sunset photographs. Again, using the copy and paste and erase technique mentioned earlier, I added them to my montage. Figure 4.129. Figure 4.130. "How long did it take to create the montage?" you may ask. The process took several hours over a weekend. I was having so much fun and learning so much that I kept working on, and playing with, the image. What was the mistake I mentioned earlier? Well, the rubber on the tires isn't spinning like the chrome hubs. To fix that, as you can see in the end-result image, I selected the Blur tool and moved it around the tires in a circular motion. I didn't have to tell you that I missed the stationary tire and no-driver problems during the creation of my initial montage. But I point out my mistakes for a good reason: You'll probably miss stuff and make mistakes while working on images in Photoshop. Don't beat up on yourself. We all make mistakesand learn from them. |


EAN: 2147483647
Pages: 72