Enhance Landscapes
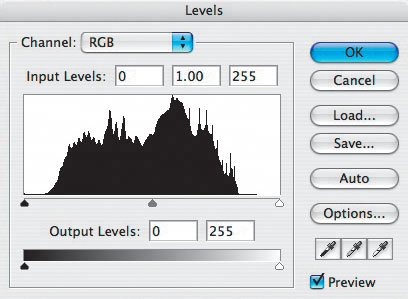
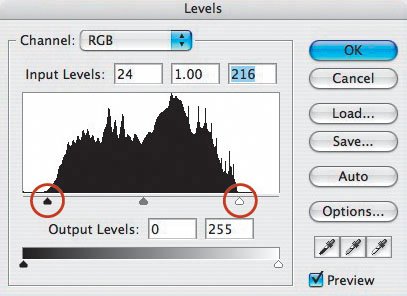
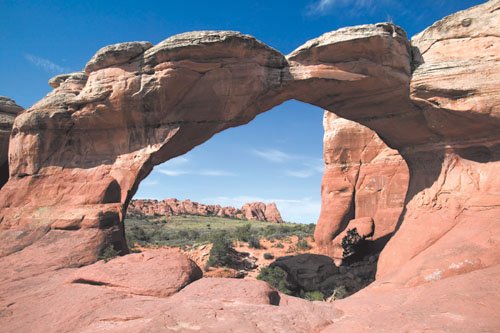
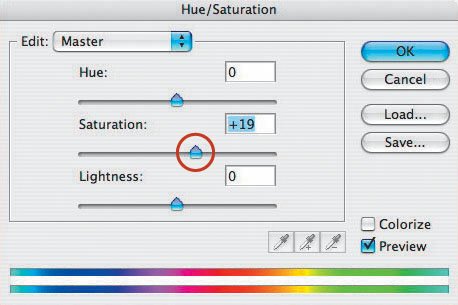
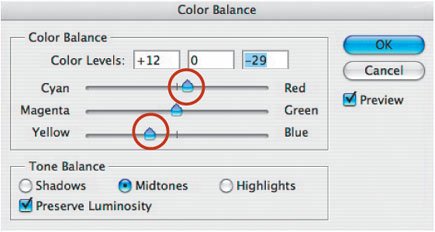
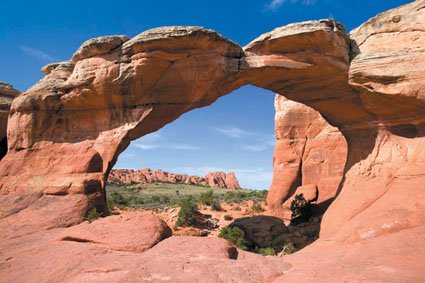
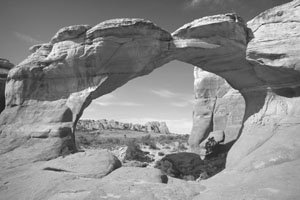
| The late Ansel Adams, a film photographer who was considered a landscape artist, was among the first to admit that the traditional wet darkroom played a very important role in his worktransforming seemingly dull negatives and test prints into photographs that look almost three-dimensional and have rich tones. Today, in the digital darkroom, you can create the same traditional darkroom effects achieved by Mr. Adams, plus many more. In this lesson, I'll show you how I used Photoshop to transform a lackluster landscape picture taken in Arches National Park in Utah (Figure 2.24). Figure 2.24.Tech info: Canon EOS 1Ds Mark II, Canon 17-40mm lens @ 17mm. Exposure: 1/125 sec. @ f/16. ISO 100. Levels (Layer > New Adjustment Layer > Levels) is a good place to start image enhancements (although many pros like to use Curves). Levels gives you a tremendous amount of creative control over the brightness, contrast, and color of your image. The histogram, or "mountain range," in the Levels dialog box shows that this image lacks some shadows (the flat part where the mountain range ends on the left side of the histogram) and some highlights (the flat part where the mountain range ends on the right) (Figure 2.25). Figure 2.25. You can make a basic Levels adjustment to enhance shadow and highlight areas by moving the slider arrows inside the mountain range in the histogram (Figure 2.26). I usually experiment with different slider positions to see how they affect my image. Figure 2.26. Here's the result of correcting the photograph's Levels (Figure 2.27). Now the image has more color and contrast. Cool! Figure 2.27. But speaking of cool, I took the picture around mid-day, when the light was cool; as a result, the image has a slightly blue cast. (I wanted to photograph this scene in the late afternoon, but I was on the move and had to get to another location.) So, I created late-afternoon lighting: a warmer quality of light with deeper shades of red and yellow. In the Hue/Saturation dialog box (Layer > New Adjustment Layer > Hue/Saturation), I boosted the Saturation and then clicked OK (Figure 2.28). How much you increase the Saturation is a matter of personal choice. Figure 2.28. In the Color Balance dialog box (Layer > New Adjustment Layer > Color Balance), I increased the Red and Yellow tones (Figure 2.29). Again, it's your call as to how much you want to modify these tones. Figure 2.29. You aren't done yet! Landscape photographers, whether they work in the wet or digital darkroom, often darken the edges of a picture to draw more attention to the main subject in the center of the frameas I did earlier with the leopard photo. That's easy to do in Photoshop. Using the Rectangular Marquee tool, I selected an area an inch or so into the frame. A dotted white line showed the selected areathe part inside the line (Figure 2.30). Figure 2.30. I then chose Select > Inverse (press Shift-Command-I: Mac or Shift-Ctrl-I: Win) to invert the selection. Now the area outside the dotted white line was selected. For a smooth transition from the darkened edges to the main part of the image, I went to Select > Feather, and in the Feather Selection dialog box, I chose a Feather Radius of 200 (Figure 2.31). That value worked well for my 300 ppi, 5x7-inch image. Your Feather Radius will depend on your personal taste and the image resolution. Figure 2.31. Finally, to darken the selected area, I went to Levels and moved the Shadow triangle on the slider bar to the right. As always, how much you move it depends on your personal taste. My goal was to make the edges darker, but not to the point that they were distracting. As you can see, the edges of the picture are evenly darkened (Figure 2.32). Figure 2.32. If you want to try to emulate the works of Ansel Adams, you can convert your color image to black and white (Figure 2.33). See the section "Black-and-White and Beyond" in Chapter 4 for ideas on how to do that. Figure 2.33. When you're photographing landscapes, keep in mind the creative enhancements that are possible in Photoshop and how much fun you can have transforming your images. |


EAN: 2147483647
Pages: 72