Jump into Easy Image Enhancements
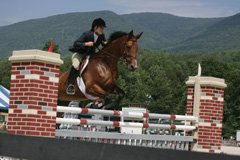
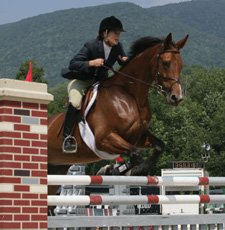
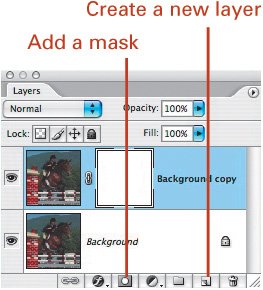
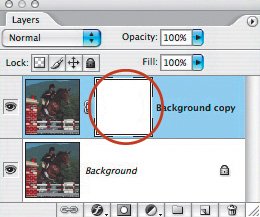
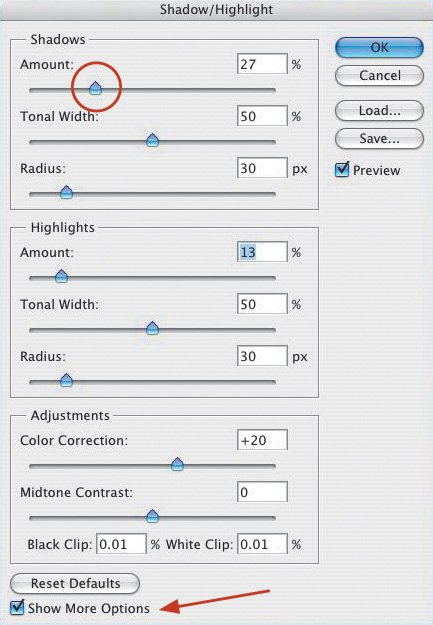
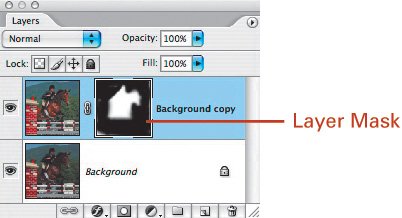
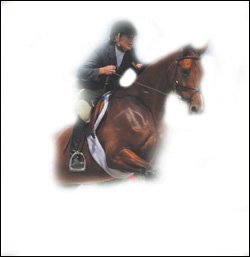
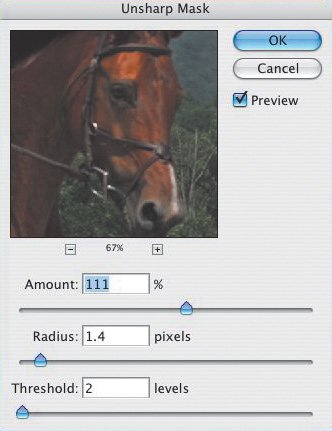
| Question: Do you know the difference between a professional photographer and an amateur? Answer: A pro never has to show his or her outtakes. Although that photographer joke is mostly true, I thought I'd share one of my outtakes with you, with the goal of illustrating how easy it is to turn an outtake into a keeper. My original shot of a horse and rider has a few problems: It's lopsided, there's too much dead space, the colors are dull, you can't see the rider's face clearly, and the dark horse looks, well, too dark (Figure 2.1). Other than that, it's a great shot! Figure 2.1.Tech info: Canon EOS 1D Mark II, Canon 28-105mm lens @ 50mm. Exposure: 1/500 sec. @ f/8. ISO 400. I made a copy of the original so I could work on the copy. My first step was to crop and straighten the image (Figure 2.2). Figure 2.2. In Photoshop, an easy way to straighten an image is to go to Filter> Distort > Lens Correction and then rotate the Angle (by clicking the line inside the wheel) until your image is straight (Figure 2.3). Figure 2.3.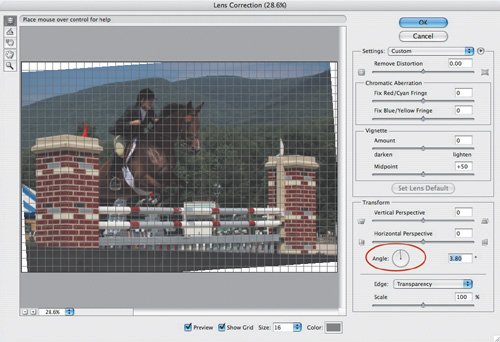 In the same window, you can also straighten an image by using the Straighten tool. Select the tool, drag it along a level line in the scene, and then release your mouse (or stylus) (Figure 2.4). Figure 2.4. If you're working in Camera Raw (which I always do first), you can use the Straighten tool (press A: Mac or Win) in the same manner just described. Doing so crops and straightens the image. Next, I duplicated the image by clicking it in the Layers palette (where it's called Background, in this case) and dragging it down to the "Create a new layer" icon at the bottom of the palette. Then, I created a Layer Mask by clicking the "Add a mask" icon (Figure 2.5). The Layer Mask is the white box next to the image (Figure 2.6). Layer Masks let you apply and undo an effect quickly and easily. Figure 2.5. Figure 2.6. My goal at this stage of the process was to see into (lighten) the shadow areas, including the rider's face and the horse's body. In the Layers palette, on the top layer, I clicked the picture of the horse and ridernot the Layer Mask. I selected Shadow/Highlight (Image > Adjustments > Shadow/Highlight), moved the Shadows sliders until I was pleased with what the shadow areas revealed (Figure 2.7), and then clicked OK. (If your Shadow/Highlight window doesn't include all the options shown here, click Show More Options at the bottom of the window.) The other areas of the image were too light at this point, but that's where the Layer Mask's utility came in handy. Figure 2.7. Next, I clicked my Layer Mask on the top layer (Figure 2.8). Figure 2.8. I selected the Brush tool and a soft airbrush (because I wanted soft edges) (Figure 2.9). With my foreground color set to black (the front box at the bottom of the Tool Bar), I clicked inside the image and "painted back" areas of the picture I didn't want to lighteneverything except the horse's body and the rider's face. When I made a mistake, accidentally moving the eraser over the horse or the rider's face, I pressed the X key on my keyboard to switch the foreground/background colors and painted out the effect with white. You can also click the double-ended, curved arrow to change the foreground and background colors. Figure 2.9. In Figure 2.10, taken from the working image window with the Background layer turned off, you see the effect of my erasing using the Layer Mask. I need to be a bit more careful with my erasing. To see how well you're erasing, turn off the Background layer by clicking the eye icon on that layer in the Layers palette. Figure 2.10. Next, I wanted to sharpen the key elements in the picture: the horse and rider. To do so, I applied the Unsharp Mask filter (Filter > Sharpen > Unsharp Mask) to the image (not the Layer Mask) on the top layer (Figure 2.11). That sharpened only the horse and rider and not the background, due to my layer and Layer Mask setup. Figure 2.11. Tip I always think selectively about sharpening (and most other image enhancements). For example, imagine this horse and rider jumping in the air against a sky background. There would be no reason to sharpen the sky; doing so might increase the digital noise in the sky. Plus, most people prefer a soft sky in a picture. After those enhancements, I flattened the image (after saving a copy with the layers intact) because I wanted to send it to Peachpit Press for inclusion in this book. Then, I took a break and played a bit of electric guitar while listening to my iTunes. When I came back to the flattened image, I realized that more enhancements could improve it. I increased the contrast (Layer > New Adjustment Layer > Brightness/Contrast) and boosted the saturation (Layer > New Adjustment Layer > Hue/Saturation). I also used the Burn tool (press O: Mac or Win) to darken the white poles in the picture and the Dodge tool to lighten the rider's face a little more. Finally, to dress up the image, I added a black border around it. To do that, I selected a small area inside the frame by using the Rectangular Marquee tool, reversed the selection (Select > Inverse, or Shift-Command-I: Mac or Shift-Ctrl-I: Win) and then filled the newly selected area with black (Edit > Fill, and select Black from the Use pop-up menu) (Figure 2.12). When filling a selection, you have several options: Black, White, Foreground Color, and so on. Click Use in the Fill window to see these options. Figure 2.12. I also made two more changes. Can you tell what they are? Take a close look (Figure 2.13). Using the Clone Stamp tool (press S: Mac or Win), I removed the dead tree from next to the horse's face and the red flag from atop the post. Figure 2.13. Now it's your turn to jump into some easy image enhancements. |


EAN: 2147483647
Pages: 72
- Using SQL Data Definition Language (DDL) to Create Data Tables and Other Database Objects
- Using SQL Data Manipulation Language (DML) to Insert and Manipulate Data Within SQL Tables
- Writing Advanced Queries and Subqueries
- Exploiting MS-SQL Server Built-in Stored Procedures
- Working with SQL Database Data Across the Internet