| Up until this chapter, we've discussed File Transfer Protocol (FTP) as the primary method for transferring files from the local computer to the remote computer. What many developers don't realize, however, is that FTP has its disadvantages, specifically: Using FTP requires that you open additional ports on your firewall which can increase the attack surface of your network and make it more susceptible to penetration by attackers. FTP has no file-locking mechanism, so it's possible for two users to upload different versions of the same file simultaneously, causing one to be overwritten. The FTP approach means you have to edit your content locally on the client. In other words, to edit a page already on the web server, you must download it to the client, edit it there, and then upload it again to the web server. This is a time-consuming and inefficient approach to managing content.
The solution to these problems is WebDAV, an alternative protocol used for publishing and managing content to web servers. An extension of the HTTP/1.1 protocol, WebDAV overcomes the three issues just described as follows: WebDAV uses port 80, the same port used by HTTP for web access. So using WebDAV means you don't have to open any extra ports on your firewall. WebDAV lets only one user modify a file at a time, while allowing multiple users to read it. This approach allows files to be locked while they are being edited, preventing unexpected changes from occurring. WebDAV lets you edit files on the server instead of needing to download them first to the client. Editing files remotely using WebDAV is as easy as if they were locally present, and the whole process is transparent to the content producer.
Aside from these benefits, WebDAV is easy to configure and easy to begin working with. While we won't cover installation of WebDAV on the remote web server, we will discuss how to connect to, publish, and remotely modify content using WebDAV within Dreamweaver. Before we begin configuring Dreamweaver to use WebDAV, we'll want to do two things on the server. (If you do not have access to the server and your system administrator has already given you the path to the folder that you'll use to publish using WebDAV, skip down to the next section discussing WebDAV and Dreamweaver integration). First, we'll want to make sure that WebDAV is enabled. If you don't have access to the remote WebDAV installation, check with your system administrator. Second, we'll want to create a new virtual directory within IIS so that we can publish files to it using WebDAV. Let's walk through this process now: 1. | Open the IIS installation on your server and select the Web Server Extensions option (assuming your web server is running on Windows Server 2003).
| 2. | Make sure that the WebDAV option is listed and allowed. If it's prohibited, click the Allow button.
| 3. | Now expand the Web Sites tree node, right-click the Default Web Site node, and choose the Virtual Directory option available from the New submenu.
| 4. | When the Virtual Directory Creation Wizard appears, click Next.
| 5. | Enter the alias name Dorknozzle and click Next.
| 6. | Browse to the Dorknozzle path on the server and click OK. Click Next.
| 7. | Enable the Read, Run, Write, and Browse option and click Next.
|
The new virtual directory will now be created in IIS. This is the directory (WebDAV enabled) to which we will be publishing. With the server configured to use WebDAV, you're now ready to configure Dreamweaver. You can configure Dreamweaver to use WebDAV by following these steps: 1. | With Dreamweaver open, select the Manage Sites option from the Site menu. The Manage Sites dialog appears.
| 2. | Select the Dorknozzle site and click Edit. The Site Definition for Dorknozzle dialog appears.
| 3. | Although your Local Info should remain the same, the Remote Info changes to coincide with the WebDAV configuration. Select the Remote Info category.
| 4. | Select the WebDAV option from the Access drop-down menu.
| 5. | In the URL text box, enter the URL to the virtual directory. In my case, the Dorknozzle virtual directory is located at the following path: http://localhost/Dorknozzle/.
| 6. | Enter your login, password, and email into the respective text boxes. When you've finished configuring the dialog, it should resemble Figure 12.24.
Figure 12.24. Configure the WebDAV Connection dialog. 
| 7. | Click OK to close the WebDAV Connection dialog.
| 8. | Click the OK button to close the Site Definition for Dorknozzle dialog.
| 9. | Click Done to close the Manage Sites window.
|
Now expand the Files panel by clicking the Expand/Collapse icon to launch the Site Management window. With the window open, click the Connect icon to open the WebDAV enabled folder in the Remote pane, similar to Figure 12.25. Figure 12.25. The WebDAV enabled folder opens in the Remote Site pane. 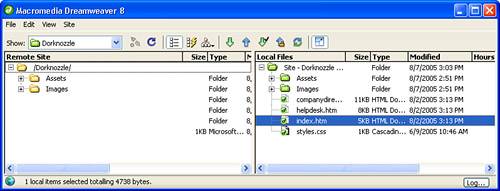
Now you can right-click files and select the Check Out option to check out files exclusively to you. |