Tips and Tricks for Using CSS
| Up to this point, you've learned about Dreamweaver's integration with CSS. I'll use the next few sections as an opportunity to discuss features that seem to fall under the radar when working with CSS in Dreamweaver, specifically:
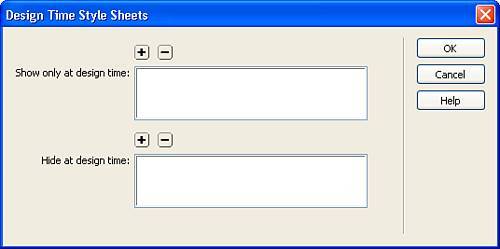
Editing CSS Files in Dreamweaver's Code ViewThe world of CSS is broad. Too broad, in fact, to cover all of its intricacies in this chapter. Even Dreamweaver, which is a full functioning visual editor, doesn't integrate nor provide intuitive functionality for every CSS concept. Although I as an author and Dreamweaver as an editor cannot attempt to cover all aspects of CSS, we can provide some direction in terms of editing the code yourself using concepts you may already know of in Dreamweaver's Code view. To open your external style sheet files in Code view, double-click the styles.css file in the Files panel. The CSS file opens in Code view (because a CSS file has no design) on its own tab in the Document window similar to Figure 7.31. Figure 7.31. Double-click the styles.css file in the Files panel to open the style sheet in Code view on its own tab.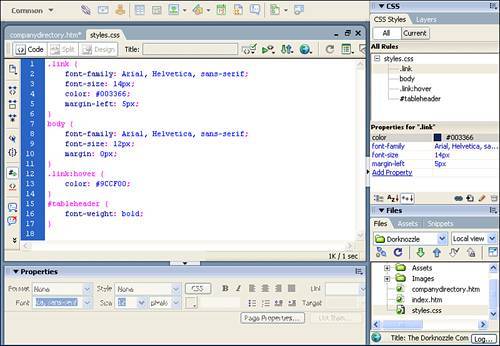 You can now freely write or edit CSS code. Of course, you can also select the style sheet directly from the CSS Styles panel and click the Edit Style button located in the bottom-right corner of the CSS Styles panel. Validating Your CSSDreamweaver enables you to check your HTML code for validity and conformance to accessibility standards. Unfortunately, it doesn't currently provide the same capability for style sheets. Instead, you can use the W3C's CSS validator to check your CSS for code mistakes or omissions. You can verify your style sheet by going to http://jigsaw.w3.org/css-validator. As you can see from Figure 7.32, three options exist to validate your document. Figure 7.32. The World Wide Web Consortium provides a website that allows you to validate your CSS code.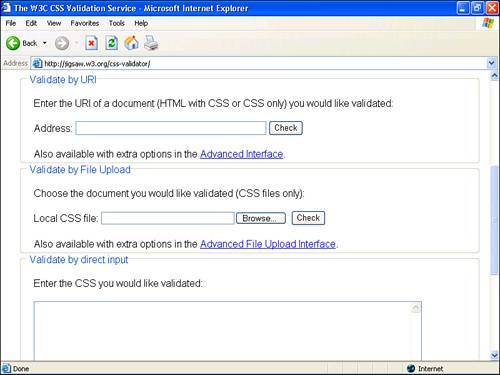 The first option allows you to validate your CSS by inputting the full Universal Resource Indicator (URI) of your page. The second option allows you to browse to and select the CSS file on your computer, while the third option simply allows you to write CSS code directly into a text box for validation. To demonstrate this interface, I'll choose the second option. First, I'll browse to and select the styles.css file and click Open. The full path appears in the text box. Now I'll click Check. The web-based application returns the results in the browser (see Figure 7.33). As you can see from Figure 7.33, the validator didn't find any errors. Figure 7.33. The web-based application returns the results of CSS validation.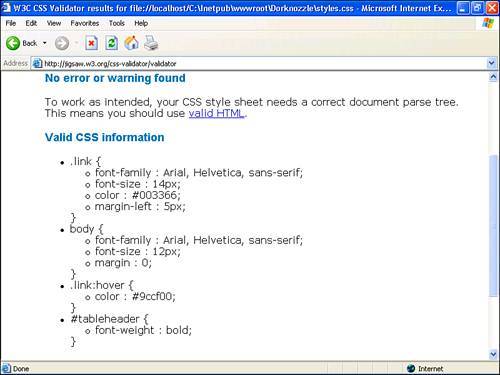 Using Design-Time Style SheetsDreamweaver 8 enables you to specify style sheets that are displayed only while you are editing and that aren't included in the web page when it's saved or previewed. For example, you might want to create a style sheet to include or exclude the effect of a Macintosh-only or a Windows-only style sheet as you design a page. These are called design-time style sheets. Design-time style sheets apply only while you are working in a Dreamweaver document; when the page is displayed in a browser window, only the styles that are actually attached to or embedded in the document appear in the browser; everything else is ignored. You can create a design-time style sheet the same way you create any other style sheet; however, because these style sheets are intended only for development, you don't have to worry about making them look pretty. The purpose is to make certain things stand out while you're editing. To create a design-time style sheet, follow these steps:
Using Built-In CSS Page DesignsOne of the hottest web development topics going is the process of laying out web page structures using CSS instead of traditional HTML-based methods such as tables or frames. As the web evolves, so too does the process of creating web pages. With that said, tables are viewed as an archaic method of page structuring; as a web developer you should start becoming aware of that fact. As a way of evolving, Dreamweaver is beginning to support CSS as a method for structuring web pages. Although CSS functionality is not yet fully integrated, workarounds do exist. As a starting point, you can simply use layers, explained with more detail in Chapter 11. An alternative is to use the built-in set of CSS structured page designs available from the New Document dialog. To use a built-in page design that's based on standards-compliant CSS, follow these steps:
Preview the page in the browser so that you can see the effect. Although you won't notice much of a difference, it's safe to say that the design meets standards expectations as defined by the World Wide Web Consortium. We'll re-design the Dorknozzle site using CSS in Chapter 11. |

EAN: 2147483647
Pages: 237