Animation with the Timeline
| As a leader in vector-based animation programs, Macromedia's Flash and Director applications provide developers with uncompromised flexibility. Developers create their animated applications, export them as either SWF or SWD files, and then import them into Dreamweaver so that they can be presented to users in a browser that has the appropriate plug-in pre-installed. Although Flash, Director, and Dreamweaver all provide the ability to work with animations, the difference in file output and complexity between the three programs is unmistakable. The one similarity these applications share, however, is frame-based animation controlled using a timeline. Make no mistake about it, Flash and Director are still considered the standard for vector-based web animation. The only drawback to using these programs is that the user's browser must have the appropriate plug-in to see the specific animation. If the user's browser doesn't have the appropriate plug-in installed, the animation won't be visible, resulting in a negative user experience. Because the Dreamweaver timeline is essentially an interface for managing HTML-based animations, no plug-ins are required, thus it might be a viable alternative to technologies such as Flash or Director that require plug-ins. Should you decide to use timelines for animations, consider the following guidelines:
NOTE As mentioned, the timeline animates layers. Recall that layers are essentially <div> tags. So where's the DHTML in animating layers? The positioning of layers (which are HTML <div> elements) is controlled by CSS positioning attributes. JavaScript controls these positioning attributes, usually within a callable function in the <head> tag of the web page. Called repeatedly, JavaScript can move the layer by changing the positioning properties of the layer incrementally, decrementally, or both, resulting in an animation. How the Timeline WorksIn the previous section, I outlined a simple scenario in which we could allow the user to change the background color of a text box by simply clicking a button. In that example, the amount of code needed to achieve the goal is minimal. Animations however, require much more code because JavaScript must control the placement of the element pixel by pixel. The code can become extremely complex when animating curves, circles, and the like. Fortunately, the timeline does all the hard work for us. Not only does it allow you to edit and manage animations using a slick and intuitive interface, but regardless of the animation's complexity within the timeline, Dreamweaver writes all the code for us. All we have to do is add our elements to the timeline (contained within a layer), manipulate a few timeline elements, and we're done. With that said, let's review the various elements of the timeline and then discuss the process involved with adding layers to the timeline. Elements of the TimelineIf you haven't done so already, access the Timelines panel by choosing the Timelines option from the Window menu or by pressing Alt+F9 in Windows and on a Mac. Pictured with more detail in Figure 17.1, a timeline in the Timelines panel seems overwhelming at first glance. Figure 17.1. The timeline in Dreamweaver provides a central interface for adding, changing, and managing animations.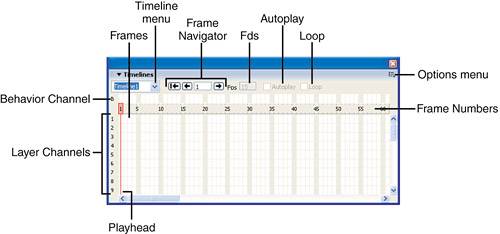 Observe the callouts in Figure 17.1 and refer to the following bullet points as explanations for each feature:
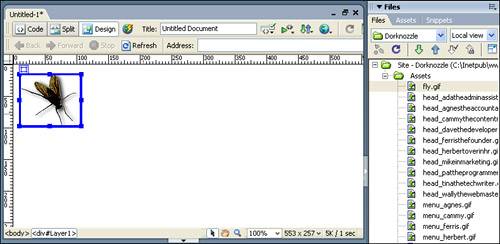
TIP It's important to understand that you're not limited to the number of animations that a single timeline can contain. For instance, if you wanted two animations to play at the same time in the same timeline, simply add a layer (representing the first animation) in channel 1 and then add a second layer (representing the second animation) to channel 2. Of course, it doesn't stop there; channels in the timeline are virtually limitless. You can add as many layers to multiple channels and create as many animations in a single timeline as your project requires. Now that you have an understanding as to what the Timelines panel consists of, let's examine how layers can be added to a timeline. Adding Layers to the TimelineAll animations created within a timeline begin with layers. Because Dreamweaver requires something tangible to manipulate, layers become the foundation for our animations and must be added to the document before other elements. To work with layers in a timeline, follow these steps:
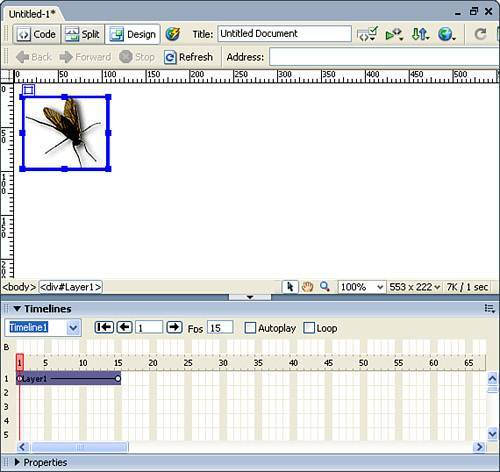
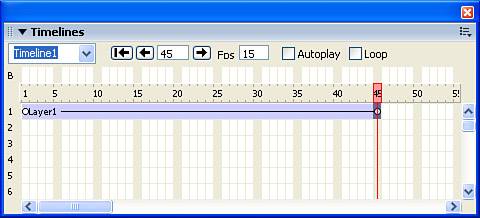
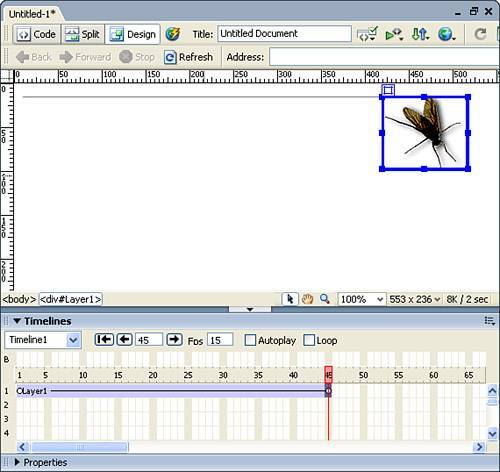
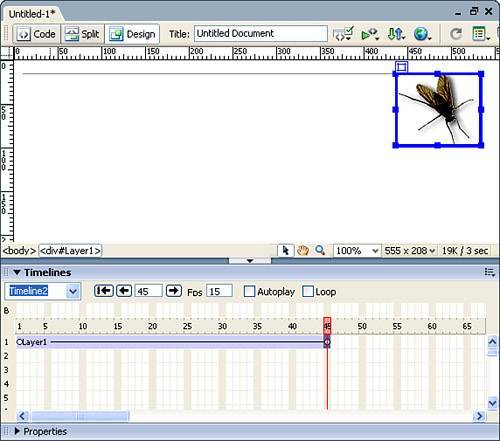
As you can see from Figure 17.3, the layer is represented as a blue bar with dots on either side when it's in the timeline. The blue bar you're looking at represents the animation, and those dots on both ends represent keyframes. Let's discuss those terms now. Frames, Frame Rate, and KeyframesThree concepts are crucial when working with animations in the timeline: frames, the frame rate (measured in frames per second, or FPS), and keyframes. To define these concepts, remember what you accomplished in the previous section. You added a layer to the first channel of the timeline, which resulted in the addition of an animation that spanned a series of frames. Remember that the timeline is constructed of frames, each representing a point in time in the animation. The frame rate governs the speed of the animation, or frames per second. If you want your animation to play for 3 seconds at 15 frames per second, you must extend the animation in the first channel so that the end of the animation stops at the 45th frame: 15 FPS * 3 seconds = 45 frames. TIP The default frame rate in Dreamweaver is 15. Even though video and film play at roughly 30fps and 24fps, respectively, these media don't have the bandwidth restrictions web pages do, and the manner in which film and video are viewed is more standardized. When animating for the web, your animation is at the mercy of the end user's machine. The processor speed, the speed of the Internet connection, how much memory is available, and the quality of the video card all play crucial roles in the appearance of an animation. So if you're developing on the latest and fastest computer, you're not getting an accurate representation about how your animation will look to the world. That's why it is especially important to test your page on several types of computers. If it chokes on a fairly standard computer, you might want to reconsider the frame rate of the animation, as well as the content you're trying to animate. Keyframes, represented by the small white dots on both ends of the animation, represent a change within the animation. In our case, the first keyframe dot represents the start of the animation and the last dot represents the end of the animation. The frames between the two keyframes are known as in between frames. Knowing what you know now of frames, frame rate, and keyframes, let's extend our animation so that it plays for 3 seconds at 15 FPS. To do this, simply click and hold the last keyframe in the animation and drag it to the 45th frame. The result resembles Figure 17.4. Figure 17.4. Drag the last keyframe of the animation to the 45th frame. Doing this causes the animation to play for 3 seconds at 15 FPS.
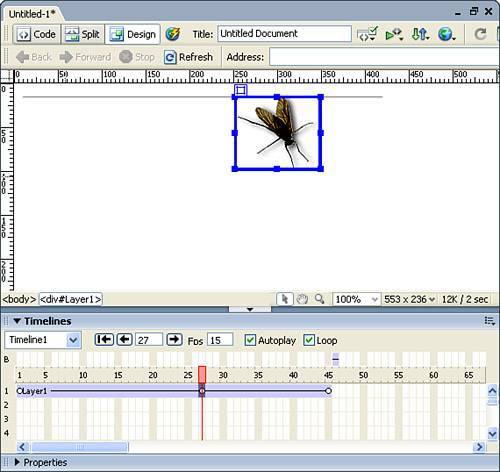
NOTE The default frame rate for our animation is 15 FPS. That's not to say that you're stuck with that frame rate. If you want your animation to play faster, change the value in the FPS text box to a higher number and press click Enter. If you want it to play slower, change the value to a lower number. Creating an AnimationWith the length and frame rate set for our animation, we're ready to actually create the animation. Remember that keyframes represent the points in time where our animation changes. Because this is the case, we'll want to select the last keyframe in our animation and position the layer in the Document window where we want our animation to end. To do this, follow these steps:
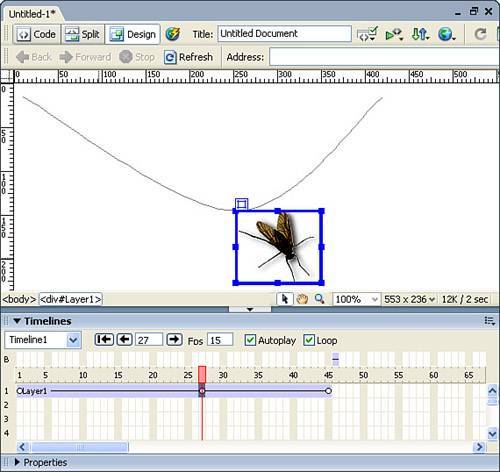
To see the animation, preview your page in the browser. The fly image should move from the left side of the screen to the right side of the screen and then back again. As you can see, creating an animation is a fairly simple process. All you had to do was select the last keyframe and then position the layer in the Document window where you want the animation to end. All the in-between frames are created by Dreamweaver using a process known as tweening. Short for in-betweening, tweening is the process of generating intermediate frames between two keyframes, giving the appearance that the first frame evolves smoothly into the last frame. Creating Curves in an AnimationOf course, your animations don't have to be as simple as the one you created in the previous section. Dreamweaver also allows you to specify curves in an animation to create a smoother and much more natural effect. To create a curve in your animation, follow these steps:
Preview the page in the browser by choosing the Preview in Browser option from the Document bar or by pressing F12. Your fly image should animate, curving straight down as it animates. Managing Animations in a TimelineUp to this point, we've discussed the basics of creating and working with animations. As we progress through the chapter, we'll discuss more advanced topics, such as recording the path of a layer, working with multiple timelines, and working with behaviors in conjunction with the timeline. Aside from those topics, however, Dreamweaver offers other options for managing objects within layers, layers within a timeline, and the timeline as a whole. Most of the options are similar and can be found in either the context menu that appears when you right-click the animation in the timeline, when you select the Timelines panel Options menu, or when you choose Modify, Timeline. TIP Depending on which method you use to access various options, the options might be named differently. Although the options perform the same task, they are named slightly differently to coincide with the selected object. For this reason, the option name is given in the following sections using both names that appear in their respective menus. The options you can use to manage objects, layers, and timelines include the following:
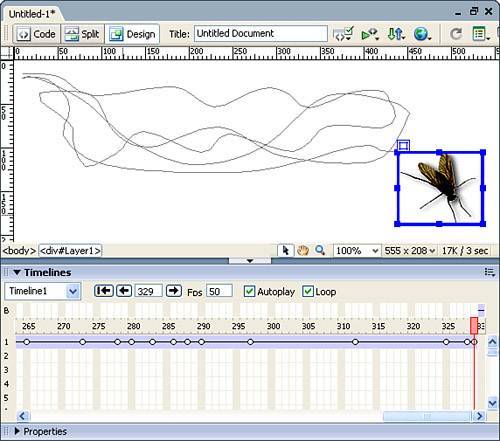
As you'll see, these options provide great flexibility when you're working with an animation in a timeline as well as with timelines as a whole. Recording the Path of a LayerOne of the more interesting features of working with animations in Dreamweaver is the Record Path of Layer feature. You can use this option to have Dreamweaver automatically build an animation simply by recording the act of you dragging a layer in the Document window. To use this feature, follow these steps:
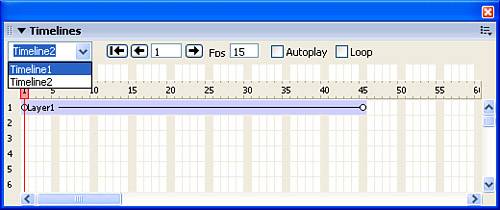
Preview your work in the browser by choosing the Preview in Browser option within the Document bar or click F12. Watch the fly moving around the browser in a natural movement. Managing Multiple TimelinesOn rare occasions, you might find that managing multiple animations in one timeline instance is arduous at best. When this becomes the case, consider branching out of the restricting confines of a single timeline instance into two or more timelines. Remember that the Timelines panel is simply a container for timelines. The number of timelines you have within the Timelines panel is restricted only by the needs of your web page. To demonstrate how multiple timelines work in Dreamweaver, follow these steps:
Preview the result in the browser by choosing the Preview in Browser option located in the Document bar (or by pressing F12). Notice that the animation in the first timeline plays while the animation in the second timeline doesn't play at all. To play the second animation, we can do one of two things: we can add a button complete with behaviors that controls which timeline to play (as explained in the next section). Alternatively, we can switch to the first timeline, disable the Autoplay option for that timeline, then switch to the second timeline and enable the Autoplay check box, resulting in the second timeline's animation playing instead of the first. To do this, follow these steps:
Preview the result in the browser by choosing the Preview in Browser option from the Document bar. This time, the second timeline plays, resulting in an animation that flows in a straight line from the left side of the screen to the right. Of course, the process of getting the second animation to play instead of the first wasn't all that intuitive. In the next section, we'll review how behaviors can interact with timelines. Using behaviors, you can easily allow the user to choose which timeline to play. If you want both timelines to play simultaneously, just enable the Autoplay option for both timelines. |
EAN: 2147483647
Pages: 237