Formatting a Table
| PowerPoint lets you format tables in a number of ways, including
Table 4.1. Tables and Borders Toolbar Buttons
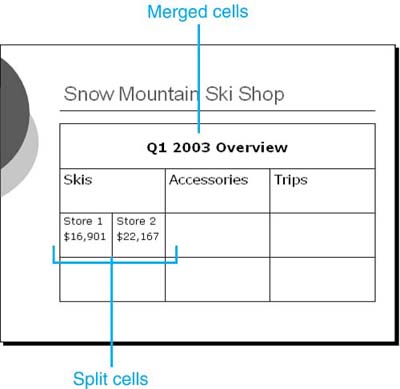
Merging and Splitting CellsOne way PowerPoint makes tables flexible is that you can merge and split table cells. For example, if you want a table to have a title centered at the top, you can merge all the cells across the top row. Or, if you need to show two separate bits of information in one location, split one cell into two. To merge cells, select the cells you want to merge and click the Merge Cells button on the Tables and Borders toolbar. Figure 4.4 illustrates two cells that were merged into one. Figure 4.4. Merged and split cells have a variety of applications within a table. CAUTION If you already have text in each of the cells you merge, each cell text becomes a line of text in the new single cell. To split a cell, select the cell you want to split and click the Split Cell button on the Tables and Borders toolbar. Figure 4.4 illustrates a cell that was split into two. Creating a BorderUse borders to draw attention to your table or even to specific information in your table. New tables get a black, solid line border by default, but you can change this. To format the border, select the table and use the Tables and Borders toolbar to change the border style, width, and color, and to set where borders appear. Setting Border StyleTo set the border style, click the Border Style drop-down list on the Tables and Borders toolbar and choose the border style you prefer. The list includes the option to apply no border, a solid line, or a variety of dashed line styles, shown in Figure 4.5. Figure 4.5. Choose the border style that suits your table. Setting Border WidthTo set the border width, click the Border Width drop-down list on the Tables and Borders toolbar and choose the width you prefer. Options include point sizes from 1/4 point (a very thin line) to 6 points (a thick line), shown in Figure 4.6. Figure 4.6. Use a thick border to create more emphasis, a thin border to create less. Setting Border ColorsTo set the border color, click the Border Color button. The box that appears offers several possible colors based on the presentation's color scheme. For more color choices, click More Colors to open the Colors dialog box. Creating BordersYou can specify which parts of your table contain borders ”the whole table or only specific outside or inside areas. To set borders, click the down arrow to the right of the Borders button on the Tables and Borders toolbar. A palette appears with several border options, as Figure 4.7 shows. Figure 4.7. You can have both inside and outside borders on your table. Setting Table Fill ColorYou can change the color that fills one or more cells in your table. CAUTION Be sure that your table text is still readable if you change a cell's fill color. For example, if your text is black, don't fill cells with dark blue. To change fill color, select the cells that you want to change and click the down arrow next to the Fill Color button on the Tables and Borders toolbar. You can
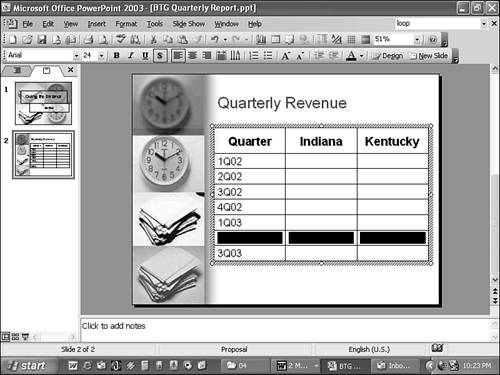
To remove a fill you no longer want, click the down arrow next to the Fill Color button and choose No Fill from the palette. Working with Columns and RowsIt never fails ”as soon as you create a table and format it just so, you find that you need to add or remove information. Inserting Rows and ColumnsTo insert a row into your table, click in the row above or below where you want to insert the row. Then choose Table, Insert Rows Above or Insert Rows Below, as appropriate, from the Tables and Borders toolbar. PowerPoint inserts the row, as Figure 4.8 shows. Figure 4.8. Add rows if you didn't create enough during the initial table creation. TIP You can resize the height or width of any row or column by selecting the row or column separator and dragging it to the new location. CAUTION When you add or delete rows and columns, your table might no longer fit well on the slide. You then need to resize the table by dragging a corner. Be careful, however, that you don't hide existing text by making the cells too small during resizing.
If you want to insert multiple rows, select that number of rows before selecting the Insert command. For example, if you select two rows and then choose Table, Insert Rows Above in the Tables and Borders toolbar, PowerPoint inserts two rows above the selected rows. To add a new column to your table, click in the column to the left or right of where you want to insert the column. Then choose Table, Insert Columns to the Left or Insert Columns to the Right from the Tables and Borders toolbar. PowerPoint inserts the column, as Figure 4.9 shows. Figure 4.9. You can add columns if your table design changes. Deleting Rows and ColumnsTo delete rows or columns, click in the row or column you want to delete and then choose Table, Delete Rows or Delete Columns from the Tables and Borders toolbar. PowerPoint deletes the entire column or row of the cell(s) you select. Deleting Tables and Table ContentsTo delete text in a cell, select the text (not just the cell) and press the Delete key. CAUTION You must select the actual text or cell ”not just place the cursor in the cell ”to delete the text. To delete an entire table, choose Table, Select Table from the Tables and Borders toolbar and then press the Delete key. PowerPoint replaces the table with a Double Click to Add Table directive. TIP Another way to delete a table is to click the outside border of the table to select the entire table and then press the Delete key. Formatting with the Format Table Dialog BoxThe Format Table dialog box (see Figure 4.10) duplicates some of what you can do with the Tables and Borders toolbar. It also gives you some formatting options that aren't available anywhere else. You can access this dialog box in one of two ways:
Figure 4.10. Use the Format Table dialog box to apply many formatting options. Using the Borders TabThe Borders tab lets you set these attributes:
Using the Fill TabUse the Fill tab, shown in Figure 4.11, to specify fill color for your table cells. Figure 4.11. You can apply fill colors to your tables, but be sure that the text is still readable. To fill selected cells with a color, click the Fill Color check box and choose a color from the drop-down list. From here, you can also access the Colors and Fill Effects dialog boxes to apply additional color and fill options. To lighten the color so that you can read text more easily on it, click the Semitransparent check box. Using the Text Box TabUse the Text Box tab, shown in Figure 4.12, to set alignment and margins in your table. Figure 4.12. The Text Box tab lets you set a variety of alignments. To set text alignment, click the drop-down list and choose from one of these alignment options: Top, Middle, Bottom, Top Centered, Middle Centered, or Bottom Centered. You can also set internal margins for the left, right, top, and bottom margins within the table cells. Doing so changes how far your text is from the cell's edges. Select the Rotate Text Within Cell by 90 Degrees check box to rotate selected text vertically. Adding Bulleted and Numbered Lists Within Tables TIP For more bullet and numbering options, select the text you want to format and then choose Format, Bullets and Numbering to open the Bullets and Numbering dialog box. This dialog box gives you more control over your lists by letting you choose a color for numbers and bullets, change numbering to alphabetical or outline, use picture bullets, and more. |
 To learn more about the Colors dialog box,
EAN: 2147483647
Pages: 261