Recording and Saving a Broadcast
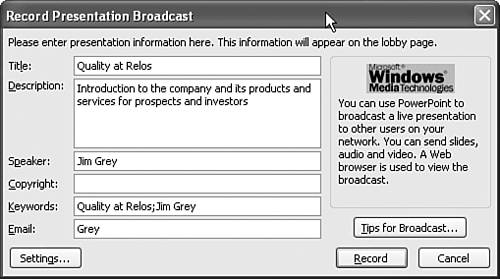
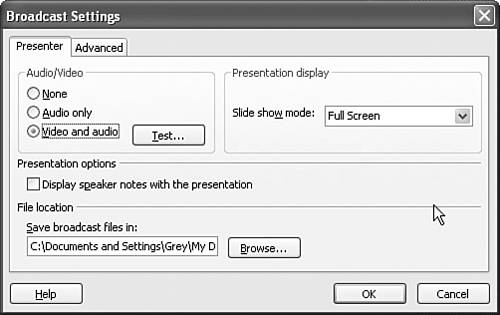
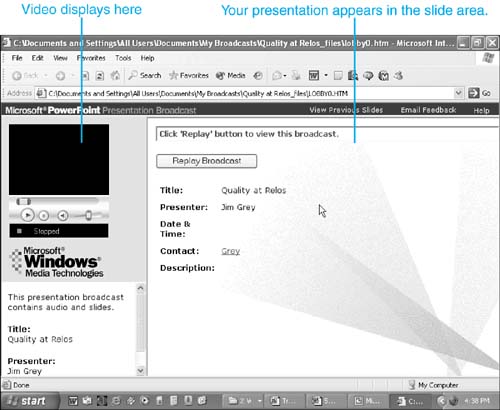
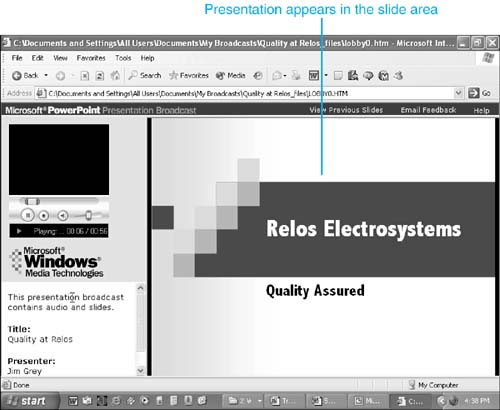
| Because running a live presentation broadcast can be complicated, it's usually better to practice recording and saving a broadcast before presenting it live. Even if your ultimate goal is to conduct a live broadcast, doing several "practice runs" in which you record, save, and replay your broadcast can help you perfect your presentation and delivery ”and make you more confident when it's time to go live. To get started, choose Slide Show, Online Broadcast, Record and Save a Broadcast. If this is the first time you've tried to create a presentation broadcast, a message appears telling you that PowerPoint needs to install some extra software to enable this feature (see Figure 18.1). Choose Yes to install the software. Figure 18.1. The first time you try to set up a presentation broadcast, PowerPoint needs to install its presentation broadcast feature. A message box appears, showing you the installation progress. You can click the Cancel button if you want to stop the install for any reason. After the online broadcasting feature is installed, the Record Presentation Broadcast dialog box opens (see Figure 18.2). Figure 18.2. Enter a title and description for your recorded presentation broadcast. The Record Presentation Broadcast dialog box sets up the basic information your audience will see in the presentation lobby page and lets you configure more advanced broadcast options. Enter a title and description for your broadcast, as well as the speaker's name and, if you want, the email address of the person organizing the broadcast. You can also add copyright and keyword information. You should provide sufficient detail here so that potential audience members will know what the presentation will be about and for whom it was designed. Specifying the length of the presentation is also a good idea. Click the Tips for Broadcast button to display related content in the PowerPoint Help window. Configuring Broadcast SettingsAfter you've entered information on the Record Presentation Broadcast dialog box, you'll need to specify a few more technical broadcast settings. Click the Settings button on the Record Presentation Broadcast dialog box to open the Broadcast Settings dialog box (see Figure 18.3). Figure 18.3. The Broadcast Settings dialog box lets you set various presentation options. The first group of options on the Presenter tab (Audio/Video) lets you specify whether you want to broadcast live audio or video (or both) with your presentation. Regardless of what you choose here, audio in the presentation itself (such as a saved narration or slide transition sounds) doesn't get broadcast. If you want to broadcast audio, you need to have a sound card and a microphone set up at your computer. If you want to provide video (usually a picture of you talking along with the presentation), you'll need to have a video camera and video capture card installed at the broadcast station. Remember that the people tuning into your broadcast need to have audio-capable computer hardware to hear any sound. You can also choose whether to let audience members see your speaker notes by selecting the Display speaker notes with the presentation check box. In the Save broadcast files in edit box, type or browse for the location where you want to save your broadcast. Because you're recording and saving this broadcast, rather than presenting it live, you can save either on your C:\ drive or in a shared network location. For your audience to view your final broadcast, however, you need to move the main broadcast Web page and its associated folder to a shared network location at some point. Type network location names using the format \\ servername \sharename . From the Slide show mode drop-down list, specify whether to display a full screen or a resizable screen. If you plan to access other programs during your broadcast (for example, to demonstrate other software), use a resizable screen. The Advanced tab of the Broadcast Settings dialog box (see Figure 18.10) includes options you'll primarily use for live broadcasts. Figure 18.10. Using a Windows Media Server lets you broadcast to a large audience. NOTE You can also directly access the Broadcast Settings dialog box by choosing Slide Show, Online Broadcast, Settings from the menu bar. Recording Your BroadcastClick the Record button on the Record Presentation Broadcast dialog box to open the Broadcast Presentation dialog box, shown in Figure 18.4. Figure 18.4. In the Broadcast Presentation dialog box, you'll prepare to record your broadcast. NOTE If you're rerecording your broadcast, PowerPoint displays a dialog box verifying that you want to overwrite the existing broadcast. PowerPoint verifies that the network locations you typed earlier are valid; then it checks that your audio and video inputs are working correctly (if you enabled those options in the Broadcast Settings dialog box when you set up the presentation broadcast). If you selected real-time audio, PowerPoint displays a Microphone Check dialog box (see Figure 18.5) to verify that your audio levels are set correctly. Figure 18.5. Read this window's text into your microphone to check your audio levels. After you've read the text out loud (and you've seen the horizontal volume bar move), click OK to continue. If you want to check the microphone level again, click the Recheck Microphone button. If you selected real-time video, PowerPoint displays a Camera Check dialog box in which you can preview the video you'll transmit to your audience. Click the Recheck Camera button to check the video again. When the Broadcast Presentation dialog box flashes Press Start when ready, click the Start button to begin. Your presentation appears in Slide Show view (see Figure 18.6); record your broadcast, speaking into your microphone (and looking into the camera, if you're including video). Figure 18.6. Record the broadcast you want to save and replay. In many ways, this process is similar to presenting a live, in-person slide show. When you finish recording, a message box appears telling you where PowerPoint has saved your broadcast (in an HTML format). Click Replay Broadcast to immediately replay the broadcast and preview what your audience will see. Click Continue to return to PowerPoint. Replaying Your BroadcastIf you clicked the Replay Broadcast button when you finished recording, your broadcast launches in Internet Explorer (see Figure 18.7). Figure 18.7. The lobby page of your recorded broadcast appears. In the upper-left corner of the browser, if your broadcast includes video, it appears in the Windows Media Player window. If your broadcast is audio only, this window is empty. Immediately below it, you'll see basic information about the broadcast (title and presenter's name) that remains throughout the broadcast. The upper-right corner of the browser window offers links to View Previous Slides, Email Feedback, and Help. The lobby page appears in the slide area, providing additional presentation information and the Replay Broadcast button. Click this button to start the actual broadcast, which appears in the slide area. Figure 18.8 illustrates an example of a broadcast. Figure 18.8. View your PowerPoint presentation in the slide area of the browser. If you saved your $Ipresentations;broadcasts;replaying>broadcast to your C:\ drive, you must move it (the HTML file in the My Broadcasts folder as well as the associated folder of the same name) to a shared network location before others can view it. Send an email with a link to the HTML lobby page to people you want to view the broadcast. When viewers load this Web page, instruct them to click the Replay Broadcast button to start.
|
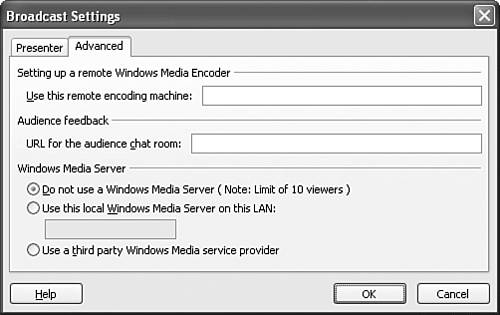
 To learn more about the options available on the Advanced tab of the Broadcast Settings dialog box,

EAN: 2147483647
Pages: 261