| There are several ways to add clips to your PowerPoint presentations. The method you choose depends on where the clip is located (in the Clip Organizer or only on your computer, for example), how you prefer to use PowerPoint, and whether you know exactly what you want to insert. Inserting Clip Art To insert clip art, you can do any of the following: -
From the Slide Layout task pane, choose any of the content layouts and click the Insert Clip Art button from the content palette. The Select Picture dialog box opens (see Figure 13.1), displaying clips from the Clip Organizer. Figure 13.1. Inserting a clip from a slide layout is just one option.  Select the picture you want to insert and click OK to insert it on your slide. If you want to search for a specific image, enter its keyword in the Search Text field and then click Search. NOTE If you want to import a clip, click the Import button. This opens the Add Clips to Organizer dialog box, where you can choose the clip you want to import.
-
From the Slide Layout task pane, choose the Title, Clip Art, and Text; Title, Text, and Clip Art; or Title, Clip Art, and Vertical Text layout; and then double-click the clip art placeholder to open the Select Picture dialog box. -
Choose Insert, Picture, Clip Art to open the Clip Art task pane, shown in Figure 13.2. Figure 13.2. Search for clip art by keyword.  Search by keyword for the type of clip art you need, and then select it. Click the down arrow to the right of the thumbnail and then choose Insert. The clip will be inserted on your slide. NOTE You can also drag your selected picture from the task pane to the slide.
The first time you open the Clip Art task pane, the Add Clips to Organizer dialog box appears. Use this dialog box to have PowerPoint automatically organize your clips for you. -
Choose Insert, Picture, Clip Art to open the Clip Art task pane. Click the Organize clips link to open the Microsoft Clip Organizer from which you can view clip art collections. Figure 13.3 shows the Clip Organizer. Figure 13.3. Browsing the collections in the Clip Organizer is another way to locate clip art. 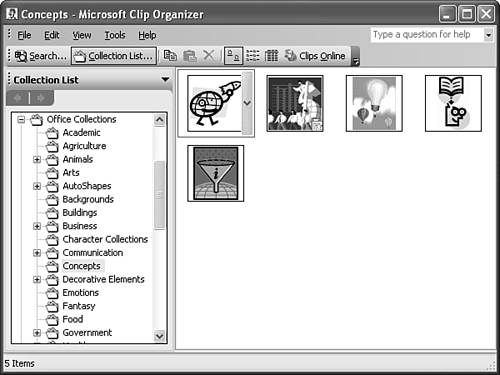 Within the Clip Organizer, you can either copy and paste a clip into your presentation, or drag and drop it if your windows are arranged to accommodate this. -
Click the Insert Clip Art button on the Drawing toolbar to open the Clip Art task pane. From here, you can either use the task pane's search functionality to search for clip art, or click the Organize clips link to go directly to the gallery. Inserting Pictures To insert a picture on a slide, do any of the following: -
From the Slide Layout task pane, choose any of the content layouts and click the Insert Picture button from the content palette. The Insert Picture dialog box opens (see Figure 13.4), which is similar to the Open dialog box. Figure 13.4. Find and insert a picture from this dialog box. 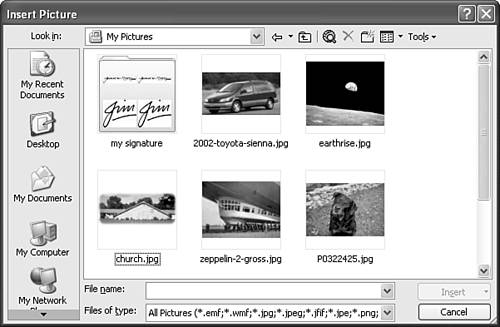  To learn more about the advanced features of the Open dialog box that are shared with the Insert Picture dialog box, see "Exploring the Open Dialog Box" in Chapter 2, p. 56 . To learn more about the advanced features of the Open dialog box that are shared with the Insert Picture dialog box, see "Exploring the Open Dialog Box" in Chapter 2, p. 56 .
Select the picture you want to insert and click Insert to insert it on your slide. -
Choose Insert, Picture, From File to open the Insert Picture dialog box. -
Choose Insert, Picture, From Scanner or Camera to open the Insert Picture from Scanner or Camera dialog box. To learn more about inserting pictures from scanners or cameras , see "Adding Clips from a Scanner or Camera" in this chapter, p. 270 .
-
Click the Insert Picture button on the Drawing toolbar to open the Insert Picture dialog box. Inserting Sounds or Movies To insert a media clip (sound or movie) to your presentation, do any one of the following: -
From the Slide Layout task pane, choose any of the content layouts and click the Insert Media Clip button from the content palette. The Select Media Clip dialog box opens, displaying available clips from the Clip Organizer. This dialog box is nearly identical to the Select Picture dialog box; simply choose the clip you want to insert and click OK. A message box asks whether you want to play the file automatically in the slideshow. Click Yes if you do. Otherwise, you need to click the file to play it. NOTE To change how the clip is played , you can choose Slide Show, Action Settings to specify mouse-click and mouse-over effects. You can set additional play options on the Custom Animation task pane. Access this task pane by choosing Slide Show, Custom Animation.
-
From the Slide Layout task pane, choose either the Title, Media Clip, and Text or Title, Text, and Media Clip layout, and then double-click the media clip placeholder to open the Select Media Clip dialog box. -
Choose Insert, Movies and Sounds, Movie from Clip Organizer or Sound from Clip Organizer. The Clip Art task pane opens; select one of the options in the task pane or click the Organize clips link to open the Clip Organizer. -
Choose Insert, Movies and Sounds, Movie from File or Sound from File. Depending on your selection, either the Insert Movie or Insert Sound dialog box opens, as shown in Figure 13.5. Figure 13.5. You can insert your own movie or sound file and have it play automatically.  Select the sound or movie you want to insert and click OK. A dialog box asks whether you want the clip to play automatically when you display the slide. Click Yes if you want to do this. Otherwise, you need to click the clip to play it. A sound clip appears as an icon on your slide, whereas a movie clip appears as a black box that is as tall and as wide as the movie. You can move the icon or box to another part of the slide if you want to. -
Choose Insert, Movies and Sound, Record Sound to open the Record Sound dialog box from which you can record your own sound. You need a microphone to record a sound. To learn how to record your own sound file, see "Recording Sound Files" in this chapter, p. 264 .
-
Choose Insert, Movies and Sound, Play CD Audio Track to open the Movie and Sound Options dialog box, where you can specify a CD audio track to play during your presentation. For details on inserting CD audio tracks, see "Playing a CD Audio Track" in this chapter, p. 265 .
NOTE You can also insert a sound or video file by choosing Insert, Object and selecting the appropriate object from the Insert Object dialog box. In general, use this method of inserting a media clip only when PowerPoint doesn't support the clip format you want.
After you insert a sound or a movie, you can set some playback options. Right-click the icon or box and choose Edit Movie Object (or Edit Sound Object) from the menu that appears. The Movie Options (or Sound Options) dialog box appears. Figure 13.6 shows the Movie Options dialog box. You can control the clip's volume, hide the clip when it isn't playing, and show the clip at full screen if it's a movie. Figure 13.6. Set playback options.  Recording Sound Files You can record your own sound clips to insert into your PowerPoint presentation. You need to have a microphone and sound card to do this. TIP In addition to adding a sound clip to a single slide, you can record a narration for your entire presentation by choosing Slide Show, Record Narration. Narrating your presentation is particularly effective if you're planning to publish to the Web or create a self-running slideshow (such as for a trade show).
To learn how to narrate your presentations, see "Recording a Voice Narration" in Chapter 9, p. 180 .
To record a sound, follow these steps: -
Choose Insert, Movies and Sound, Record Sound to open the Record Sound dialog box, which appears in Figure 13.7. Figure 13.7. Record a sound to play with a particular slide. 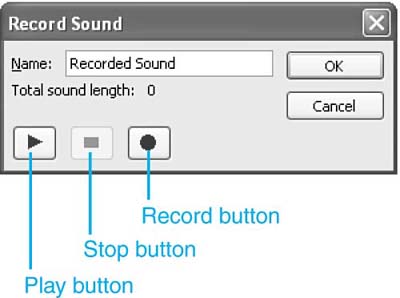 -
Enter a description for this sound in the Name field. -
Click the Record button to begin recording your sound. -
Click the Stop button when you finish recording. To play back the sound, click the Play button. -
Click OK to save the sound with the presentation; click Cancel to exit and start over. The sound now appears as an icon in your presentation, and you can use it anywhere in that slideshow. For example, you can play the sound when you click a specific object using PowerPoint's action settings. To learn how to play sounds with action settings, see "Using Action Settings" in Chapter 15, p. 333
Playing a CD Audio Track You can also play a specific audio track from a CD during a PowerPoint presentation. For example, you might want to include music from a CD as a background or to introduce your presentation. To do this, follow these steps: -
Choose Insert, Movies and Sound, Play CD Audio Track to open the Insert CD Audio dialog box, shown in Figure 13.8. Figure 13.8. Music from a CD can serve as a background sound.  -
In the Clip selection group box, choose the start and end tracks to play. -
If you want to play only part of one track, indicate the time spans in the Start At Time and End At Time fields. For example, you might want to play only the first two minutes of a track. -
If you want, click the Sound volume button and choose how loud the audio will play. -
In the Display options group box, choose whether to hide the CD icon when the music isn't playing. Also, choose whether to show playback controls that let you pause the audio and adjust the volume during playback. -
Click OK to close. PowerPoint displays a CD icon on the open slide. These steps insert the CD clip in to the slide, but you must use the Custom Animation dialog box to set up your presentation to play this file during the slideshow. For details on setting up custom animation options, see "Creating Custom Animations" in Chapter 15, p. 324 .
|