Using FrontPage 2003 to Customize Windows SharePoint Services
|
| < Day Day Up > |
|
FrontPage 2003 is a full-featured Web page editor that you can use to edit or create sophisticated Windows SharePoint Services sites as well as normal Web pages. Although entire books have been written about FrontPage, the coverage here focuses on accomplishing some select tasks on your SharePoint site. For a thorough grounding in FrontPage, see Microsoft Office FrontPage 2003 Inside Out (Microsoft Press).
| Note | Microsoft FrontPage 2002 and earlier versions don’t work with the version of Windows SharePoint Services installed on Windows Small Business Server. However, a copy of FrontPage 2003 is included with Windows Small Business Server 2003, Premium Edition. |
Customizing Existing SharePoint Sites
Although you can customize most aspects of a SharePoint Web site using a Web browser, as discussed earlier in this chapter, FrontPage provides the ability to exert complete control over the SharePoint site. From a client computer, you can easily modify the contents of link bars, work with Web Parts, create new pages, and do anything else you want.
| Tip | You can also use FrontPage to customize the default Web site created by Windows Small Business Server. For security purposes, use a Web hosting company to host your public Internet site, and don’t publish your default Web site to the Internet. Employees will still be able to access the SharePoint site from the Internet using the Remote Web Workplace, which is available on the Internet at http://www.example.com/remote, if you configure your firewall appropriately (where http://www.example.com is the Internet domain name of the Windows Small Business Server computer). |
Opening the SharePoint Site And Getting Comfortable
To open the SharePoint Web site (http://companyweb) in FrontPage 2003, complete the following steps:
-
In FrontPage, choose Open Site from the File menu.
-
In the Open Site dialog box, type http://companyweb in the Site Name box and then click Open. To open the default Web site for the Windows Small Business Server computer, type http://sbssrv (where sbssrv is the computer name of the Windows Small Business Server computer).
-
The site is opened in Folders view (Figure 17-16), which shows a listing of folders and pages on the site:
-
To open a folder, double-click it. To return to the previous folder, click the Up One Level button on the right side of the view.
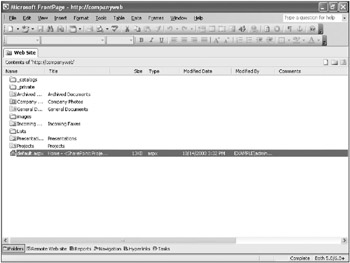
Figure 17-16: The http://companyweb site in FrontPage 2003. -
To open a page for editing, double-click it. This displays the page in Design view, a What You See Is What You Get (WYSIWYG) view that you can use to edit the page as if it were a normal Microsoft Office document.
-
To change the Design view of a page to match a specific screen resolution, click the Page Size display on the Status bar and choose the desired resolution; 760 × 420 (800 × 600 Maximized) is usually a good choice.
-
To change the Estimated Time To Download reading to reflect a different speed network connection, click it on the Status bar and choose the desired connection speed. As a rule, pages shouldn’t take more than 15 seconds to download over the targeted connection speed, if possible.
-
To disable tools that create pages incompatible with certain browser versions, choose Page Options from the Tools menu and then use the Authoring tab (Figure 17-17) to specify Web browser compatibility options.
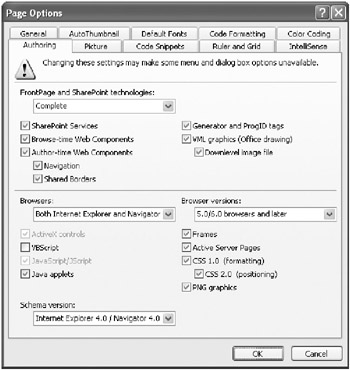
Figure 17-17: The Page Options dialog box. -
To select a specific area of a Web page by using an HTML tag (a trick Macromedia Dreamweaver users are accustomed to), click the desired tag at the top of the page in Design view.
-
To change the view to show HTML code or view the page as it would appear rendered in Internet Explorer 6, click the Split, Code, and Preview buttons at the left side of the Status bar.
-
To preview a page in the Web browser of your choice, click the down arrow next to the Preview toolbar button and select the desired browser and resolution. To add browsers to the list, choose Edit Browser List.
-
| Tip | To back up the entire Web site, choose Server and then Backup Web Site from the Tools menu. To package a group of pages and all dependant files into a Web Package that can be imported into any other site, choose Packages and then Export from the Tools menu. |
Adding Links and Customizing the Link Bar
Two essential tasks that you can’t perform using the SharePoint Web interface are adding links to pages and customizing the link bar that appears across the top and left side of a SharePoint site. These are easy to accomplish in FrontPage—just open the page in FrontPage 2003 and follow this list of options:
-
To add a link to a link bar, click + Add Link on the appropriate link bar (Figure 17-18). This opens the Add To Link Bar dialog box, which you can use to link to another item in the site or a page anywhere on the Internet.
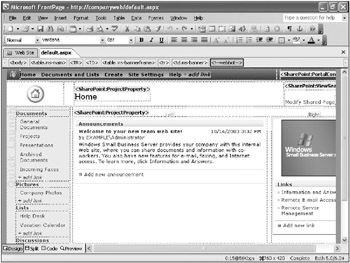
Figure 17-18: The http://companyweb Home page in FrontPage. -
To edit a link bar, right-click a link bar and choose Link Bar Properties. This displays the Link Bar Properties dialog box (Figure 17-19). Select the link bar you want to edit from the Choose Existing box, and use the following list:
-
Click Create New to make a new link bar.
-
To add, remove, or edit links, click the Add Link, Remove Link, and Modify Link buttons, respectively.
-
To rearrange links, click the Move Up and Move Down buttons.
-
Click the Style tab to change the link bar style, orientation, and appearance.
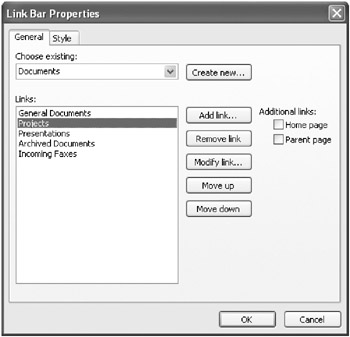
Figure 17-19: The Link Bar Properties dialog box. -
-
To add a bookmark in a page so that you can create hyperlinks to that specific location in the page (such as the top of the page), place the cursor at the location to which you want to link, choose Bookmark from the Insert menu, type a name for the bookmark, and then click OK.
-
To add a normal hyperlink, place the cursor in the desired location or select the desired element, and click the Insert Hyperlink toolbar button. Use the Insert Hyperlink dialog box to specify where the hyperlink should send users. To send users to a bookmark in the current page, click Place In This Document on the Link To bar, select the appropriate bookmark, and then click OK.
Adding Web Parts
To add Web Parts to a Windows SharePoint Services page with FrontPage, complete the following steps:
-
Open the SharePoint page and place the cursor in the location you want to insert a Web Part.
-
Choose Insert Web Part from the Data menu to display the Web Parts task pane.
-
If you want the Web Part to be customizable using the SharePoint Web site, first create a new Web Part zone in which to place the Web Part. To do so, click New Web Part Zone.
-
Select the Web Part that you want to insert and then click Insert Selected Web Part. The new Web Part is placed on the page (in the newly created Web Part zone, if you made one), as shown in Figure 17-20.
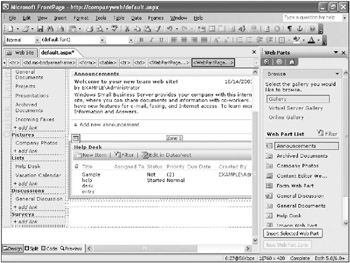
Figure 17-20: A Web Part in a newly created Web Part zone. -
To connect a Web Part to a data source (for those Web Parts that support connections), right-click the newly inserted Web Part and choose Web Part Connections from the shortcut menu. This displays the Web Part Connections Wizard, which walks you through the connection process.
| Tip | To change whether a user can customize a Web Part zone, right-click the zone and choose Web Part Zone Properties from the shortcut menu. |
Creating New SharePoint Web Sites
FrontPage 2003 makes it easy to create powerful SharePoint Web sites from templates or from scratch. Once again, without going into detail about this, here’s how to get started:
-
In FrontPage, choose New from the File menu.
-
In the New task pane, click More Web Site Templates.
-
In the Web Site Templates dialog box (Figure 17-21), click the SharePoint Services tab.
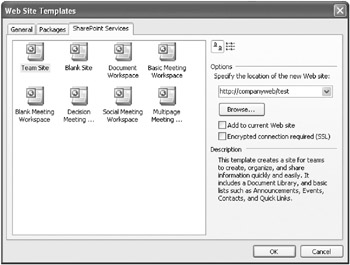
Figure 17-21: The Web Site Templates dialog box.Tip You can use the Packages tab of the Web Site Templates dialog box to create a News And Reviews Site or a Web Log (blog) site.
-
Select the desired template, specify where to save the new site, and then click OK. FrontPage creates the new site and displays it.
|
| < Day Day Up > |
|
EAN: 2147483647
Pages: 224