Methods
The actual process of overclocking your CPU is simple: Just change the clock speed, the Front Side Bus (FSB) multiple, or both, on the motherboard. The clock speed is the rate (in millions of cycles per second, or megahertz) at which the CPU's internal oscillator operates-when you increase the clock speed, the CPU runs faster. The FSB connects the CPU to the main memory and the chipset, so increasing the FSB multiple reduces the amount of time the CPU needs to communicate with the memory and chipset.
Depending on the motherboard's design, you can sometimes change these values by either moving a jumper, changing a switch setting, or editing the BIOS settings. Other systems, including most Intel CPUs and motherboards have the speeds locked, so overclocking may not be possible on systems that use those components.
The User's Manual for your motherboard should contain specific instructions for setting the clock speed, so you must have a copy of the manual before you proceed. If you can't find the manual, look for a copy to download from the motherboard maker's Web site.
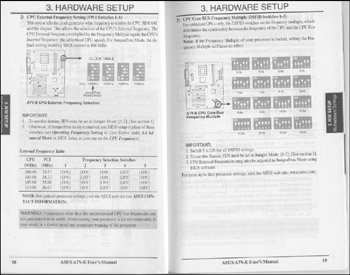
You won't find a section in the manual called "How to Overclock," but the information is probably there if it's possible to change the speed. For example, the instruction sheet shown in Figure 18.1 explains how to change the switch settings on an older ASUS A7V333 motherboard.

Figure 18.1: Change the switch settings on this motherboard to set the clock speed.
Some brand-name computer makers don't encourage overclocking, so they don't include the necessary information in their manuals. If you have one of those systems, your best source of information will be the Web sites dedicated to overclocking.
On more recent motherboards, the BIOS sets the clock settings instead of depending on switch or jumper settings. For example, one of my computers has an Overclock Tuner option in the BIOS Settings utility.
In addition to the manual, the other source of valuable information about overclocking your particular combination of CPU and motherboard is the online community of enthusiasts. If other people have tried overclocking a computer with the same components, there's a good chance that they have described their experience in one of the overclocking forums or newsgroups, or in a users' forum sponsored by the motherboard manufacturer.
It's worth the time and trouble to search for information before you try to modify your own system. It's always cheaper to learn about potential disasters from somebody else's experience. If there's a potential hazard or pitfall, you want to know about it before you fry your own CPU chip; if there's a particular combination of settings that work best, you want to know that, too. To find online information, use Google or some other Web search tool to search for your motherboard make and model.
| Tip | Before you start to experiment with overclocking, be sure to make a complete backup of all the essential files on your hard drive. This way, if your overclocked processor damages the contents of the drive, you can restore your data from an offline copy. |
If your motherboard uses jumpers or switches to change the clock settings, unplug the power cable from the computer before you do anything else. Use an antistatic wrist strap to protect your computer from static electricity.
When you have found and read everything available about overclocking with your motherboard, try increasing the settings, one step at a time. Don't go immediately to the highest possible numbers, but do things gradually. After each change, turn on the computer and watch closely as the BIOS runs the POST and Windows loads. Before you run any other software, use the system monitor utility supplied with your computer or motherboard, or a diagnostic program such as SpeenFan (download it from http://www.almico.com/speedfan.php) or Motherboard Monitor (http://www.mbm.livewiredev.com/) to measure the CPU's temperature. If everything appears to be working, try running a game or some other program that consumes a lot of system resources while you watch for the temperature to rise.
| Tip | The Dr. Hardware diagnostic program can tell you exactly how fast your CPU is running, and run some benchmark programs that show you how your performance has improved. You can find Dr. Hardware at http://www.dr-hardware.com |
If the system seems to do everything you want it to do, let it run for an hour or two to allow heat to build up and make sure there isn't a problem that wasn't obvious at startup. Then turn off the computer and increase one of the overclocking settings by one more step. Repeat the process, one step at a time until Windows doesn't load, or the temperature monitor tells you that the CPU or other components are too hot, or you get a blue-screen failure, or the system doesn't start at all. At that point, either you have pushed the system to its current limits, or the CPU is overheated, so you should either drop the settings by one step, or try to increase the amount of cooling with a bigger or more effective heat sink (see the next section in this chapter for more about cooling your system).
As you run tests on your newly overclocked system, remember that you're trying to get the system to fail; that's the only way to find the highest settings that your system tolerates. In effect, you're cranking up the speed until something breaks, and then turning things down until they work again.
Your system has at least two speed settings that work together: the clock and the FSB multiple. You can try increasing just one setting, and leave the other one at the standard value, or try changing both values, one at a time. You may discover that certain combinations work better than others.
EAN: 2147483647
Pages: 372