Keyboard Overview
|
| < Day Day Up > |
|
Keyboards are also crucial devices in the vast majority of computers. Keyboards can be had for under five dollars, and for several hundred dollars. Keyboards come in versions for different languages. There are Dvorak keyboards, which have the alphabet laid out in a pattern conducive to faster typing than the QWERTY type, which was designed for old typewriters to keep the typebars from jamming. Some keyboards come with features such as ergonomic shapes or built-in touchpads. Some have extra buttons used for turning the computer on and off, connecting to the Internet, controlling audio CDs, or opening any program designated by the user.
Not everyone is familiar with all the keys on a keyboard, so an explanation of some of the lesser-known keys follows.
-
Windows key: Opens the Windows Start menu. See Figure 9.5.
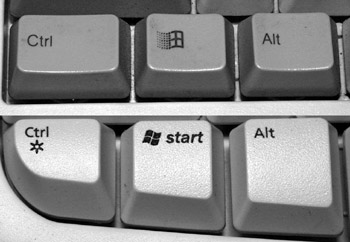
Figure 9.5: The Windows key. -
<Print Screen|Sys Rq>: There are various abbreviations of this key label. This key doesn't actually cause the screen to print, at least in Windows. If it is enabled, pressing this key copies the screen to the clipboard so that if you open any document or image program and use the Paste command (<Ctrl> + <V> or Edit > Paste), the screen image appears in the document or image program. Holding the <Alt> key when you press Print Screen stores just the active window in the clipboard.
-
<Pause>: If Quiet Boot or its equivalent isn't enabled in the BIOS, lots of valuable information about hardware can appear on the screen early in the boot process. Some of this information moves down the screen at about the same pace as the credits after a television show. Use the Pause key to stop this movement so you can actually read it.
-
<Num Lock>: This key toggles the numeric keypad on and off. It also, as stated earlier in this chapter, can be used to test for a lockup as long as there is a working Num Lock light. If pressing the key has no effect, you can be almost certain that the machine is locked up. If the Num Lock light responds to the key, the computer isn't locked up, although it could be in a virtual lockup condition in which the pointer moves, but nothing really responds in a reasonable amount of time. The <Caps Lock> key can be used for the same purpose.
-
<Home>, <End>: These keys move the cursor to the beginning and the end of a line in a document, respectively. Holding down the <Ctrl> key when pressing these causes the cursor to move to the beginning and end of the entire document, respectively.
Keyboard Interfaces
There are four main interfaces for keyboards:
-
PS/2: All varieties of ATX motherboards, except "legacy-free" models, come with PS/2 keyboard connectors. The same rules that apply to PS/2 mice apply to PS/2 keyboards. Plug in and unplug these only when the power is off, and don't attempt to plug any other device into a PS/2 keyboard port. Windows installs these keyboards transparently. Models with extra features need software disks from the manufacturer. Adapters exist to plug a PS/2 keyboard into an AT port, or vice versa.
-
5-Pin DIN (AT): All varieties of AT motherboards come with these keyboard connectors. These are the only type of keyboard that can be used in a computer with one of these motherboards. Although there should be no problem hot plugging an AT keyboard, it is better to be safe and turn off the computer first.
-
USB: These are hot-pluggable devices. Some have their own auxiliary USB connectors, which are handy for USB mice.
-
Wireless: These come in the USB and PS2 varieties and can be either infrared or RF controlled.
Keyboard Maintenance
There is one overriding rule that must be followed when cleaning a keyboard: don't let it get wet! Keys and the body of the keyboard can be cleaned with a slightly damp cloth, but don't let water get underneath the keys. The most common damage that occurs to keyboards is when someone spills liquid into them. Air sprays such as Blow Off are great for removing dust. Sprays are available to clean the surfaces of keyboards; make sure they are designed specifically for computer keyboards.
Troubleshooting Keyboard Configurations
What little configuration that can be done for the main functions of a keyboard can be done in the Keyboard applet in Control Panel. Figures 9.6 and 9.7 shows a typical Keyboard applet from Windows 2000. As with pointing devices, it is helpful to be familiar with these settings.
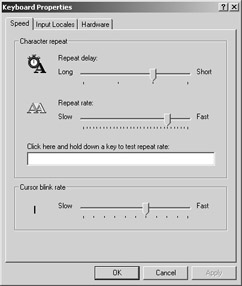
Figure 9.6: Speed page of the Keyboard applet in Windows 2000.

Figure 9.7: Input Locales page of the Keyboard applet in Windows 2000.
Repairing Keyboard Problems
Keyboards are generally trouble-free unless subjected to liquids or physical shock. If a broken keyboard is an inexpensive model, it is probably best to replace it. The cost to replace the unit is usually lower than the value of the time it takes to attempt to fix one. That being said, some keyboards are more expensive, some are no longer available, and some users are "attached" to their keyboards. If you have a situation like this, disassemble the keyboard, if possible, and carefully clean the internal components inside. Then, reassemble the keyboard and try it out. If you are careful, you are unlikely to cause any further damage, and hopefully you can fix the problem. If a liquid has spilled into the keyboard, you should spray the non-residual contact cleaner on the surfaces under the keys. Use cotton swabs to clean the surfaces. This cleaning spray is expensive; expect to use up to $10 worth cleaning one keyboard.
Keyboard Error Codes
The only error message you're likely to encounter is the six-beep (usually) POST code indicating a keyboard or keyboard controller problem. If this happens, and replacing the keyboard doesn't help, unless the motherboard is under warranty, your only solution will be to use a USB keyboard if the computer has a USB port. If not, it is probably time to retire the motherboard.
Laptop Keyboards
Laptop keyboards are essential to the portability of a laptop. Imagine trying to tote a laptop or use one on a plane if you have to use a separate keyboard. The most common reason to have to replace a laptop keyboard is if liquid spills on it, but the rest of the machine still works. Laptops vary widely in how to remove the keyboard, and laptop manufacturers vary widely in providing such information. For example, IBM® makes detailed service instructions for its ThinkPad® laptops available on its Web page (ibm.com), while many other companies do not make this information available on the Web. There are two common ways to remove a laptop keyboard. One is, with the power off and battery removed, to look for a removable panel around the keyboard. There might be a screw or two holding it in place (see Figure 9.8).
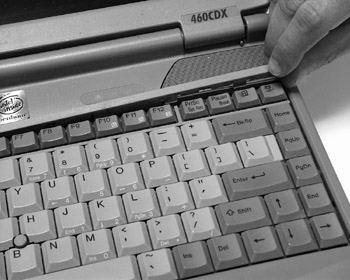
Figure 9.8: The removable panel type of laptop keyboard removal.
Remove the screw(s) and then the panel. You might then see a screw holding in the keyboard. Remove the screw and lift the keyboard slightly. Look underneath to see where the ribbon cable is, as shown in Figure 9.9. Make certain not to stress the ribbon cable as you lift the keyboard out of the way. The other method some manufacturers use is to look at the bottom of the laptop and remove any screws marked with "K" (see Figure 9.10). Then, gently lift the keyboard out following the previous instructions to prevent damage to the ribbon cable.
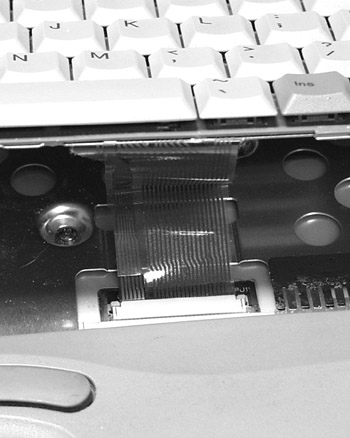
Figure 9.9: Treat the ribbon cable with care.
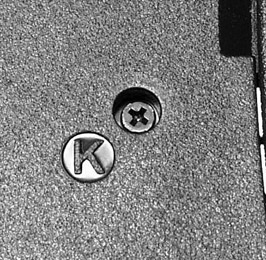
Figure 9.10: The “K” screw.
| Note | If liquid has spilled on a laptop, do not attempt to power it on until you or a technician experienced in portable computers has determined that there is no liquid present anywhere in the system. See Chapter 11 for more information on attempting to rescue a laptop that has been exposed to liquid. |
|
| < Day Day Up > |
|
EAN: 2147483647
Pages: 175