Time Navigation Controls Area
| The time navigation controls area is at the top of the track content area portion of the Timeline panel (Figures 5.5). It is composed of the following: Figure 5.5. The time navigation controls area is made up of four components
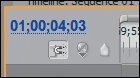
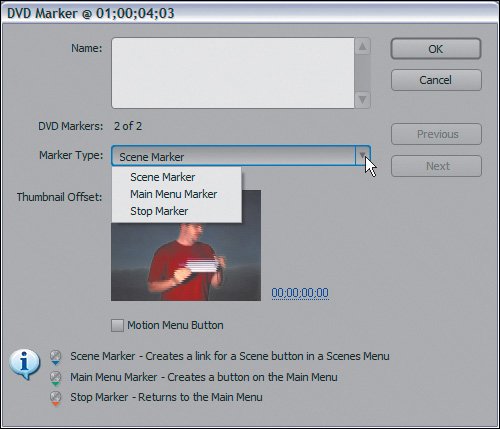
Start at the top with the viewing area bar. The Viewing Area BarThe Timeline panel's viewing area bar functions the same as the one in the Monitor panels. By decreasing its size, you zoom in the timeline's view. Expand the bar to zoom out. If the CTI is within the visible area of the Timeline panel, adjusting the viewing area bar intelligently keeps the CTI centered within the panel. You can also drag the bar left or right to focus on a particular portion of the timeline. The Time RulerThe time ruler is the gray bar delineated by tick marks that represent the timecode values for the active sequence. Clicking and scrubbing in this area activates the CTI to up-date and play back the video underneath the area being scrubbed. The timecode values displayed on the time ruler increase or decrease, respectively, when you zoom in or out your current view. In the time ruler, In points and Out points are shown as a dark gray point between brackets. You can assign In and Out points here, as well as view them. Work Area and Work Area BarThe work area is the dark gray area at the bottom of the time ruler. Here the lighter colored work area bar and the markers are visible. To assign markers, press one of the marker buttons at the top of the track header area. In the timeline, a marker will be assigned to whatever frame the CTI is on. The work area bar dictates the area you want to preview, play, or export in the timeline. The work area bar helps you define smaller areas to preview and export as you can either export the entire sequence or just the work area. Below the work area, you may see either a red or green line. The color tells you whether or not rendering preview files is necessary or completed (Figures 5.6a and b). When you work in the timeline and apply an effect to a clip, a red bar displays above that clip signifying that its data must be re-processed and preview files need to be created in order to properly play the clip back with the effect. Using the work area bar, you define the areas over which you want preview files created. If you set the work area bar above the clip and press Enter, Premiere will render preview files for the clip. Once you create the preview file, the red bar turns green. Figures 5.6a and b. When you apply an effect to a clip, a purple line appears on it as an indicator (a). Above the track content area and below the work area bar, the red bar specifies that this clip needs rendering to play back at full resolution. When you press Enter, Premiere creates preview files for only the portion of the clip that is covered by the work area bar (b)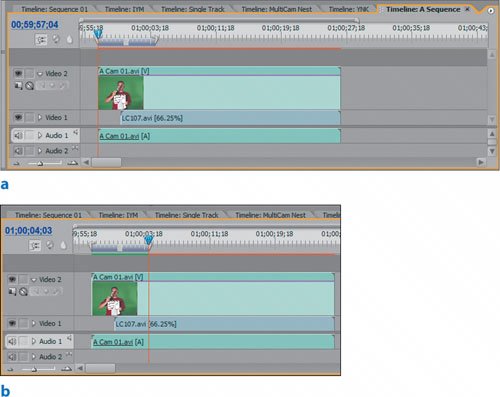 The important thing to remember is that the work area bar allows you to define specific areas to export or for which to build preview files. In the 2.0 Edit > Preferences > General dialog box, you'll find a brand new check box that relates to the work area. To play back only the work area after building preview files, check the Play Work Area After Rendering Previews check box (Figures 5.7). In former versions of Premiere Pro if your work area defined a portion of your timeline, say in the middle of a 20-minute sequence, Premiere Pro would render the necessary preview files and then play back your timeline from the beginning of the entire sequence. With the new check box turned on, you can concentrate on just the area you're adjusting. Figure 5.7. This is one of those check boxes that I recommend leaving checked. It's a head scratcher to find a scenario where you would want to have this turned off. It's just as easy to expand your work area bar to cover your sequence as it is to open the Preference and uncheck the box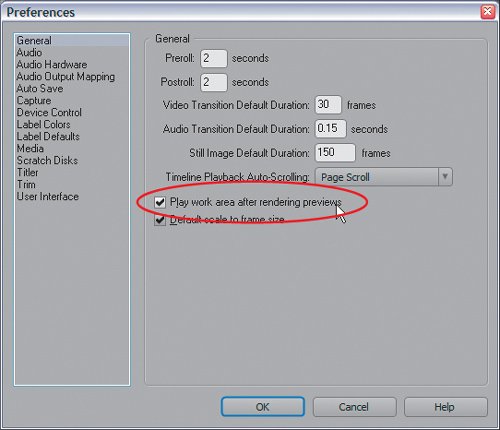 Timecode AreaNext to the work area reside three important controls (Figures 5.8): Figure 5.8. The Timecode area houses the timecode display (in blue), the Snapping button (left), the Set DVD Marker, and Set Unnumbered Marker buttons (right)
You'll learn more about markers and Snapping mode in several lessons later in the book, as they are very helpful with lining up shots and arranging your edits with precision. There is also plenty more to explore and learn about building your own custom DVD menus, as you'll see in Chapter 11, "DVD Basics." |

EAN: 2147483647
Pages: 200