| It's time to complete the DVD customization by modifying the visual and audible elements of the menus. Updating a menu background and adding an audio soundtrack to a menu is easy to do, but you need physical files in your Project panel in order to do it. This final lesson (before you burn your DVD) reveals a method in which to customize any DVD with alternative project files and relevant project elements, providing the finishing touch to a custom menu-based DVD. This lesson is will teach you how to incorporate elements of your existing project in your DVD's menu layout. Because the photo montage is about Italy and you have a sequence with a map of Italy, you will incorporate two flavors of the map as a background graphic for the Main menu and Scenes menu, respectively. For each menu, you will reposition and resize the links/buttons and add a looping soundtrack to complete the menu. Let's start with modifying the backgrounds. | | 1. | Open the BACKGROUND NO BUTTONS sequence in the Timeline panel. With the sequence active, select File > Export > Export Frame. Use the default Windows Bitmap Settings as your file type for exporting and let Premiere assign the default name to the file. Open the BACKGROUND BUTTONS sequence and choose Export Frame again using the same settings (Figures 16.13a and 16.13b).
Figures 16.13a and b. By exporting a single frame from each of the sequences you created a physical file that can replace the background of each menu. The first image of the map without buttons (a) will serve as the Main menu background, and the image with buttons (b) will be used for the Scenes menu  
Notes For this lesson you can continue on your current project or open the Custom_DVD03.prproj project from the APPST2 Lesson Files/Chapter 16 folder. Either way, be sure that your Project panel, DVD Layout panel, Effect Controls panel, and Timeline panel (with the DVD sequence active) are all a part of your current workspace. Background elements for menus can be still images or a video clip. Because you couldn't use a sequence as a background for a menu, you exported a frame from the sequence as a still. The Main menu now shows the map of Italy to provide the flavor for the DVD.
| | | 2. | Open the DVD sequence in the Timeline panel and in the DVD Layout panel click the Main Menu 1 icon in the DVD Menus area. From the Project panel, drag and drop the BACKGROUND NO BUTTONS.bmp file directly into the center of the DVD Layout panel (see Figure 16.14a). Click the icon for the Scenes Menu 1 in the DVD Menus area of the DVD Layout panel. Open the Effect Controls panel and be sure that the Menu Background properties are revealed. Finally, drag and drop the BACKGROUND BUTTONS.bmp file into the center of the box below the video or still text that says Drag Media Here.
Figures 16.14a, b, and c. You can drag and drop the still file directly into the center of the active Main menu in the DVD Layout panel (a), or you can drag and drop the still from the Project panel into the Background placeholder of the Effect Controls panel for the selected menu (b). In either case, the still becomes the background element of the Main menu (c) 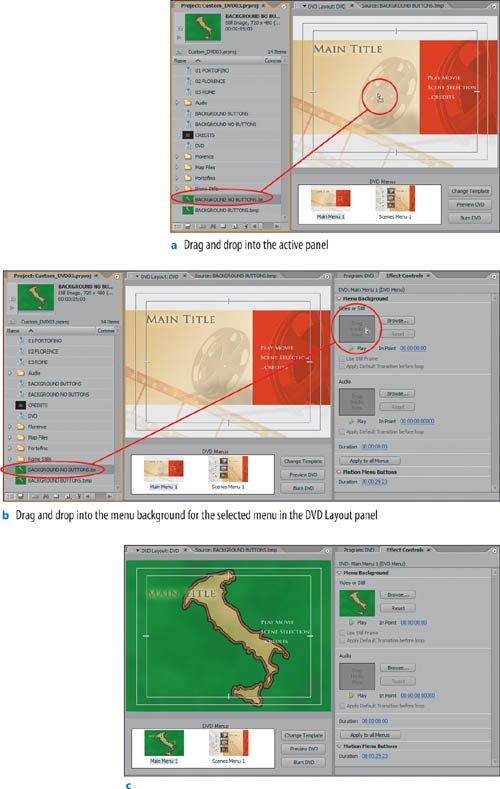
Although both actions achieved the same result, this step revealed two ways of updating a background. If you wanted the background element to be video instead, simply drag and drop a video file using either method technique.
Now it's time to alter the text and buttons a bit further to put the finishing touches on the two menus. To adjust a Scene button's text and color properties you select the button and modify the properties in the Effect Controls panel. To adjust a button's physical position, you simply click on it and drag it to a new place. We'll modify a few text elements together, then I will leave you to do the remaining buttons.
| | | 3. | With the Main Menu 1 active in the DVD Layout panel, double-click on the phrase "Main Title" and change the text to Italy Trip 2003 (Figure 16.15a). Drag the updated text element to a lower region of the frame so that it does not overlap with the Italy graphic (Figure 16.15b). With the text still selected, click on the color swatch for the text in the Effects Controls panel (Figure 16.15c) and make the primary color darker. Drag the other text elements and better position them in the frame to match Figure 16.15d. Because the Main Title text element was not a button, double-clicking opened the Change Text dialog. If it were a button, double-clicking would have opened the DVD marker associated with the button as you saw earlier in the chapter. With the text selected, the physical properties of the text are revealed in the Effect Controls panel, making it easy to change text color or many other attributes. The easiest way to customize a menu is to keep your Effect Controls panel open and right next to the DVD Layout panel so you can quickly select the element to modify and change its settings immediately.
Figures 16.15a and b. To change a button's text, double-click on the text in the menu and modify it in the Change Text dialog (a). To reposition a button or text element, simply drag and drop as you would in the Titler (b) 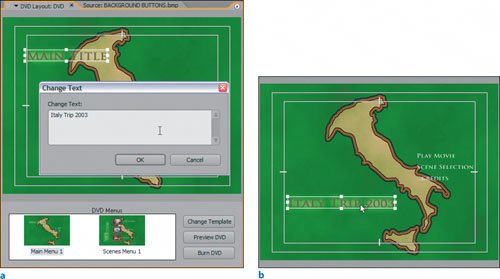
Figures 16.15c through d. To modify the properties of the selected text, open the Effect Controls panel and reassign the values to your liking. To change text color, select the text, click the color swatch in the Effect Controls panel, and pick a new color (c). 16.15d shows the results of all these changes 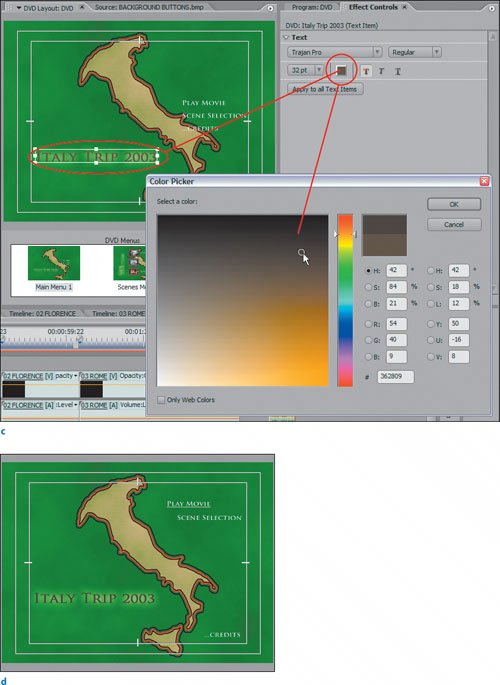
| | | 4. | Click the icon for the Scenes Menu 1 in the DVD Menus area of the DVD Layout panel. Click on the Portofino button and drag its lower-right corner in toward the upper left to shrink it (Figure 16.16a). Reposition the reduced button to just above the button for its real location on the map (Figure 16.16b). Resize and reposition the remaining buttons in the menu (Figure 16.16c), then change each button's text color to black. In the cases where the text still overlaps Italy on the map, double-click on the text and add a few spaces before the start of the word in the Name field of the DVD Marker dialog (see Figures 16.17a , 16.17b, and Figure 16.17c).
Figures 16.16a, b and c. Select a button and you can resize it in the DVD Layout panel just as you would in the Titler (a). Although you can resize the text again to make it bigger through the Effect Controls panel, the only way to reduce the size of the thumbnail is by dragging its boundaries in (b). 16.13c shows all the buttons resized and repositioned 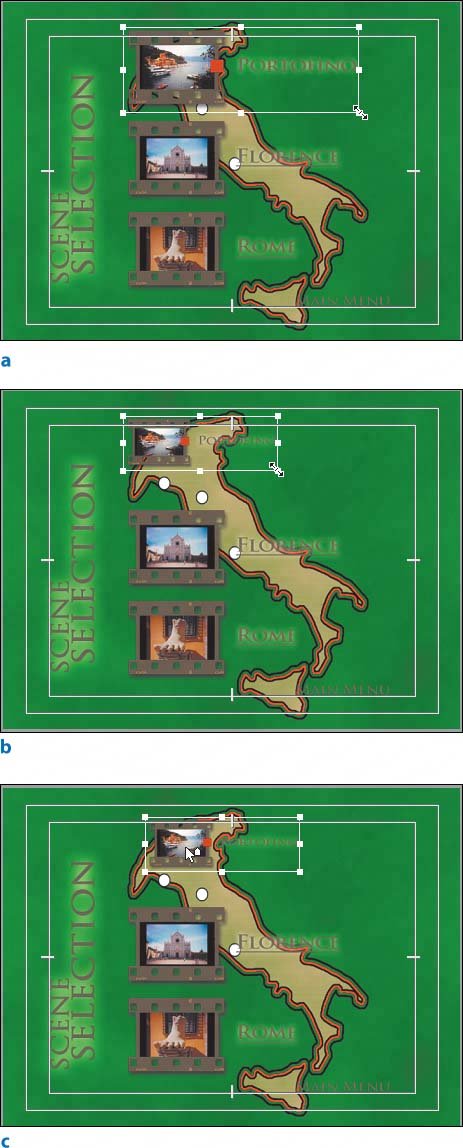 
Figures 16.17a, b and c. Initially, the text overlaps Italy on the map (a). Double-click on the text to bring up the DVD Marker dialog where you can add five or six spaces before the word "Portofino" (b) to add more space between the thumbnail and the text (c) 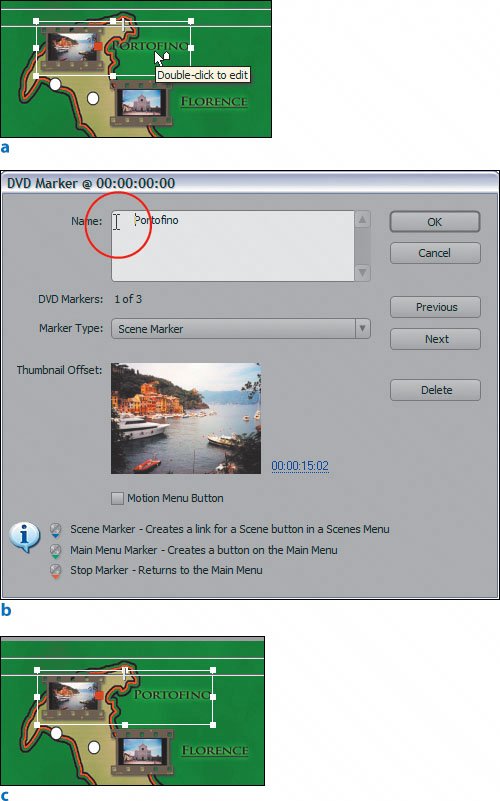 
Because you cannot assign or change a button thumbnail to an exact size as you can text, you needed to drag the button dimension in the proper direction to change its overall size. Then you were able to increase the size of the text without changing the size of the thumbnail.
| 5. | Open the DVD sequence in the Timeline panel and select the TheCoast_s.mp3 file beneath the CREDITS title. While holding down the Ctrl key, use the Selection tool (V) to click on the yellow volume fade line in the center of the clip and create four keyframes (Figure 16.18a). Clicking on the first and last keyframes individually, drag each to the bottom of the clip as in Figure 16.18b. With this file still selected, choose Clip > Audio Options > Render and Replace. Double-click on the created clip Audio 1_TheCoast_s.wav in the Audio folder of the Project panel and play it in the Source Monitor. Open the DVD Layout panel and select each of the menus. Drag and drop the newly created audio file directly into the DVD Layout panel as you did the stills earlier in this lesson (see Figures 16.19a and 16.19b). Click Preview DVD and navigate your DVD to see how it sounds and what it looks like.
|
Figures 16.18a, b and c. To create a custom volume fade for the audio file in the timeline, you need to create four Volume keyframe handles by holding down the Ctrl key and clicking four times on the yellow volume fade bar in the audio file (a and b). Drag the first and last keyframes to the bottom of the clip so that the volume level fades up at the beginning and back down at the end (c) 
Figures 16.19a and b. After creating a custom audio file with a fade in and out, simply drag and drop it onto the menus that you want the audio to play in when they are open (a). As you did with the stills, you can also drag the audio file directly into the Audio portion of the Menu Background properties in the Effect Controls panel (b) 
Although this lengthy step alluded to some audio tinkering you will master later in the book, in essence you used the Render and Replace command to create a customized audio file that appears in your Project panel and can be used as a background audio loop for your menu. You first adjusted the volume levels of the file in the timeline so that it fades up to full volume and then back down. The Render and Replace command takes the selected audio from the timeline and makes a new clip that has the volume fades written into the file. This is a physical file that is written to disk and populates your Project panel. Because the file exists as a unique clip it can be dragged and dropped onto any of your DVD menus to serve as the Audio portion of the Menu Background. Because you can't use the audio or video from a project sequence to populate the background of a menu, you exported a still frame to serve as the image background and used the Render and Replace command to create loop-able short audio file to serve as the sound background. That's it! Your DVD is customized and ready to burn. |