| Premiere Pro 2.0 comes with a selection of DVD templates that you can assign to any sequence intended for DVD authoring. To load a template for a particular sequence, open the DVD Layout panel and choose the Change the Template option. Let's begin working with our project to make this happen. | | 1. | Open APPST2 Lesson Files/Chapter 16/Custom_DVD01.prproj. Before you start working on this project make sure that your layout looks like Figure 16.1.
Figure 16.1. Your Project panel, DVD Layout panel, Effect Controls panel, and Timeline panel should be visible in your layout to make the DVD building process more efficient 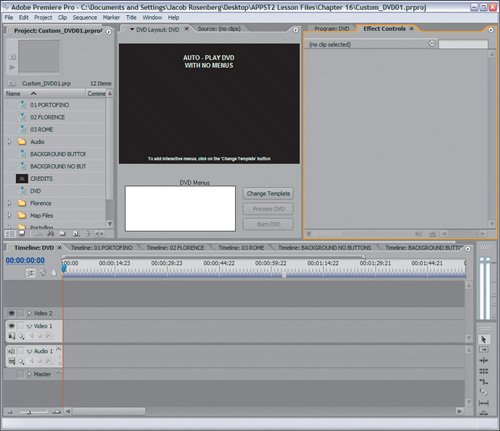
I went ahead and added the two remaining photo montages (Portofino and Florence) to complete the Italy photo montage with three complete picture sequences. Each sequence follows the same editorial structure as the Rome sequence created in Chapter 14, "Working with Stills: Motion and Advanced Keyframing."
| 2. | Make sure the DVD sequence is open in the Timeline panel. In the DVD Layout panel, the loaded sequence should be DVD. From the Project panel, drag and drop the 01 PORTOFINO, 02 FLORENCE, and 03 ROME sequences to the DVD sequence in the Timeline panel. Make them adjacent to each other with no gaps and in their numbered order (Figure 16.2).
Figure 16.2. Here you quickly laid down the three sequences that make up your photo montage. Nesting each location sequence allowed you to define their boundaries much more efficiently and simplifies the process of defining scenes for the DVD 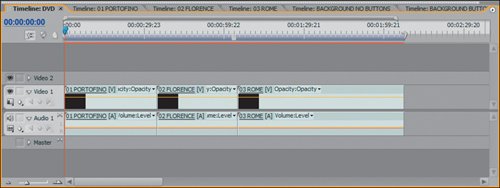
Each location is identified in the Project panel by a single sequence that is then nested into the master DVD sequence. Laying down the three location sequences establishes the entire photo montage. Having each location defined by a single nested clip eases the process of defining scenes for your DVD menu. The entire DVD sequence is now the Play All movie track for your DVD, while each of the nested sequences becomes a scene from that movie.
| | | 3. | With the DVD sequence active in the DVD Layout panel, click the Change Template button. In the DVD Templates dialog, click the button for Apply a Template for a DVD with Menus. From the Theme drop-down menu select Entertainment. Click on the Film Main Menu template (Figure 16.3), and click OK. When the Missing DVD Markers dialog appears asking if you'd like Premiere to create DVD markers automatically (Figure 16.4), click Yes. In the Automatically Set DVD Scene Markers dialog, make sure that At Each Scene is checked and click OK (Figure 16.5).
Figure 16.3. First, select a template to use for the DVD. Here, I've chosen Film Main Menu. Click OK 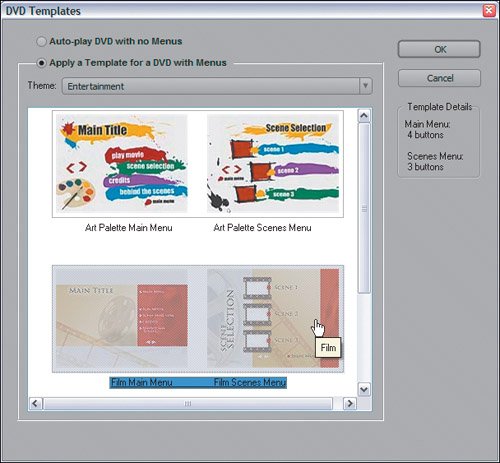
Figure 16.4. A dialog then appears stating that no DVD markers exist in the DVD sequence. To add markers automatically, click Yes 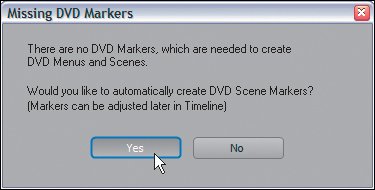
Figure 16.5. In the final dialog, you choose to have markers automatically added at every scene cut point in your sequence. A scene cut point is defined as an edit 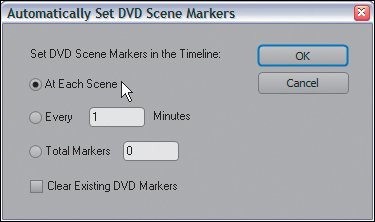
With your DVD sequence open in the Timeline panel, the DVD Layout panel also hosts the DVD layout information for the sequence (Figure 16.6). Because the default DVD mode for sequences is Auto-play no template is loaded. To apply a template to the active sequence and begin working on menu structure and layout, you selected Change Template.
Figure 16.6. Here is the timeline showing three cut points, one for each of the three nested sequences 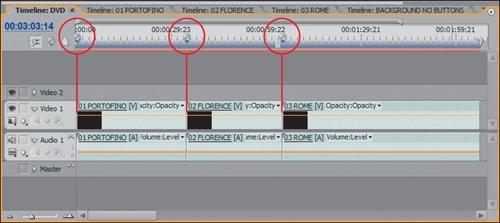
Notes When you plan to customize a template, consider the layout and text of the template as opposed to the exact image contents of it. For the example, I liked the Film template's simple text formatting and its Scenes menu structure, which shows thumbnails with text written horizontally to the right from the thumbnail. After you select the template, Premiere looks for DVD markers to populate the template's Scenes menu. If the DVD sequence has no Scene markers, Premiere Pro will create them for you automatically. In step 2, you nested the three location sequences creating three distinct edit points: the start of the sequence with the first location, the cut from the first to second sequence, and the cut from the second sequence to the third. When Premiere analyzes your sequence, any cut in the timeline is defined as a scene point. Choosing to apply a marker at each scene applies a Scene marker to every cut in your sequence. The resulting DVD menu has one Main menu and one Scenes menu with three scenes. If you were to build a DVD with more than three scenes, additional Scenes menus would automatically be created to accommodate the total number of scenes. By default the Film template displays a maximum of three scenes in its Scenes menu. Into the DVD Layout panel, click between Main Menu 1 (Figure 16.7a) and Scenes Menu 1 (Figure 16.7b) to see the structure of the DVD you are building.
Figures 16.7a and b. With the DVD Layout panel and Effect Controls panel both open, you can see the layout for the Main menu (a) and the Scenes menu (b), which has three scenes that you can access 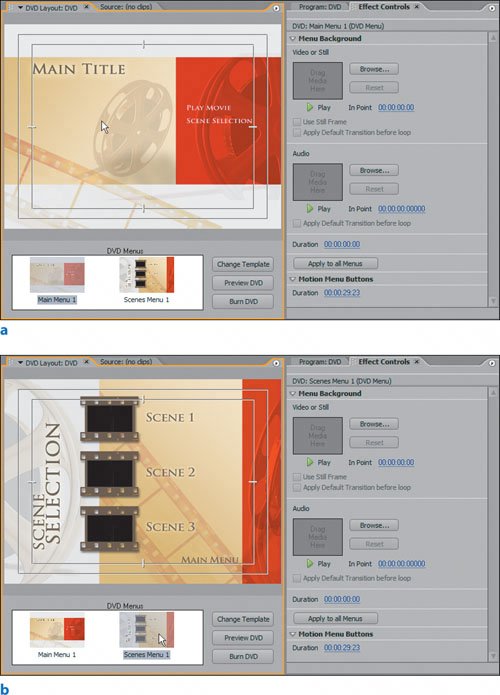
| | | 4. | In the DVD sequence, double-click on the first DVD scene marker at the beginning of the sequence. Type Portofino into the Name field (Figure 16.8a), then click Next. Type Florence in the Name field for DVD marker 2 of 3, click Next, type Rome in the final marker's Name field, and click OK. Click on Scenes Menu 1 in your DVD Layout panel (Figure 16.8b).
Figures 16.8a and b. To modify the name of a Scene marker, double-click on the physical marker in the Timeline panel and enter the name in the Name field (a). After step 4 all three markers are named for the montage to which they link (b) 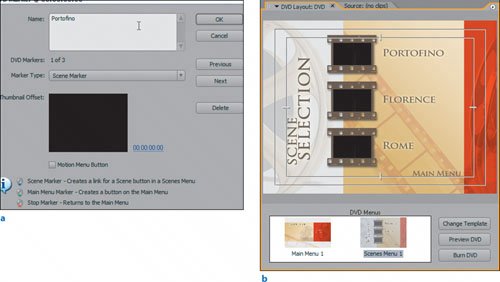
By opening the markers and adding the name that corresponds with the nested sequence beneath the markers you now have a scenes menu that accurately reflects the scene names to which links lead. This is the first true customization step.
| 5. | Activate the DVD sequence in the Timeline panel and press the End key on your keyboard. With the Edit Line aligned to the end of the 03 ROME clip, click the Set DVD Marker button below the Timecode field of the Timeline panel (Figure 16.9a). In the resulting DVD Marker dialog box set the Marker Type to Stop Marker, and click OK (Figure 16.9b). In the DVD Layout panel, click the Preview DVD button and navigate the menu structure clicking the links you created to familiarize yourself with what leads where.
|
Figures 16.9a and b. Click the Set DVD Marker button to access the DVD Marker dialog (a). Because the Edit Line is at the end of the sequence's final clip, you assign a Stop marker to signify the end of the sequence (b) 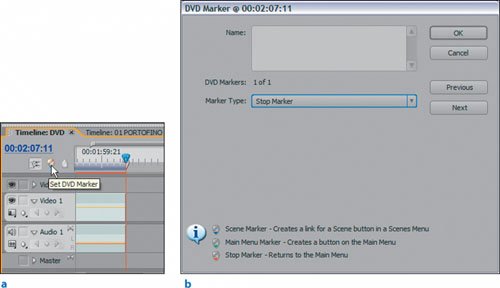
The Play Movie command in the Main menu of your DVD layout plays from the beginning of the DVD sequence to the end of the last clip in the sequence. Adding a Stop marker at the end of the 03 ROME clip forces Play Movie to end at that point. (In the next lesson you are going to add another clip to the sequence that serves as an additional track on the DVD.) Navigating your DVD in preview mode simulates the user experience. Clicking Play Movie plays the entire sequence in one play. Clicking on Scene Selection accesses the Scenes menu and then clicking on the individual scene names start playback from that scene. Notes To start this lesson you can either continue with the project you are currently working with or open the project Custom_DVD02.prproj from the APPST2 Lesson Files/Chapter 16 folder.
Having assembled your sequence and loaded a template, you are well on your way to customizing and burning a DVD. In the next short lesson you will customize the thumbnail image for each scene and add a second movie track to the Main menu. Animating Thumbnails and Adding a New Movie Let's take the DVD design a step further by adding a credits movie to the Main menu and turning on the thumbnail images for each scene so that you can see a reference image from it. | | 1. | With the Custom_DVD02.prproj project open, be sure that the DVD sequence is open in the Timeline panel and that the DVD Layout panel displays the same sequence. Click the Scenes Menu 1 icon on the DVD Menus section of the DVD Layout panel. Click once on the Portofino text, and open your Effect Controls panel (Figure 16.10a). In the Poster Frame area of the Effect Controls panel for the Portofino button, click the Play button and then stop playback around 15;00 (Figure 16.10b).
Figures 16.10a and b. With the Portofino text selected, the Effect Controls panel shows the properties associated with that button. Although you have the option of making the thumbnail play live video (Motion Menu button), by playing back the Poster Frame and stopping it at a specific point (b), you can define the frame on which you stop (In point) as the Poster Frame inside the thumbnail of the Portofino button 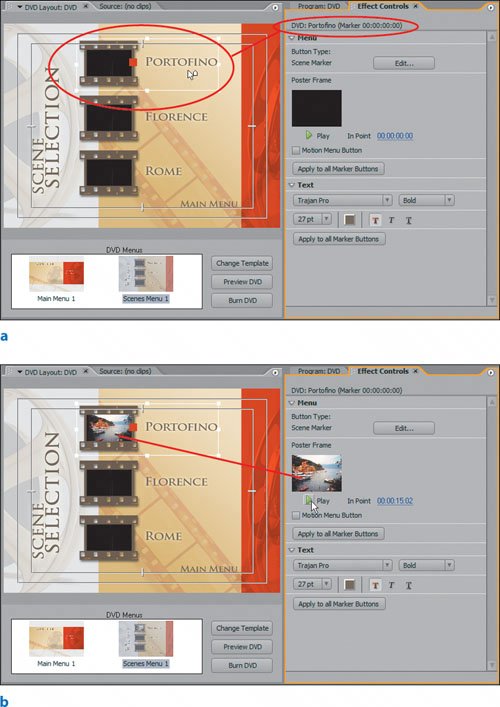
To customize the links (also referred to as buttons) on the Scenes Menu 1 page, you clicked on the scene you wanted to adjust and opened the Effect Controls to see the properties that could be modified. Because this template contained a Scenes menu with both text and a thumbnail as a single button, you can update the image in the thumbnail by playing back the video that the Scene button links to and stopping it at an exact frame. The frames at around 15;00 are indicative of Portofino and serve as a perfect Poster Frame for the thumbnail. To make the thumbnail for Portofino live video from the montage, click the Motion Menu Button check box and define the In point from which you want the live video to start.
| | | 2. | Select the Florence button in the Scenes Menu 1 menu. In the Effect Controls panel click on the In Point hot-text value, type 1522, then press Enter. Select the Rome button and type 2207 in the In Point field (Figure 16.11).
Figure 16.11. You can click and drag the In Point value to modify it or enter a specific value. Modifying each menu button's Poster Frame further customizes your DVD 
Clicking once on the In Point field allows you to manually enter a value for the In point. Clicking and dragging enables you to scrub to the value you want as the Poster Frame. The benefit of scrubbing is that you see the video in the Poster Frame update dynamically.
| | | 3. | With the DVD sequence active in the Timeline panel, drag and drop the CREDITS title from the Project panel after the 03 ROME clip; leave some blank space between the last clip and the CREDITS title. Press the End key to snap the Edit Line to the end of the CREDITS clip. With Video 1 targeted, press Ctrl+D to assign your default transition to the tail of the clip. Press Page Up to snap to the beginning of the CREDITS clip and press Ctrl+D to assign a default transition to the head of the clip. With the Edit Line at the head of the clip, click the Set DVD Marker button and modify the Marker Type to Main Menu Marker. In the Name field, type "…Credits" and click OK. In the DVD Layout panel, click the icon for Main Menu 1 in the DVD Menus area (Figure 16.12).
Figure 16.12. With the DVD Layout panel displaying the Main Menu 1 menu you can see the newly added "…Credits" button that links directly to the clip instance below in the DVD sequence. Notice that the Main Menu marker assigned to the beginning of the CREDITS title is green. Each DVD marker is signified by a different color: Red for Stop marker, Blue for Scene marker, and Green for Main Menu marker 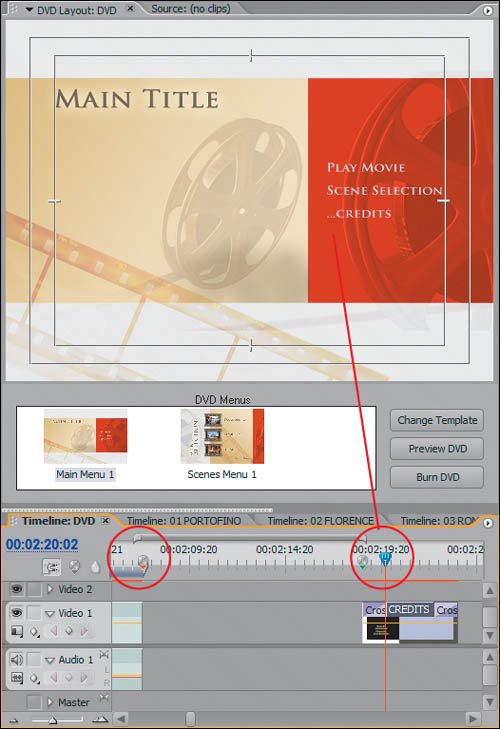
Adding more than one movie file to your custom DVD is quite easy; you just add the files to your sequence and assign a DVD marker to the beginning of the content. If you assigned a Scene marker then you would be able to play back the movie by accessing it through one of the Scenes menus. By assigning a Main Menu marker to the file you get access to the movie through the Main menu. Each DVD template has a defined number of buttons that can be added to the Main menu; the Film template has a limit of four.
By assigning a transition at the beginning and end of the CREDITS title, when the button to play the movie is clicked, the screen will go black and fade into the credits and then fade back out when it gets to the end of the clip.
If you intended to add more clips to your timeline after the CREDITS clip, to make sure that the Credits button played only the Credits clip you would need to add another Stop marker at the end of the CREDITS clip instance.
| 4. | Right-click on the CREDITS clip in the DVD sequence and access the Speed/Duration settings. Reassign the Duration value to 10;00. In the Project panel open the Audio folder and double-click on the file TheCoast_s.mp3. Assign an Out point to the clip at 10;00 and drop it directly beneath the CREDITS clip in the timeline. Open the DVD Layout panel and preview the DVD to see and hear the accessing of the …Credits movie.
|
In the last step of this lesson you added some audio beneath the CREDITS clip so that audio and video played when the movie was accessed. This task also sets you up for some more customizations in the chapter's final lesson. |