Using the Checklist
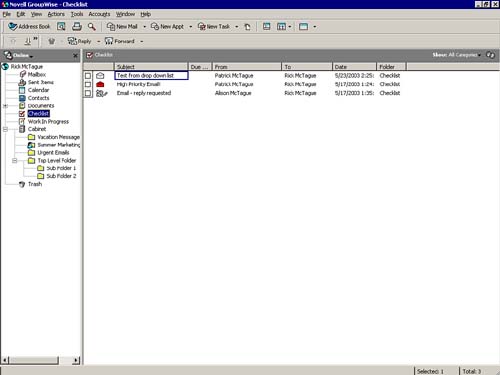
| One of the most convenient new features of GroupWise 6.5 is the Checklist. In previous versions of GroupWise, the Task List folder simply contained every task that was in a mailbox, displayed in a list fashion. To place an item into the Task List folder, you had to change the message type to Task. The GroupWise 6.5 Checklist allows you to simply place any message ”using click and drag ”into the Checklist folder for action at some point. NOTE The message retains its original type and does not become a task. Tasks are not contained in the Checklist folder unless placed there on purpose. Figure 5.20 shows messages in the Checklist folder. Figure 5.20. The Checklist folder contains messages requiring some type of action. Once a message is placed into the Checklist folder, a box is displayed next to the item, allowing it to be "completed" by a single mouse click. To move items into the Checklist folder, select the message (or messages) with a single mouse click (or Ctrl+click or Shift+click to select multiple messages) and drag them to the Checklist folder. NOTE To keep a copy of the message in its original folder, hold the Ctrl key down while performing the click-and-drag steps. Optionally, you can select messages as described, right-click, and choose Move to Checklist Folder from the QuickMenu. TIP You can view items in any folder as "Checklist" items. That way, you can work within the same folder. With any folder selected, choose View, Display Settings, As Checklist. To make this change permanent on a particular folder, right-click the folder, click Properties, click the Display tab, choose Checklist under the View By drop-down list, and click OK. |
EAN: 2147483647
Pages: 191