Organizing Messages with the Cabinet
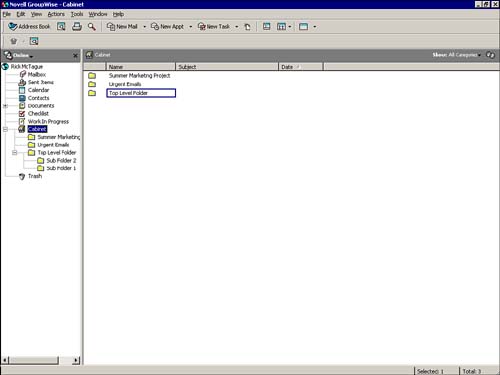
| You use the Cabinet to organize and store your message folders. You can organize folders in the Cabinet the same way you organize directories in DOS or Windows 3.1, or folders in Windows 95/98/2000/XP and on the Mac OS. The folders in your Cabinet fall into five categories : personal folders, shared folders, find results folders, IMAP folders, and NNTP folders. You create personal folders for your own, private use. Use them to organize your messages and documents into separate groups. For example, you can create folders for information pertaining to certain projects, for specific message types, or for messages from certain individuals. You can also create shared folders, which contain messages that can be viewed by other users. A shared folder's creator determines the access rights to the folder. For example, when you create a shared folder, you can decide who is permitted to read the messages in the folder, who can add messages to that folder, and so forth. Find results folders are used to display a fresh listing of items that are the results of a Find session. For example, a High Priority Items folder can do a fresh search of your entire mailbox for messages that have a priority of High. Each time you click this folder, the search is performed again, so the listing is updated. The Find tool is covered later in this chapter. NOTE The Sent Items and Checklist folders are "system" folders and cannot be deleted. IMAP folders are used when accessing an IMAP 4 mail account on the Internet with the GroupWise client. Enabling this feature is discussed in Chapter 8, "Advanced Features." NNTP folders are used to store messages received from Internet newsgroups. Setting up NNTP access with the GroupWise client is also discussed in Chapter 8. Creating FoldersGroupWise folders work the same way as the subdirectory structure of your computer's hard drive. When you open GroupWise 6.5, your folders appear on the left side of the screen. Your name should automatically appear on the top-level folder (the user folder). In addition to your user folder, eight default GroupWise folders exist: Mailbox, Sent Items, Calendar, Documents, Checklist, Work In Progress, Cabinet, and Trash. You can only add new folders in the Cabinet, in your user folder, in the Documents folder, and in the Work In Progress folder. You cannot create subfolders under any Find results folder (such as Sent Items or Checklist), under the Calendar, under Trash, or under the Mailbox folder. We recommend that you store most of your GroupWise messages in Cabinet folders. You can organize the folders and subfolders in your Cabinet any way you like. NOTE In GroupWise, folder names can include punctuation and spaces. Figure 5.1 shows some typical folders. A button with a plus sign to the left of a folder indicates that the folder contains hidden subfolders. A button with a minus sign to the left of a folder means that the folder has been expanded to show all its subfolders. Click a + or - button to show or hide the substructure beneath a particular folder. Figure 5.1. You can create folders to help organize messages. To create a folder, follow these steps:
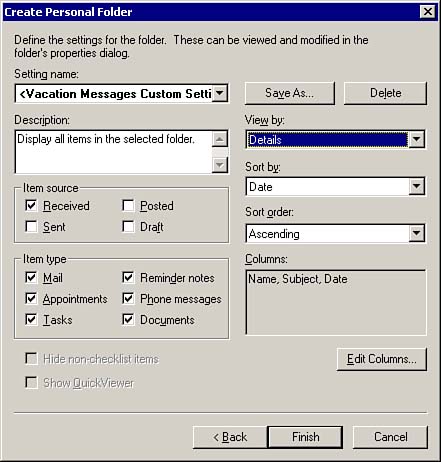
As you create folders, you can change the settings later by editing the properties of the folder. Highlight the folder, click the right mouse button, and choose Properties. NOTE We explain more about how to customize the Cabinet and its folders in Chapter 11, "Customizing GroupWise." Sharing FoldersWhen you create a folder in GroupWise 6.5, you can easily share it (and its contents) with other people in your system. This feature, called shared folders , is an excellent way to manage information that pertains to many people. For example, your company might have a shared folder called Company Notices to store messages intended for the entire company. As mentioned before, the creator of the shared folder controls access to it. In the Company Notices example, a few key people might receive Add privileges (to add messages to the folder), and everyone else would be given Read privileges. Table 5.1 explains the different kinds of access privileges. Table 5.1. Shared Folder Access Privileges
To share a folder, follow these steps:
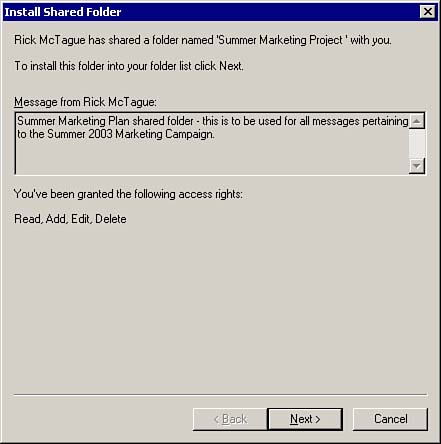
Your Shared Folder Notification message automatically is sent to the participants, informing them about their access to the shared folder. The people you shared the folder with receive a Shared Folder Notification message in their Mailbox. Each recipient needs to install the shared folder. To do this, follow these steps:
TIP When you install a shared folder from someone else, it is represented by a little man facing to the left (your folders). If you create a shared folder, the man is blue and is facing toward the right (items). You can use shared folders to move mail from one user to another. This would be useful for directly exchanging a large group of messages, rather than forwarding them individually. Following are the steps involved (for this example we define the source user as the one whose mail is to be moved, and the target user as the user who is to become the new "owner" of that mail):
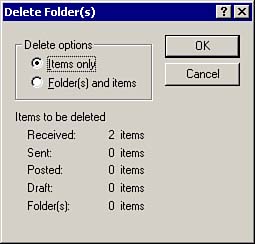
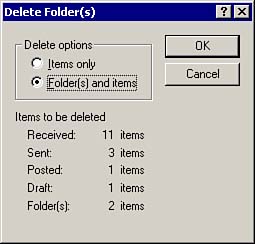
Deleting FoldersTo delete a folder, follow these steps:
Renaming FoldersTo rename a folder, follow these steps:
TIP You can use the Folders option under the Edit menu to determine which folders open in the main GroupWise screen when you start GroupWise. You can also use this dialog box to move folders up or down in the listing of folders, to create new folders, and to rename folders as shown in Figure 5.6 . Figure 5.6. The Folders dialog box is an alternate method of managing your folders. NOTE The folder list can be sorted manually using the Folder Manager, or you can click the folder you wish to move and drag it to its destination. |

EAN: 2147483647
Pages: 191