| The sample scenario illustrates the process of creating a sample portlet project that handles action events. You will create, deploy and run this portlet application. These exercises will allow you to understand the techniques used to develop portlets that process action events. The development workstation is illustrated in Figure 5-3. Figure 5-3. Development workstation 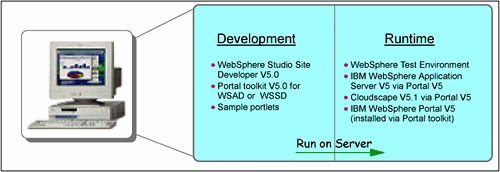 5.4.1 Scenario overview Portlet events contain information about an event to which a portlet might need to respond; to receive these events, an event listener must be implemented in the portlet class. Three types of events are found in the Portlet API: ActionEvents, MessageEvents and WindowEvents . There are also two additional events, PortletSettingsAttributeEvent and PortletApplicationSettingsAttributeEvent, which are used for notifications about changes to the attributes of the portlet settings of a concrete portlet or concrete portlet application. In this scenario, you will create a sample portlet based on a Basic portlet type using the Portlet Wizard; you will then add code to support ActionEvent handling. To send an ActionEvent, you must associate a PortletAction with the http request. The PortletAction is normally linked with URLs or buttons in HTML form, providing a way to the portlet programmer to implement different processing actions for different user selections. The sample scenario is illustrated in Figure 5-4. Figure 5-4. Event handling scenario 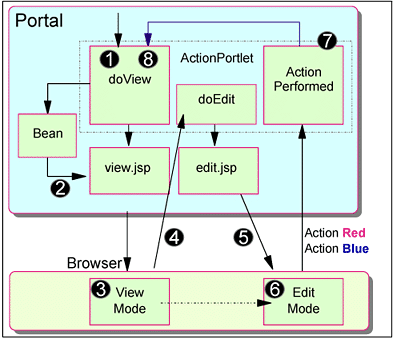 The sequence flow for this scenario is as follows : -
Initially, the doView method is executed. -
A JSP is called to render an initial screen. A message is obtained from the request object. -
The Portlet View mode screen is shown in the browser window. -
The user clicks Edit to go into Edit mode. -
The Edit mode screen is displayed (the doEdit method is executed). -
The user selects the desired action button (red or blue). -
The actionPerformed method is executed to process the action. A resulting message is stored in the request object. -
The doView method is executed to complete the cycle and a message is obtained from the request object. 5.4.2 Creating the ActionEvent portlet In this section, you create a Basic type portlet application with the name ActionEvent. The portlet application will be published and executed in the test environment. -
If WebSphere Studio Site Developer is not running, click Start-> Programs-> IBM WebSphere Studio-> Site Developer 5.0 . -
Select File-> New-> Project . Figure 5-5. Starting creation of Portlet project 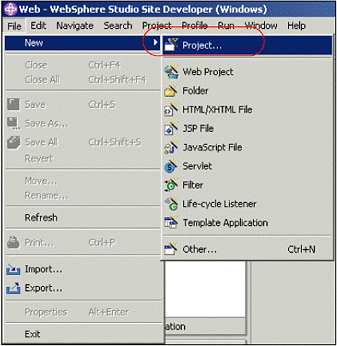 -
Select Portlet development-> Portlet application project . Click Next . Figure 5-6. Selection of Portlet application project 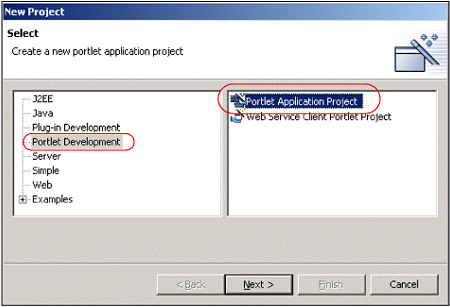 -
The Portlet wizard will load. Enter ActionEvent as the project name. Then click Next . Figure 5-7. Defining the portlet project 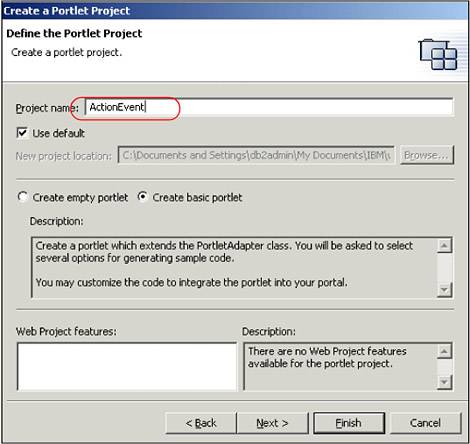 -
You will be adding this project to the existing DefaultEAR project. Accept the default and click Next . Figure 5-8. J2EE settings page 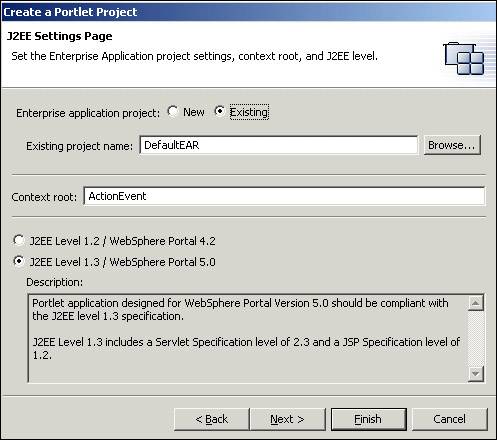 -
There are no module dependencies for this project. Click Next . Figure 5-9. Module dependencies  -
Review and accept the default portlet settings. Click Next . Figure 5-10. Portlet settings 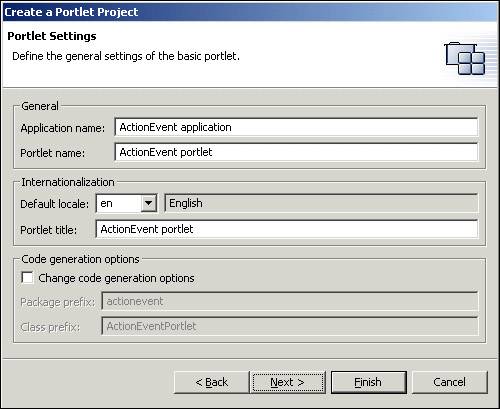 -
Deselect the option for adding a form sample. In this project, you will create your own form. However, make sure that Add action listener remains checked. Click Next . Figure 5-11. Event handling 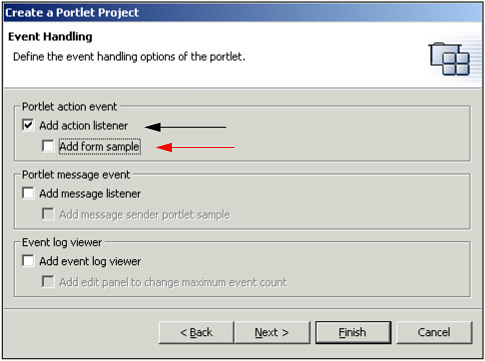 -
This portlet project does not use the Credential Vault. Leave this option unchecked and click Next . Figure 5-12. Single Sign-On 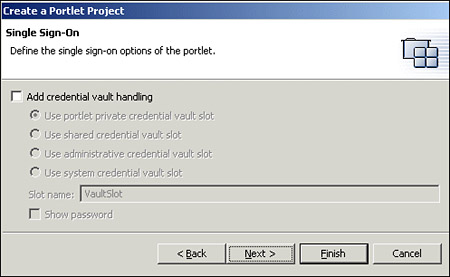 -
Leave the markup and mode options unchecked. This project will not require them. Click Finish to generate your project. Figure 5-13. Modes and markups 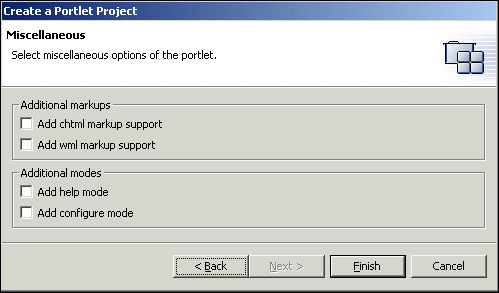 -
Since you are adding an additional portlet project to the DefaultEAR project, you will receive a dialog informing you of this. Click OK . Figure 5-14. Server configuration dialog 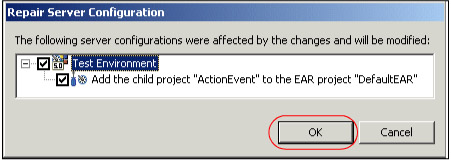 -
In the Portlet.xml file that is now open on your screen, expand the Portlet Application tree and select actionevent.ActionEventPortlet . -
Scroll down to the markups category and click the drop-down menu to enable fragment editing for the HTML markup. -
Click File-> Save Portlet.xml to save the changes you made to this file. Figure 5-15. Editing portlet.xml 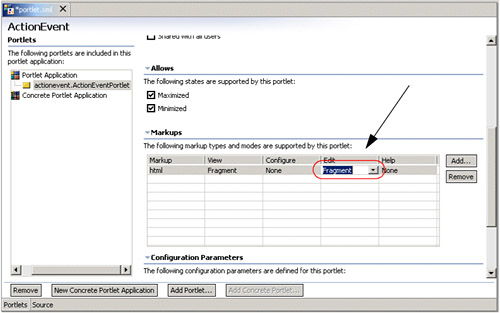 -
Now that the new project has been successfully added, you will want to remove the HelloWorld project so it is not deployed when you test this project later on in this exercise. To do this: -
Open the application.xml in the /DefaultEAR/META INF/ folder by double-clicking it. Figure 5-16. Application.xml 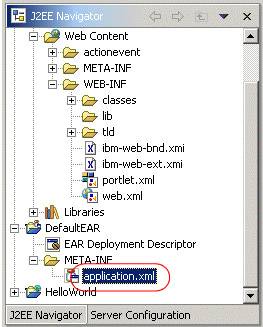 -
Select Module . -
Remove all WAR modules except for this project called ActionEvent. Figure 5-17. Removing WAR modules 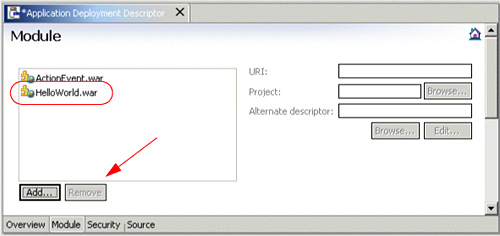 -
Click File-> Save All . -
If you receive the Repair Server Configuration dialog box, click OK . Figure 5-18. Configuration change dialog 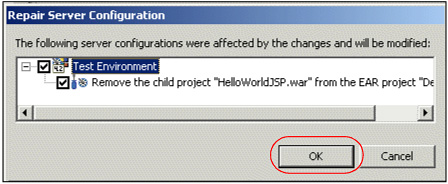 -
The first step is to add a JavaServer Page (JSP) to your project. Right-click ActionEvent , then click Web Content-> actionevent-> html . -
Click New-> JSP File . Figure 5-19. Adding a JSP 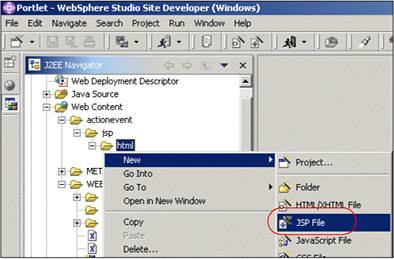 -
The Add JSP Wizard will run. On the first screen, enter ActionEventPortletEdit.jsp for the file name. Make sure that the Create as JSP Fragment option is checked. Click Next . Figure 5-20. New JSP File Wizard 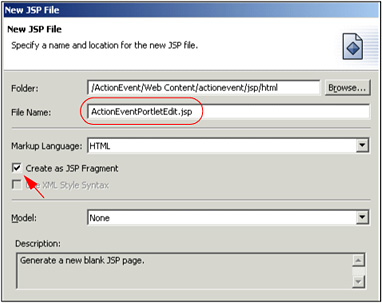 -
In the window that pops up, click the Add Tag Library button. Figure 5-21. Add Tag Library window  -
Check the /WEB-INF/tld/portlet.tld tag library, then enter portletAPI as the Prefix. Click OK . Figure 5-22. Selecting a tag library to add 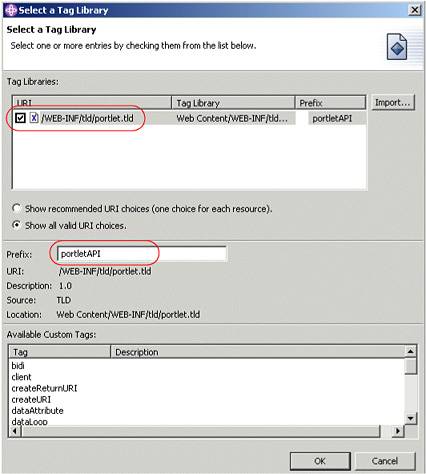 -
Verify that the tag library has been added to the project. It should be listed in this window. Click Next to continue. Figure 5-23. Tag libraries 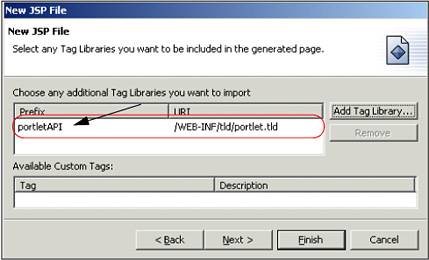 -
On the next screen of the New JSP File wizard, make sure that Generate a Page Directive is unchecked; it is not needed. Click Next to continue to the last screen of the wizard. Figure 5-24. Page directive information  -
On the last screen of the wizard, accept the defaults and click Finish . Figure 5-25. Encoding and content type 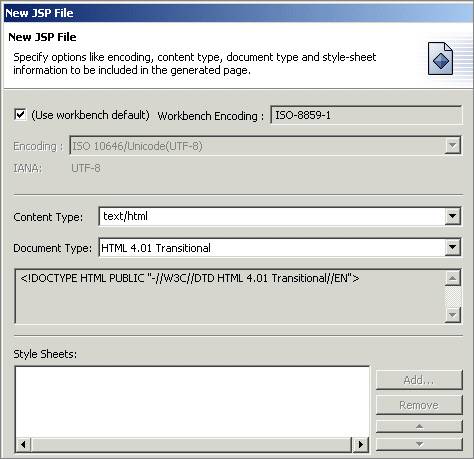 -
The ActionEventPortletEdit.jsp will now open on your screen. You will now edit this JSP and add two buttons for the user to click, corresponding to the two actions that they will be able to select when they run this portlet. Example 5-7. ActionEventPortletEdit.jsp (Edit mode) <%@ taglib uri="/WEB-INF/tld/portlet.tld" prefix="portletAPI" %> <%@ page import="actionevent.*" %> <TABLE class="Portlet" border="0"> <TR> <TD>Please select an action: <FORM method='POST' action="<portletAPI:createReturnURI> <portletAPI:URIAction name='<%=ActionEventPortlet.ACTION_RED%>'/> </portletAPI:createReturnURI>"> <TABLE class="Portlet" border="0"> <TR> <TD><INPUT type='submit' name='redButton' value='Red Action'></TD> </TR> </TABLE> </FORM> <FORM method='POST' action="<portletAPI:createReturnURI> <portletAPI:URIAction name='<%=ActionEventPortlet.ACTION_BLUE%>'/> </portletAPI:createReturnURI>"> <TABLE class="Portlet" border="0"> <TR> <TD><INPUT type='submit' name='blueButton' value='Blue Action'></TD> </TR> </TABLE> </FORM> </TD> </TR> </TABLE> -
After making these updates, you will notice that the Tasks area of your screen indicates two errors. You will also see two small red Xs to the left of the JSP code. This is because the action values have not been defined at this time; they will be defined at a later time. For now, click File-> Save ActionEventPortletEdit.jsp and exit this file. Figure 5-26. Editing ActionEventPortletEdit.jsp 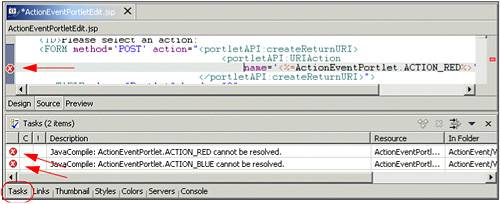 -
Next, you will make changes to the ActionEventPortletView.jsp file. Open it by double-clicking the file which is located in the /Web Content/actionevent/jsp/html/ folder. Make the changes highlighted in the following example. Example 5-8. ActionEventPortletView.jsp (View mode) <%@ page contentType="text/html" import="java.util.*, actionevent.*"%> <%@ taglib uri="/WEB-INF/tld/portlet.tld" prefix="portletAPI" %> <portletAPI:init/> <DIV style="margin: 6px"> <H3 style="margin-bottom: 3px">Welcome!</H3> This is a sample <B>view mode</B> page. You have to edit this page to customize it for your own use.<BR> The source file for this page is "/Web Content/actionevent/jsp/html/ActionEventPortletView.jsp". <br> <% if (request.getAttribute("value") == null) { %> <B>No action performed, select your action in Edit Mode</B> <% } else { %> <B><%= request.getAttribute("value") %> ...was selected !</B> <% } %> </DIV> -
Click File-> Save ActionEventPortletView.jsp to save your changes. -
Next, you will make the changes to ActionEventPortlet.java. Open this file for editing by navigating to the /Java Source/actionevent/ folder and double-clicking it. Figure 5-27. ActionEventPortlet.java 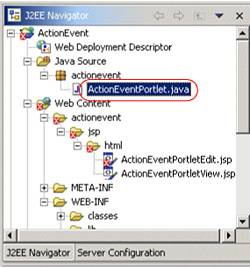 -
Several changes need to be made to ActionEventPortlet.java. Refer to the following examples to make these: -
First, you will add the variables ACTION_RED and ACTION_BLUE to hold the values for each of the two possible user actions. Example 5-9. ActionEventPortlet.java ... public static final String VIEW_JSP = "/actionevent/jsp/ActionEventPortletView."; // Add strings corresponding to the actions public static final String ACTION_RED = "ACTION.RED" ; public static final String ACTION_BLUE = "ACTION.BLUE" ; ... -
Next, you will edit the doView method to send content to the JSP to render. Example 5-10. ActionEventPortlet.java ... public void doView(PortletRequest request, PortletResponse response) throws PortletException, IOException { // Create an instance of portlet data to store values PortletData portData = request.getData() ; // Extract value in portlet data into variable String value = (String) portData.getAttribute("value") ; // Store the extracted value in the request request.setAttribute("value", value) ; // Invoke the JSP to render getPortletConfig().getContext().include(VIEW_JSP+getJspExtension(request), request, response); } ... -
Next, you will edit the actionPerformed method to process the action. Example 5-11. ActionEventPortlet.java ... public void actionPerformed (ActionEvent event) throws PortletException { if( getPortletLog().isDebugEnabled() ) getPortletLog().debug("ActionListener-actionPerformed called"); // ActionEvent handler String actionString = event.getActionString(); // Add action string handler here if(actionString.equalsIgnoreCase(ACTION_RED)){ // Create the string of HTML to be rendered String value = "Action <FONT color=\"#ff0000\">RED</FONT>" ; // Create a portlet request PortletRequest request = event.getRequest() ; // Create an instance of portlet data to store values PortletData portData = request.getData() ; try{ // Save value into portlet data portData.setAttribute("value", value) ; portData.store() ; } catch (AccessDeniedException ade){ }catch (IOException ioe){} } if(actionString.equalsIgnoreCase(ACTION_BLUE)){ // Create the string of HTML to be rendered String value = "Action <FONT color=\"#0000ff\">BLUE</FONT>" ; // Create a portlet request PortletRequest request = event.getRequest() ; // Create an instance of portlet data to store values PortletData portData = request.getData() ; try{ // Save value into portlet data portData.setAttribute("value", value) ; portData.store() ; } catch (AccessDeniedException ade){ }catch (IOException ioe){} } } ... -
Finally, you will add a doEdit method that will invoke the ActionEventPortletEdit.jsp when the user enters Edit mode. You can add this method wherever you like, as long as it is within the ActionEventPortlet class and not in any other method. Example 5-12. ActionEventPortlet.java ... // doEdit method called when user enters edit mode public void doEdit(PortletRequest request, PortletResponse response) throws PortletException , IOException{ // Invoke the JSP to render getPortletConfig().getContext().include("/actionevent/jsp/ActionEventPortle tEdit."+getJspExtension(request), request, response) ; } ... -
Click File-> Save All . Right-click the ActionEvent project in the navigator panel and click Run Validation . This should clean up the unresolved values in edit JSP. Figure 5-28. Run validation 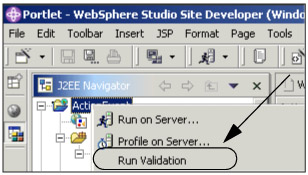 5.4.3 Run the ActionEvent portlet application -
Because you have created a new portlet project, you will need to restart the test environment to pick up these changes. -
Click the Servers tab at the bottom of your screen. -
Right-click WebSphere Portal v5.0 Test Environment or Test Environment . -
Click Restart . Figure 5-29. Restarting the server  -
It is now time to run your project on the server. Right-click the ActionEvent project in the navigator panel and click Run on Server using the test environment. Figure 5-30. Run on Server 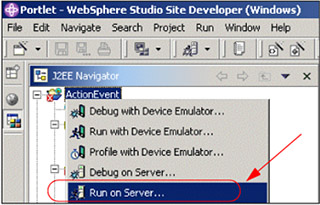 -
If prompted, click Finish in the Server Selection window to use the test environment to run your project. Figure 5-31. Server selection window 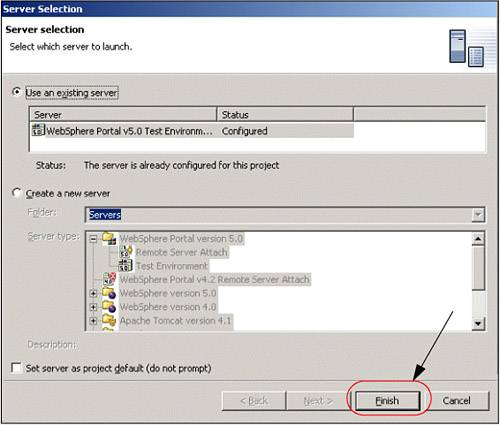 -
The portlet will display in the WebSphere Studio Site Developer integrated Web browser. Notice that the message No action performed, select your action in Edit Mode is displayed. -
Click the icon highlighted in Figure 5-32 to enter the Edit mode. Once in Edit mode, click the Red Action button. Figure 5-32. Portlet running in View mode 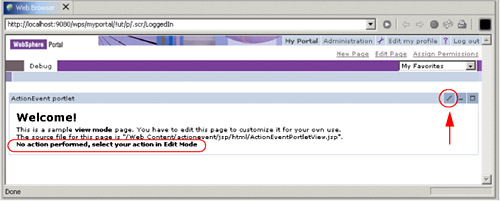 Figure 5-33. Edit mode 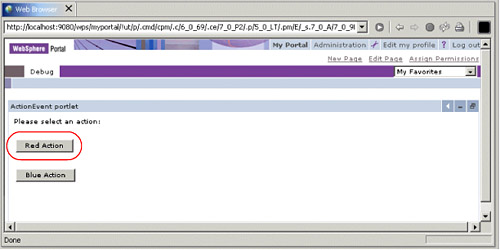 -
You are returned to View mode and the result of your action is displayed. Figure 5-34. View mode showing Red action 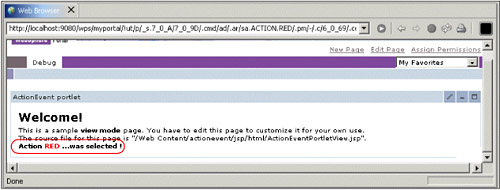 -
Return to Edit mode and select the Blue Action button. Figure 5-35. View mode showing Blue action 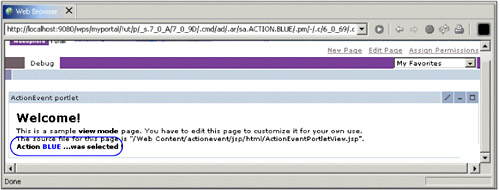 |