10.3 Drawing a Rectangle with a Hatch Brush
| < Day Day Up > |
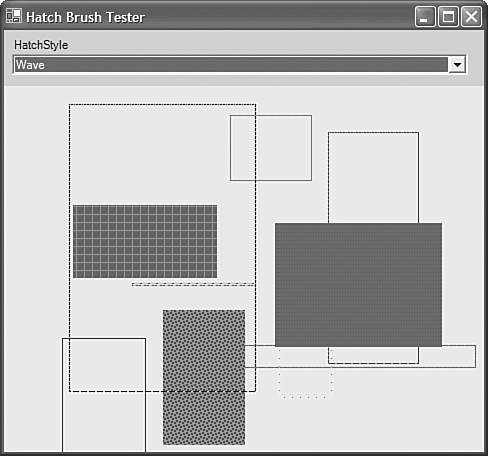
TechniqueThe DrawRectangle and FillRectangle method both use a Brush object. The previous recipe used a SolidBrush to fill the border or interior of a rectangle with a single solid color. To draw the border or fill the interior with a specified color and a pattern, use a HatchBrush object. In addition to a background Color value and foreground Color value, the HatchBrush constructor also requires a value from the HatchStyle enumerated data type. Listing 10.2 Drawing Rectangles with a HatchBrush private void Form1_Click(object sender, System.EventArgs e) { Random randNum = new Random( DateTime.Now.Millisecond ); int width = randNum.Next( this.Width-mouseHit.X ); int height = randNum.Next( this.Height-mouseHit.Y ); int fr = randNum.Next(255); int fg = randNum.Next(255); int fb = randNum.Next(255); int br = randNum.Next(255); int bg = randNum.Next(255); int bb = randNum.Next(255); Graphics surface = Graphics.FromHwnd(this.Handle); surface.FillRectangle( new HatchBrush((HatchStyle)Enum.Parse( typeof(HatchStyle), comboBox1.SelectedItem.ToString()), Color.FromArgb(fr,fg,fb), Color.FromArgb(br,bg,bb)), mouseHit.X, mouseHit.Y, width, height ); } private void Form1_MouseDown(object sender, System.Windows.Forms.MouseEventArgs e) { mouseHit = new Point( e.X, e.Y ); } private void comboBox1_SelectedIndexChanged(object sender, System.EventArgs e) { Invalidate(); } CommentsIn the last recipe, you saw how to create a SolidBrush object representing a solid color. You could then use this brush to fill the interior of a shape or use it as the ink for a Pen object. Every shape-rendering method within the Graphics class uses a generic Brush object, but through object-oriented programming principles, you can pass any object that is derived from the Brush class. One of these is the HatchBrush , which renders a solid color that is then overlaid with a pattern rendered in a different color. There are three main components to a HatchBrush . The BackgroundColor property is the solid color that is displayed in the areas not filled with the pattern. The pattern itself is rendered using the color specified in the ForegroundColor property. Finally, the HatchStyle property defines the pattern and is set to one of the several different values defined in the HatchStyle enumerated data type. In Figure 10.1, you can see different rectangles rendered with different hash styles. Figure 10.1. You can use a HatchBrush to render patterns within the interior of a shape or as the ink for a Pen that draws an unfilled shape. |
| < Day Day Up > |
EAN: 2147483647
Pages: 440